This article received a significant update on August 7th, 2024. Mentions of “Smart Motion Detection” have been replaced with “Ultra Motion Detection” and the photos have been updated accordingly.
What is Uniview UMD (Ultra Motion Detection)?
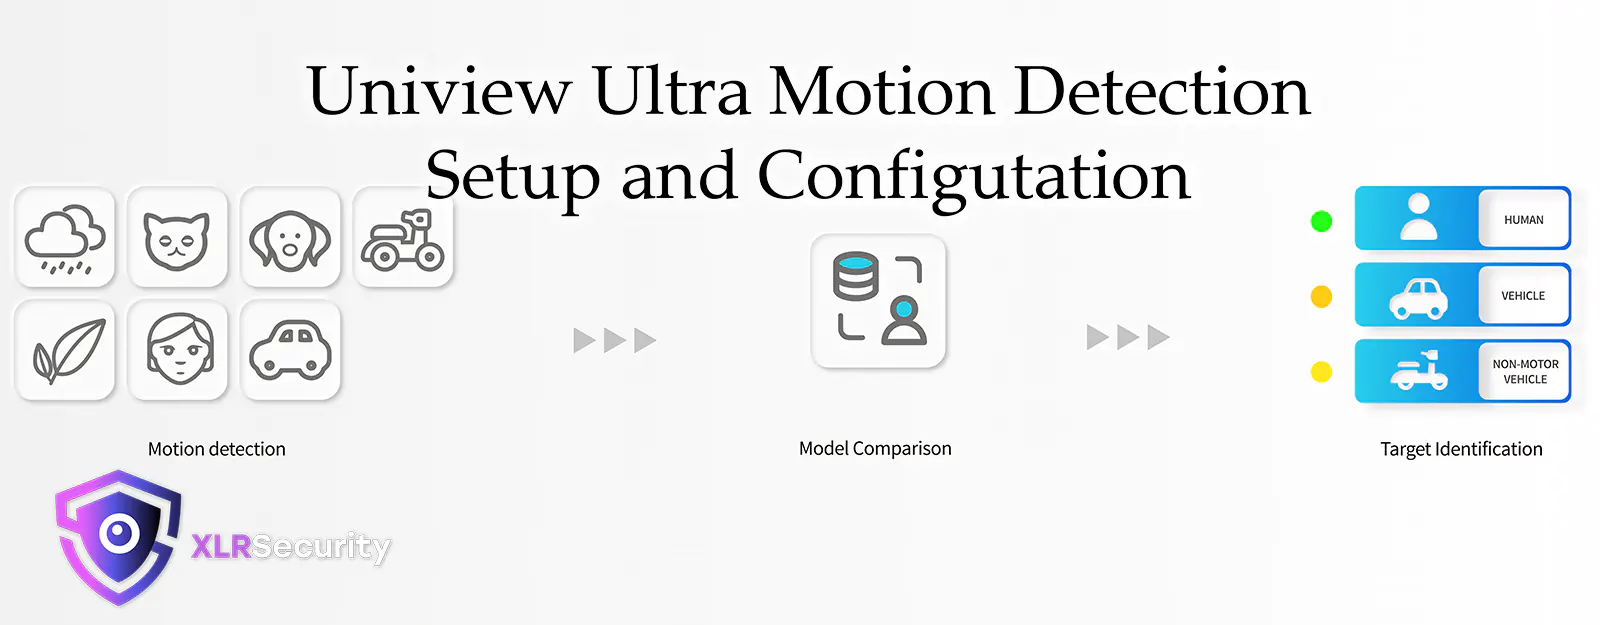
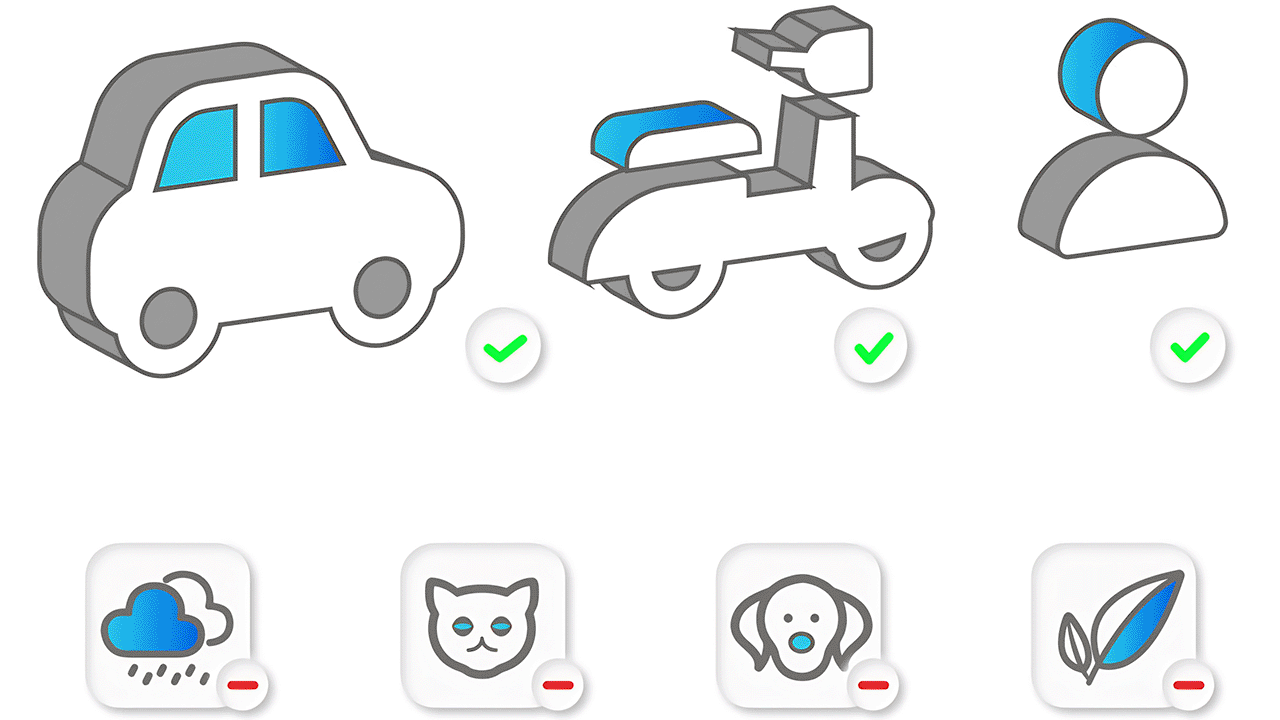
In November 2022, Uniview released a new feature called “Ultra Motion Detection”, which utilizes an intelligent algorithm in their security cameras to filter unwanted motion detection. This helps you focus on important recordings of potential threats, while ignoring motion from car headlights, falling leaves, and heavy rain.
Which Devices Support This Feature?
Uniview’s UMD feature is currently available on their Prime Series[*] IP cameras and NVR301-X series and NVR501 series recorders updated to firmware 2022-12-12 or newer. The feature can enabled through the NVR, or by logging directly into the camera.
Configuring Ultra Motion Detection from the NVR
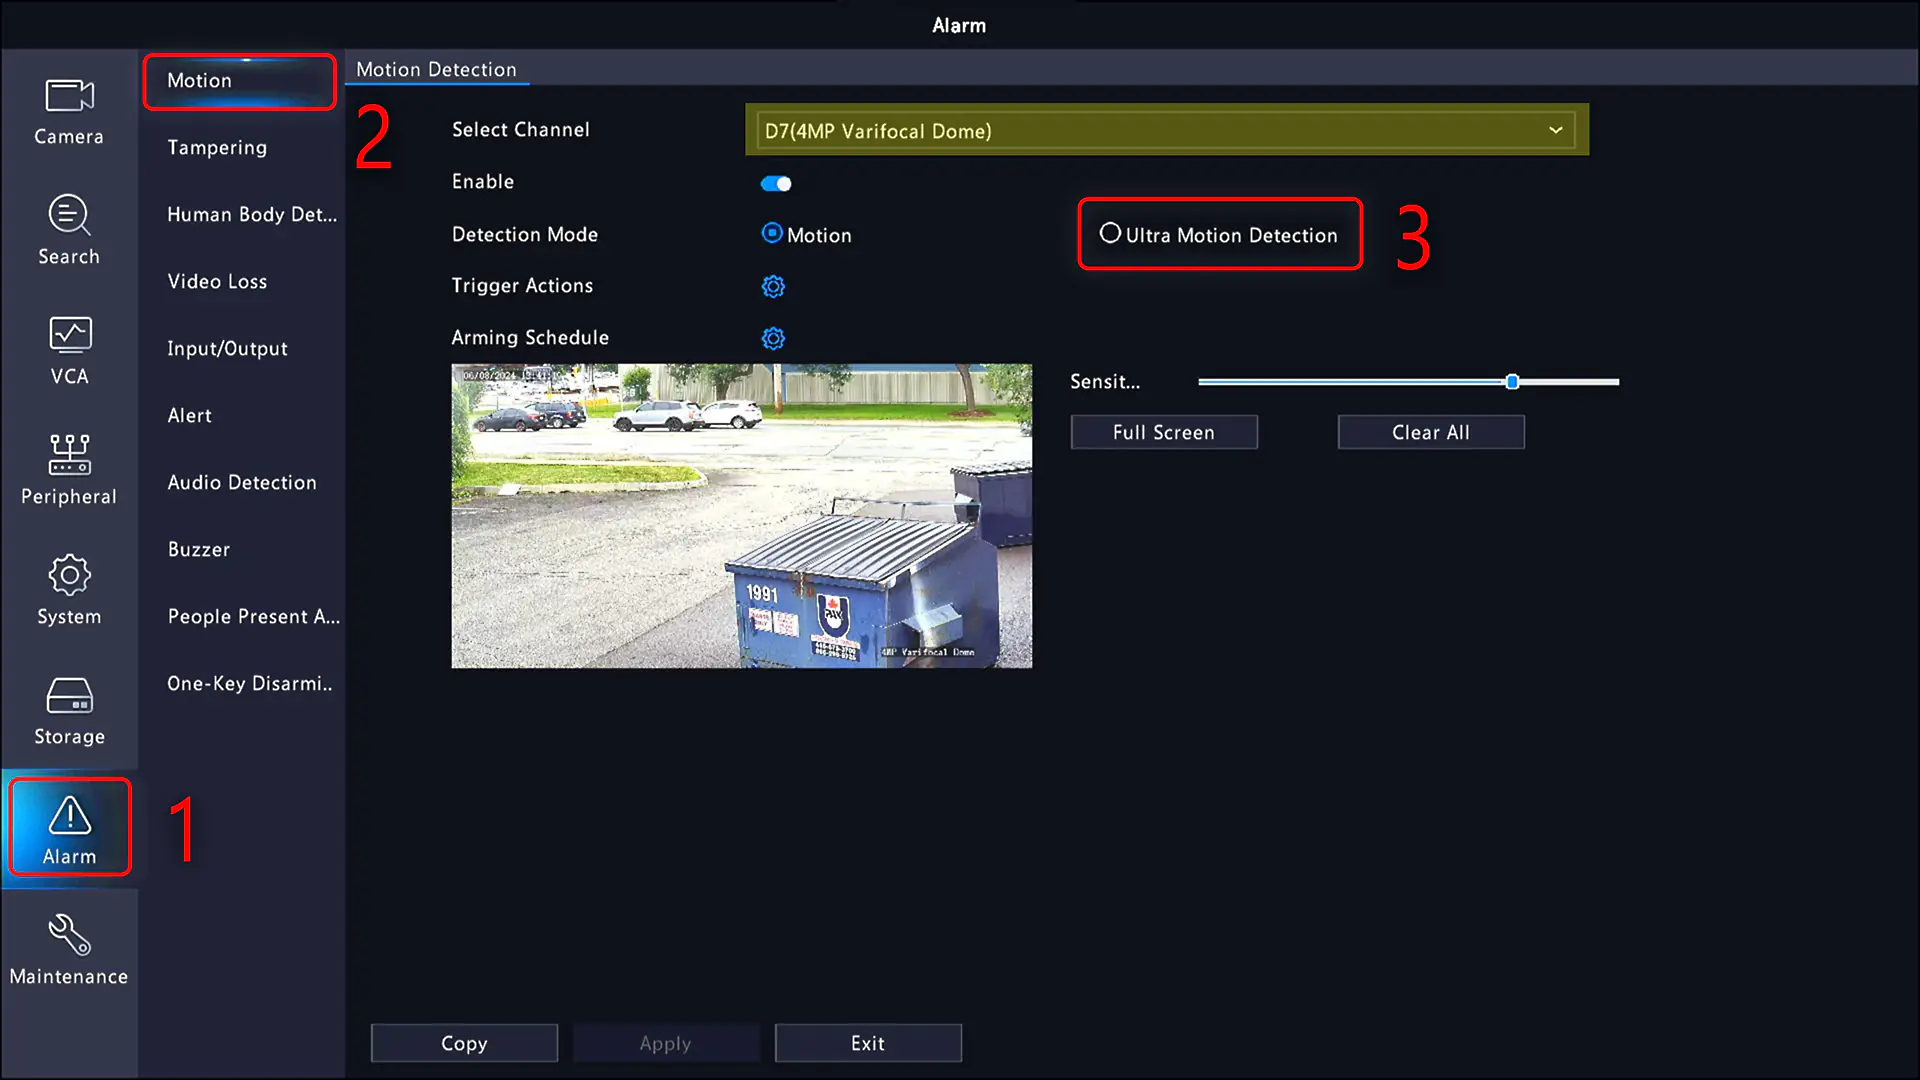
You can configure UMD through the NVR or by logging into the web interface through a computer. If you are using the NVR, begin by right clicking to open the main menu. Enter your username and password to login, and navigate to Alarm -> Motion.Next, select which camera you want to setup (in this example we choose D1) and tick the box beside Ultra Motion Detection.
You can set a specific region of the camera as a detection zone. You can draw up to 4 detection zones using rules 1, 2, 3, and 4. Additionally, you can adjust the sensitivity of each motion zone, as well as object type. After you’re done adjusting the detection zones, click Apply at the bottom of the screen to save the settings.
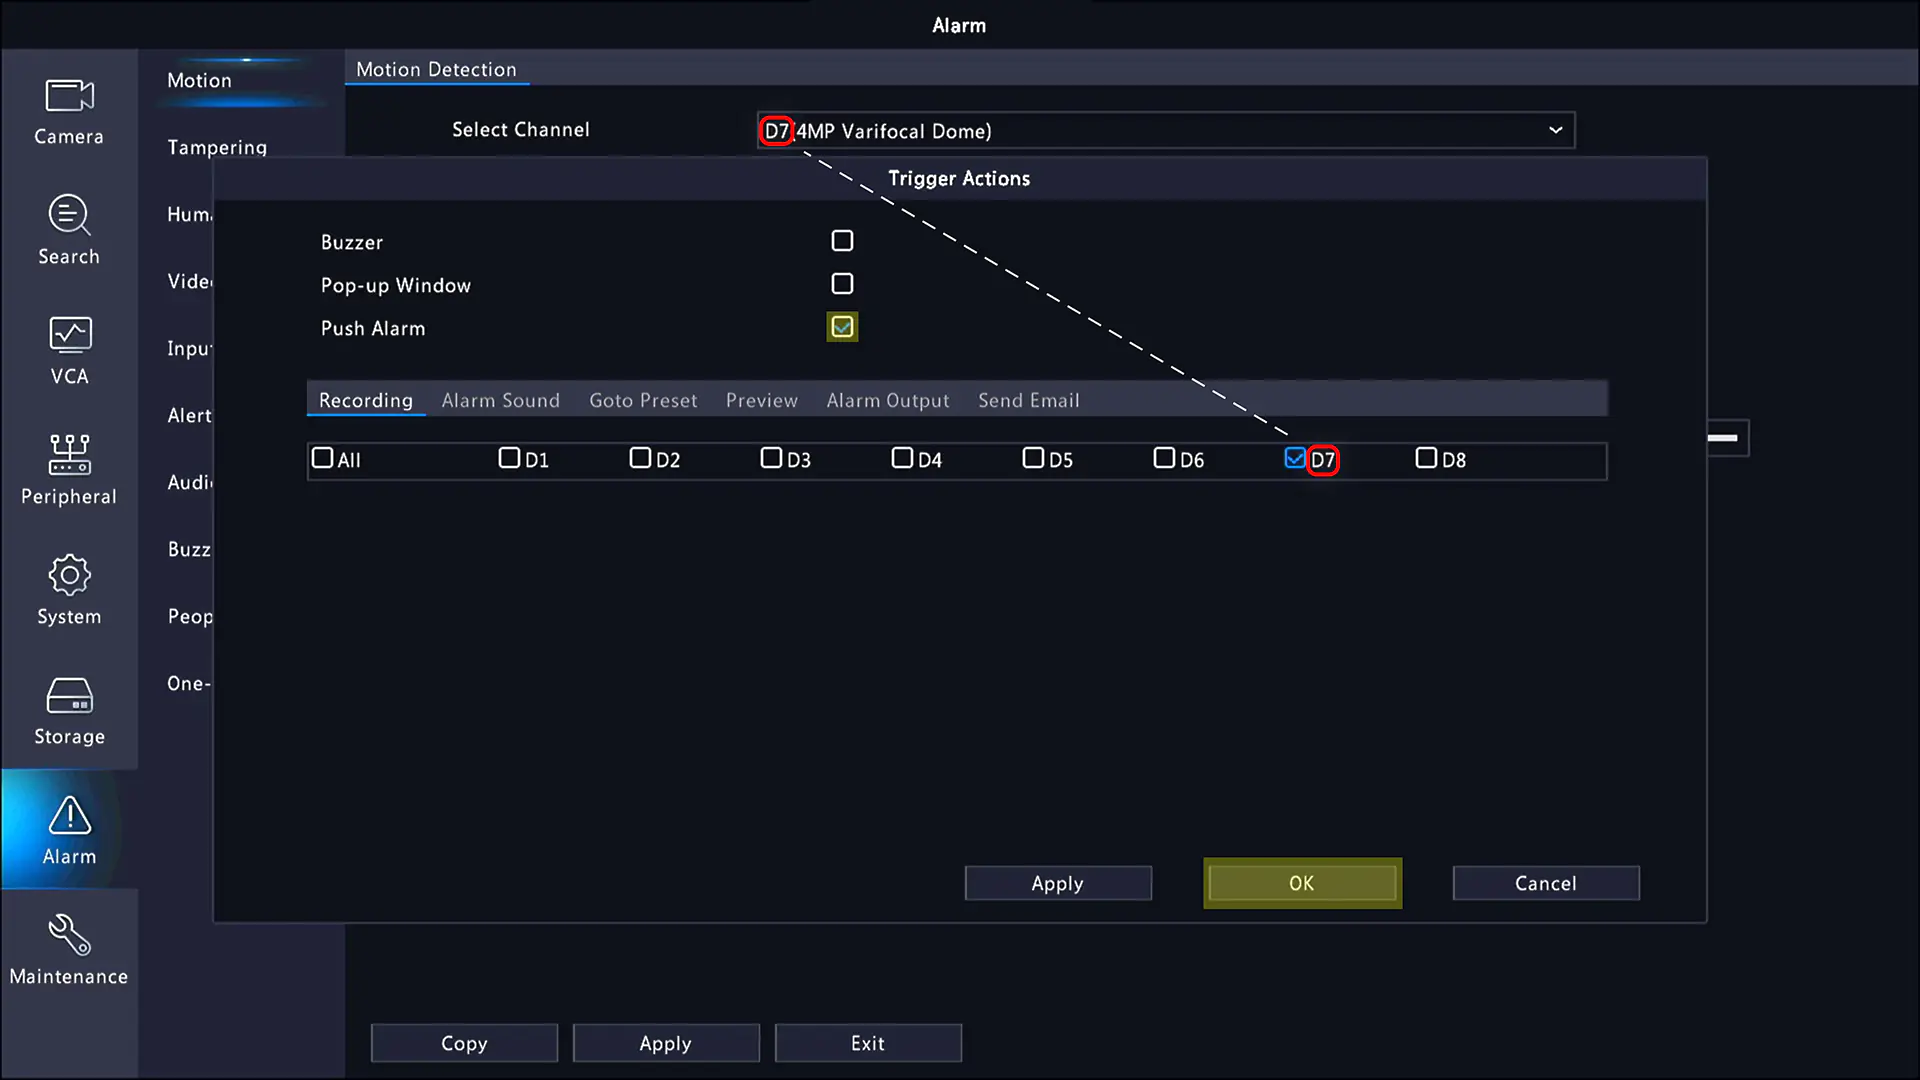
Lastly, don’t forget to setup a Trigger Action for the ultra motion detection; otherwise it won’t do anything!
You can set trigger actions by clicking the Gear Icon beside Trigger Actions. I suggest you enable recording on the same channel as the camera, so the camera will begin recording whenever the zone is triggered. When Ultra Motion Detection is triggered, you will see a purple line during playback. This makes it easy to search for important events.

Configuring Ultra Motion Detection from an Internet Browser
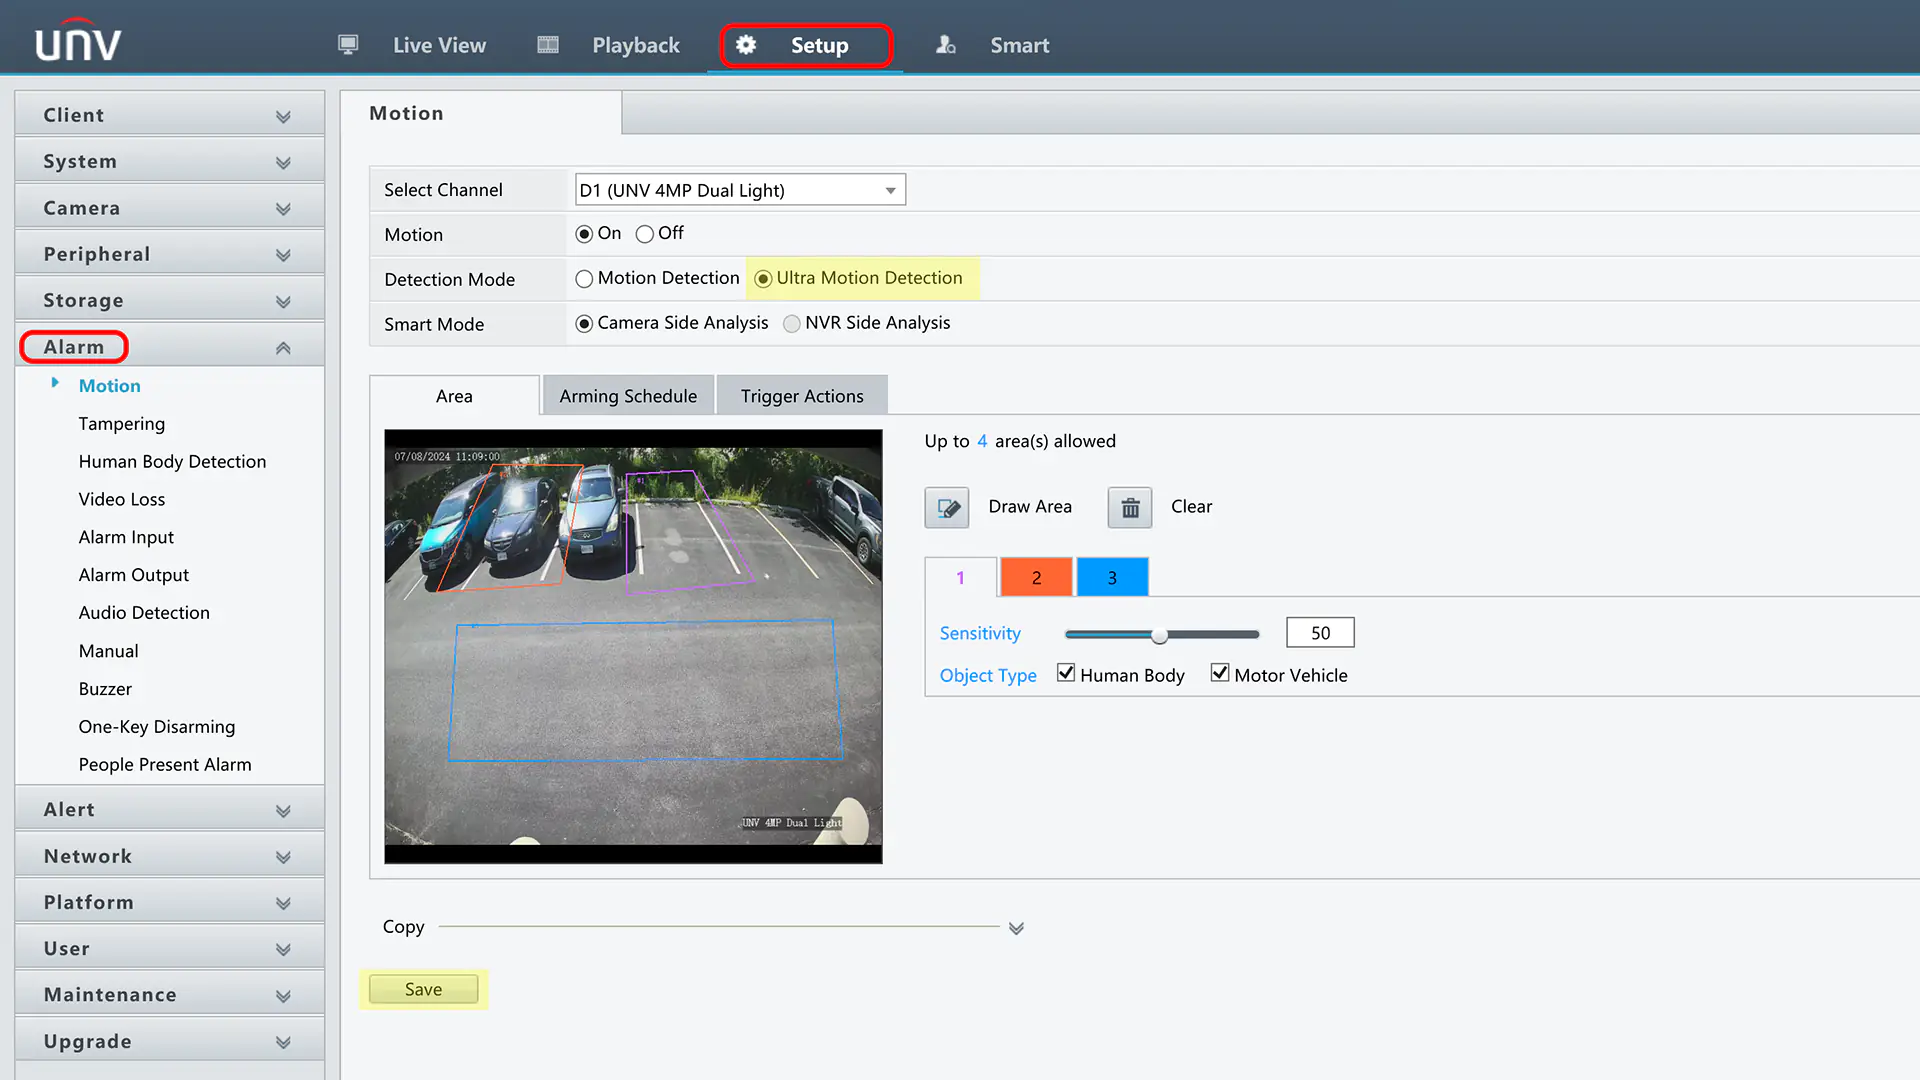
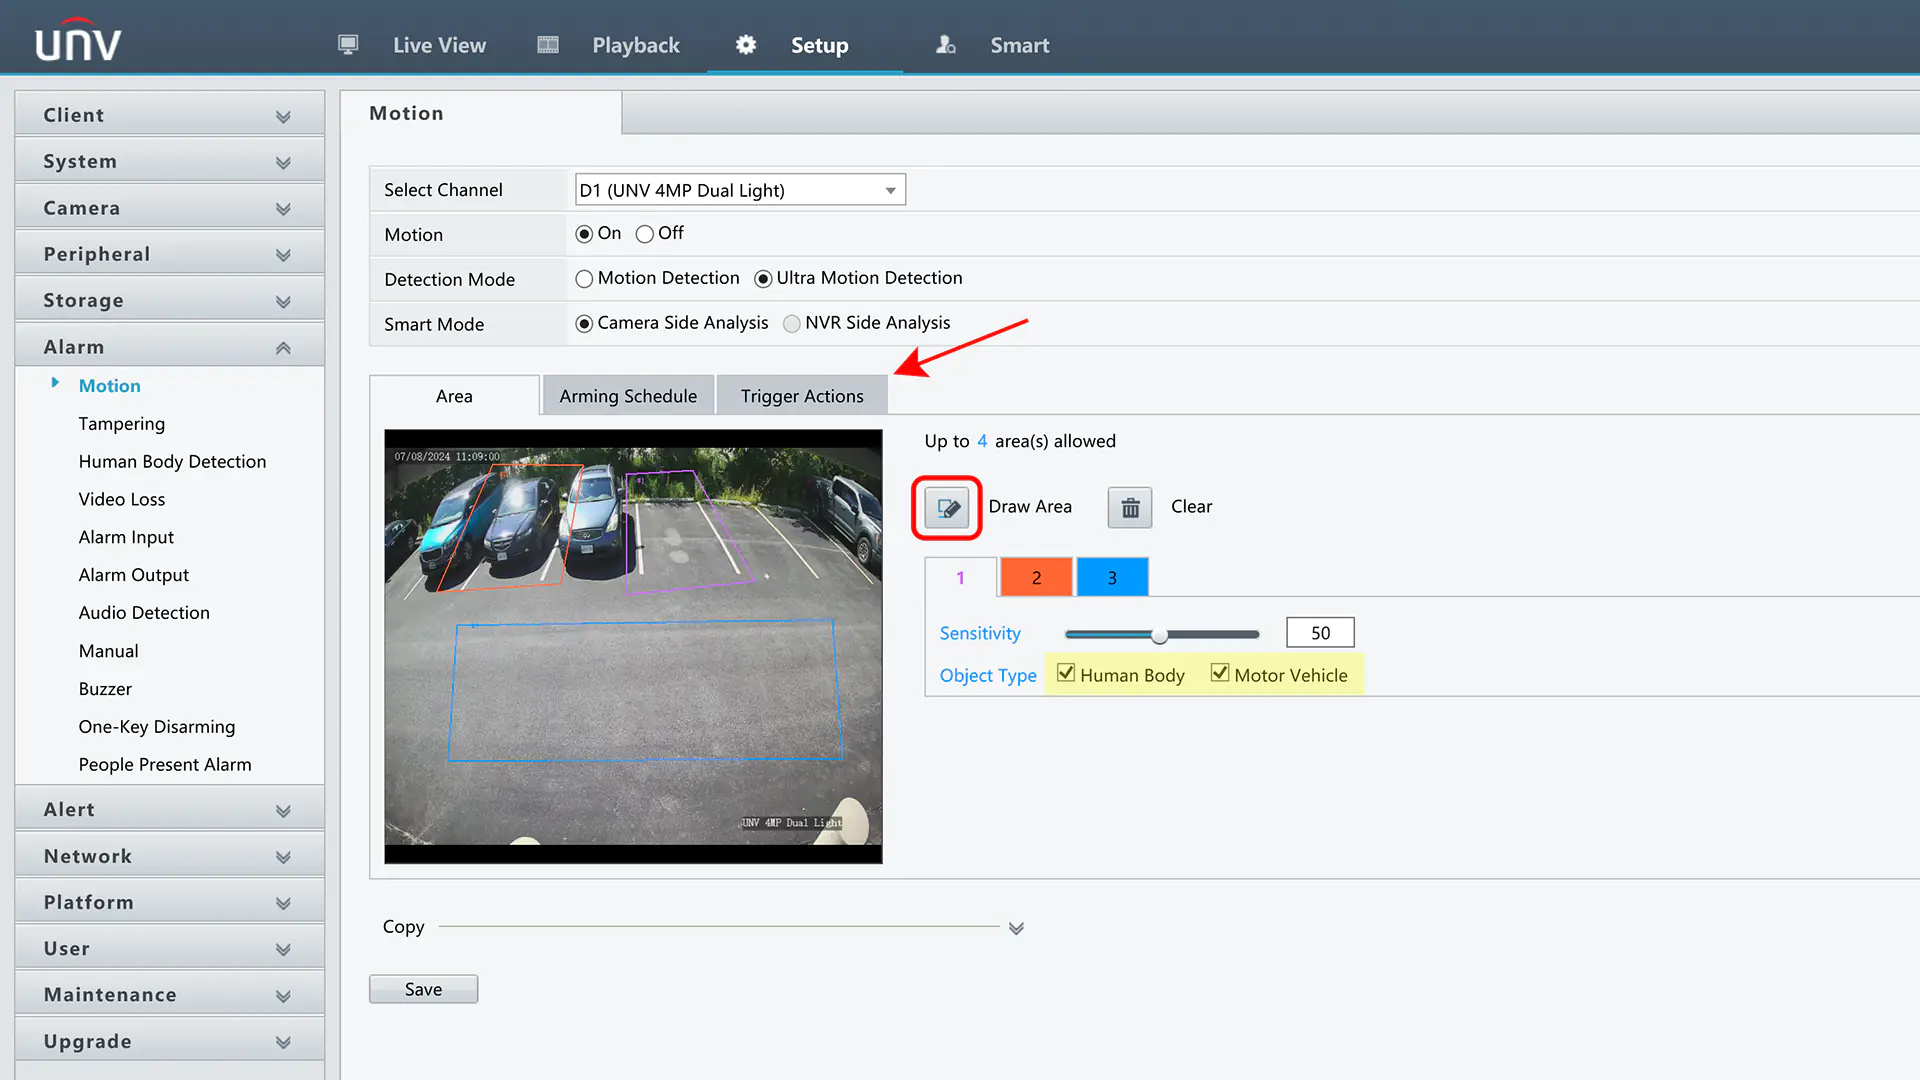
If you prefer to adjust the settings from your computer, you can also enable Ultra Motion Detection by logging into the NVR from the web interface. Navigate to the Setup -> Alarm and select the camera you’d like to configure. Then, tick the box beside Ultra Motion Detection switch from regular motion detection to Ultra Motion Detection.
To draw a detection area, click the Pencil Icon and left click over the camera’s image. Every time you click, it will mark a corner of the detection area. Make sure the detection zone fully covers the areas of interest, then click Finished Drawing once you’re done. You can draw up to four zones per camera.
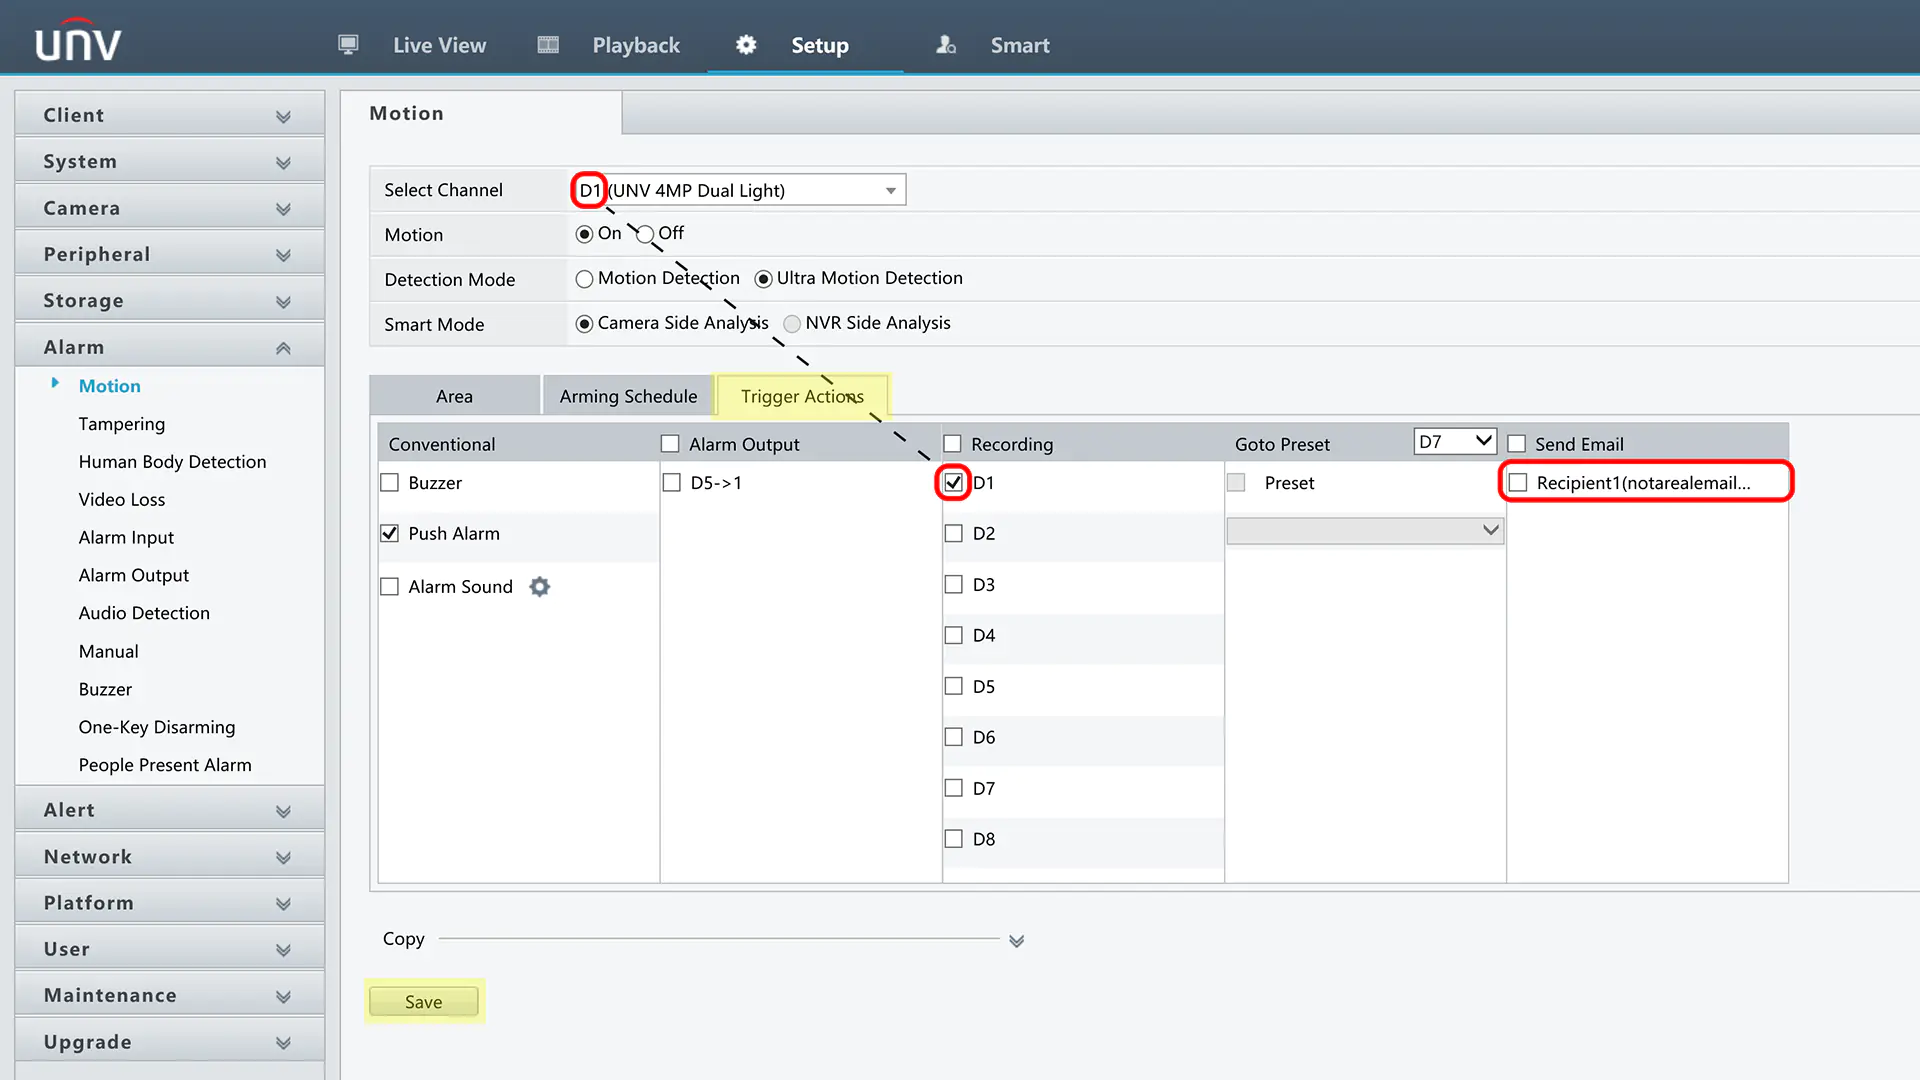
Next, you need to setup the trigger actions for the camera. This tells the NVR what to do when motion is triggered; do you want it to record, trigger an alarm output, or send an email? How about all three? These settings can be configured from the Trigger Actions menu.
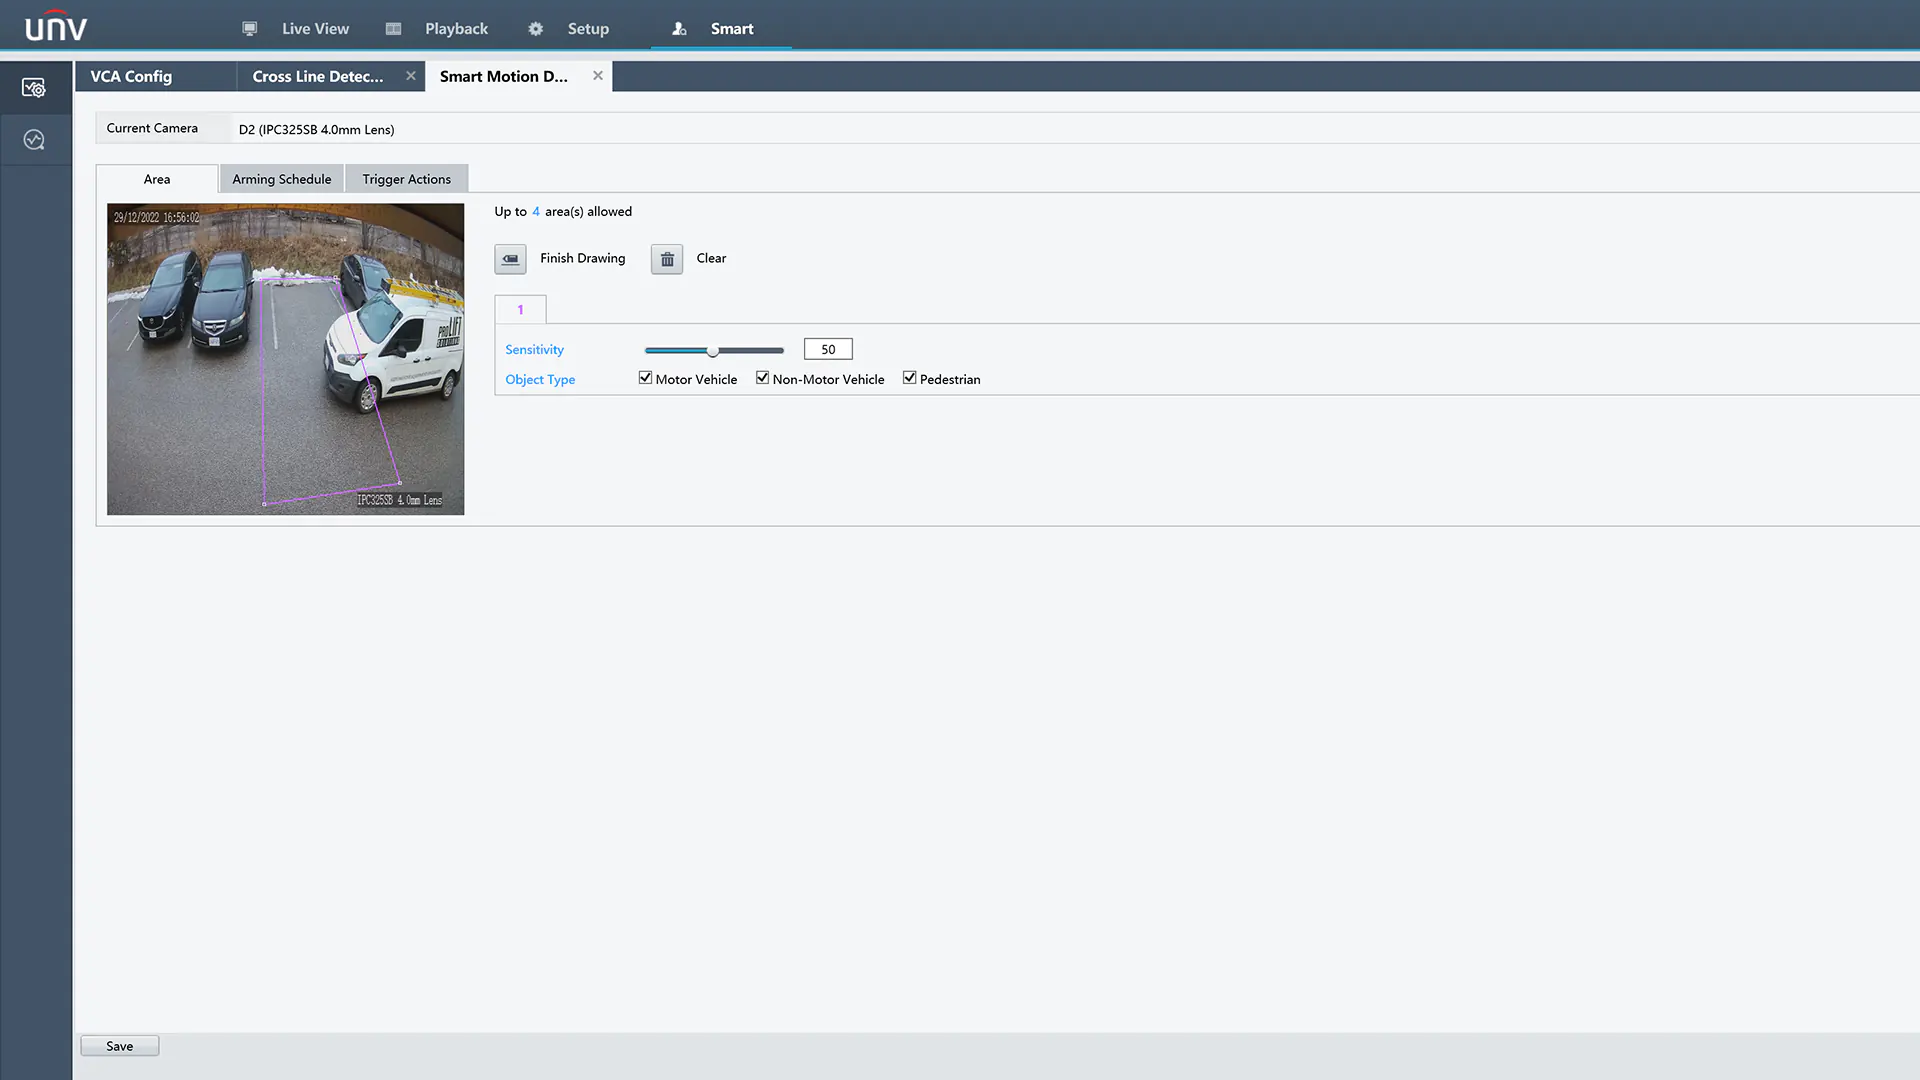
After setting up the trigger actions, you can also fine-tune the detection zones by adjusting the sensitivity and selecting object types. Each zone can have a different sensitivity and object focus, so you have the freedom to be creative if you’d like. For example, you set the zone to trigger only when a person enters the area, while ignoring vehicles – or vice versa.
Finally, click Save on the bottom left to save all the adjustments you made. Walk in front of the camera to ensure the detection is triggering properly, making adjustments if necessary.
What are the Differences Between Uniview SIP and UMD?
Uniview cameras have had a feature known as “Smart Intrusion Prevention”, AKA SIP, since 2020. This allowed you to setup a cross line or intrusion area with an intelligent filter for human, vehicle, and non-motor vehicle detection. While this feature was very useful for reducing false positives, it also took extra time to setup and configure.
With the introduction of Uniview “Ultra Motion Detection”, you can now apply the intelligent filters to a motion detection area. There are fewer settings to adjust, greatly simplifying your setup process while also resulting in faster footage retrieval from playback due to less unwanted recordings.

Final Thoughts
Ultra Motion Detection is a natural evolution of Uniview’s intelligent AI algorithm. By detecting humans, vehicles, and non-vehicles, the camera is able to filter out false motion and enables you to search for footage more easily. We’re excited to see it finally arriving towards the end of 2022, and we look forward to seeing how it performs in the field.
If you have any questions about Uniview features or functionally, we’d be happy to assist you. Visit our Contact Page to send us an inquiry via email or telephone.