As a Uniview distributor, we get asked a lot of questions about security cameras. One of the most common questions we get asked is: “Do Uniview cameras work on Hikvision recorders?”
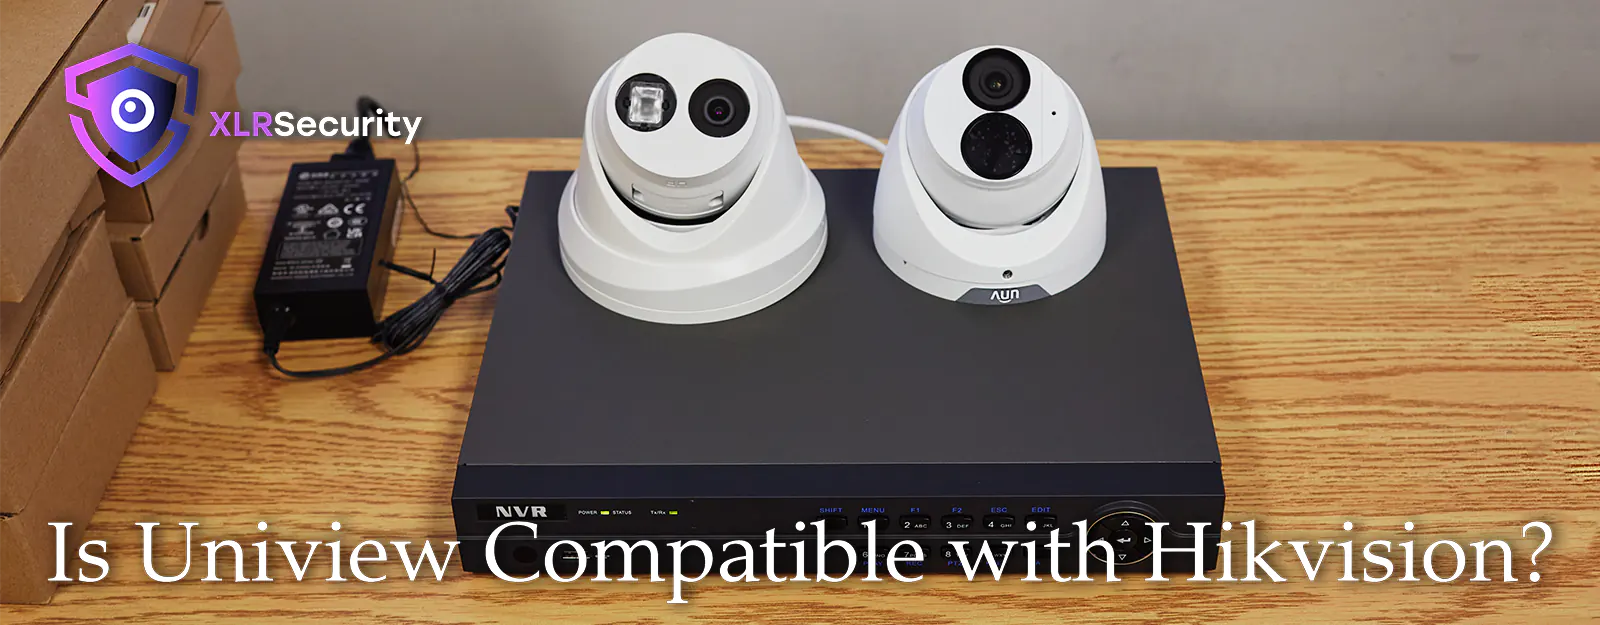
The short answer is yes, Uniview cameras work with Hikvision recorders. There are a few steps you need to follow if you want to get a UNV camera working on Hikvision. So, we decided to buy a Hikvision OEM recorder to show you how it’s done.
How to Add a Uniview Camera to a Hikvision NVR
Requirements and Setup
First, you’ll need a few items before you get started:
- A laptop or desktop computer with an ethernet port
- Two ethernet cables
- The username and password for your Hikvision NVR
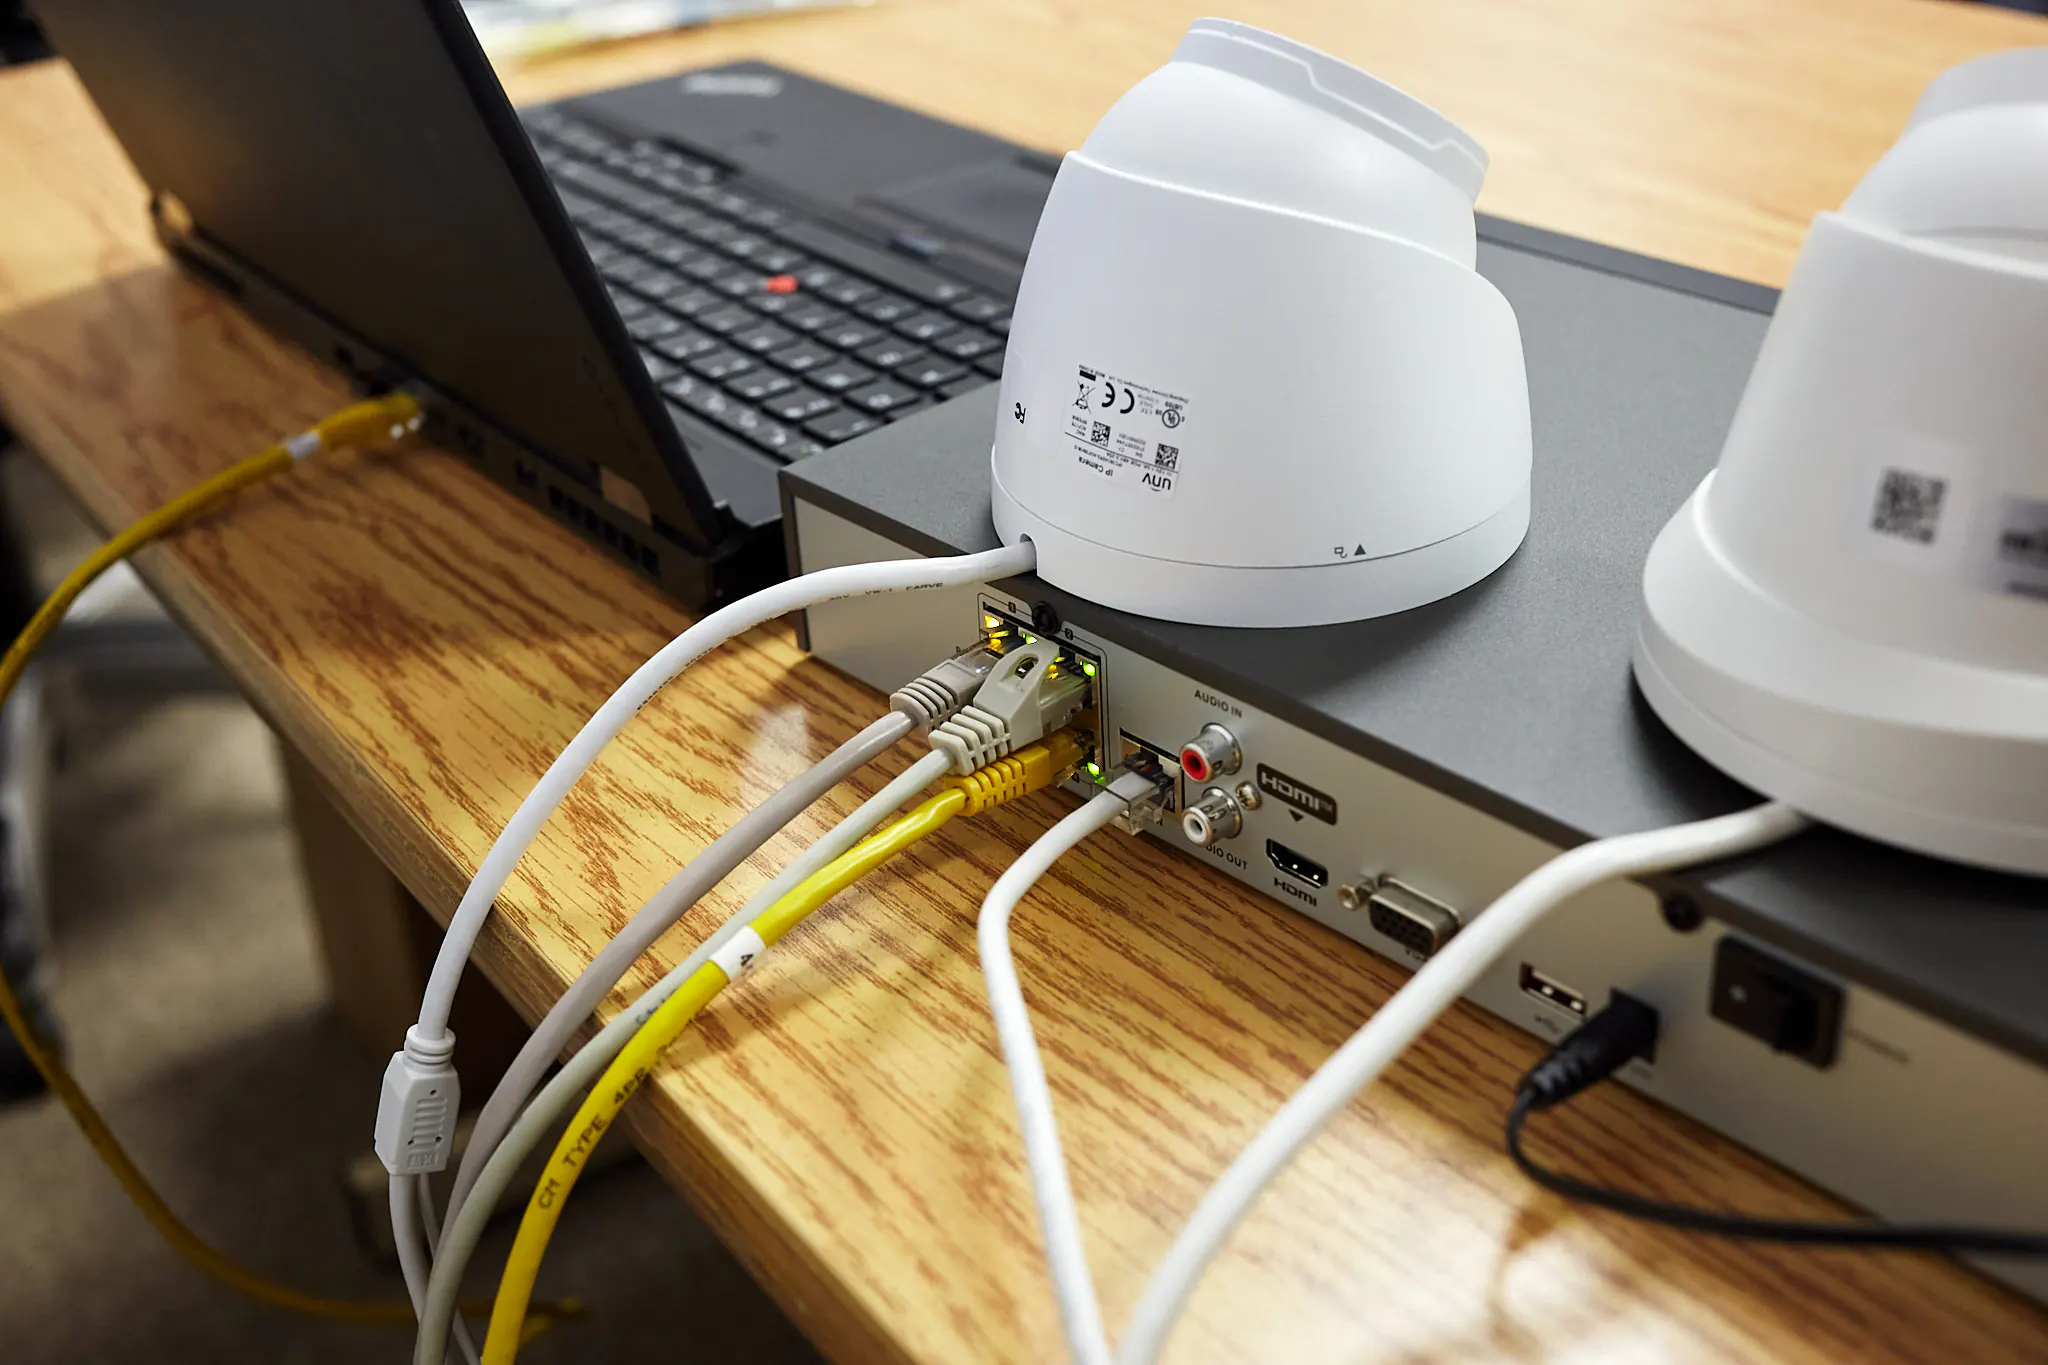
Next, take one of the ethernet cables and plug your Uniview camera into one of the PoE ports on the Hikvision NVR. Also, plug your laptop into a different PoE port on the back of the Hikvision NVR. You may need to unplug one of the existing cameras temporarily to free up a port.
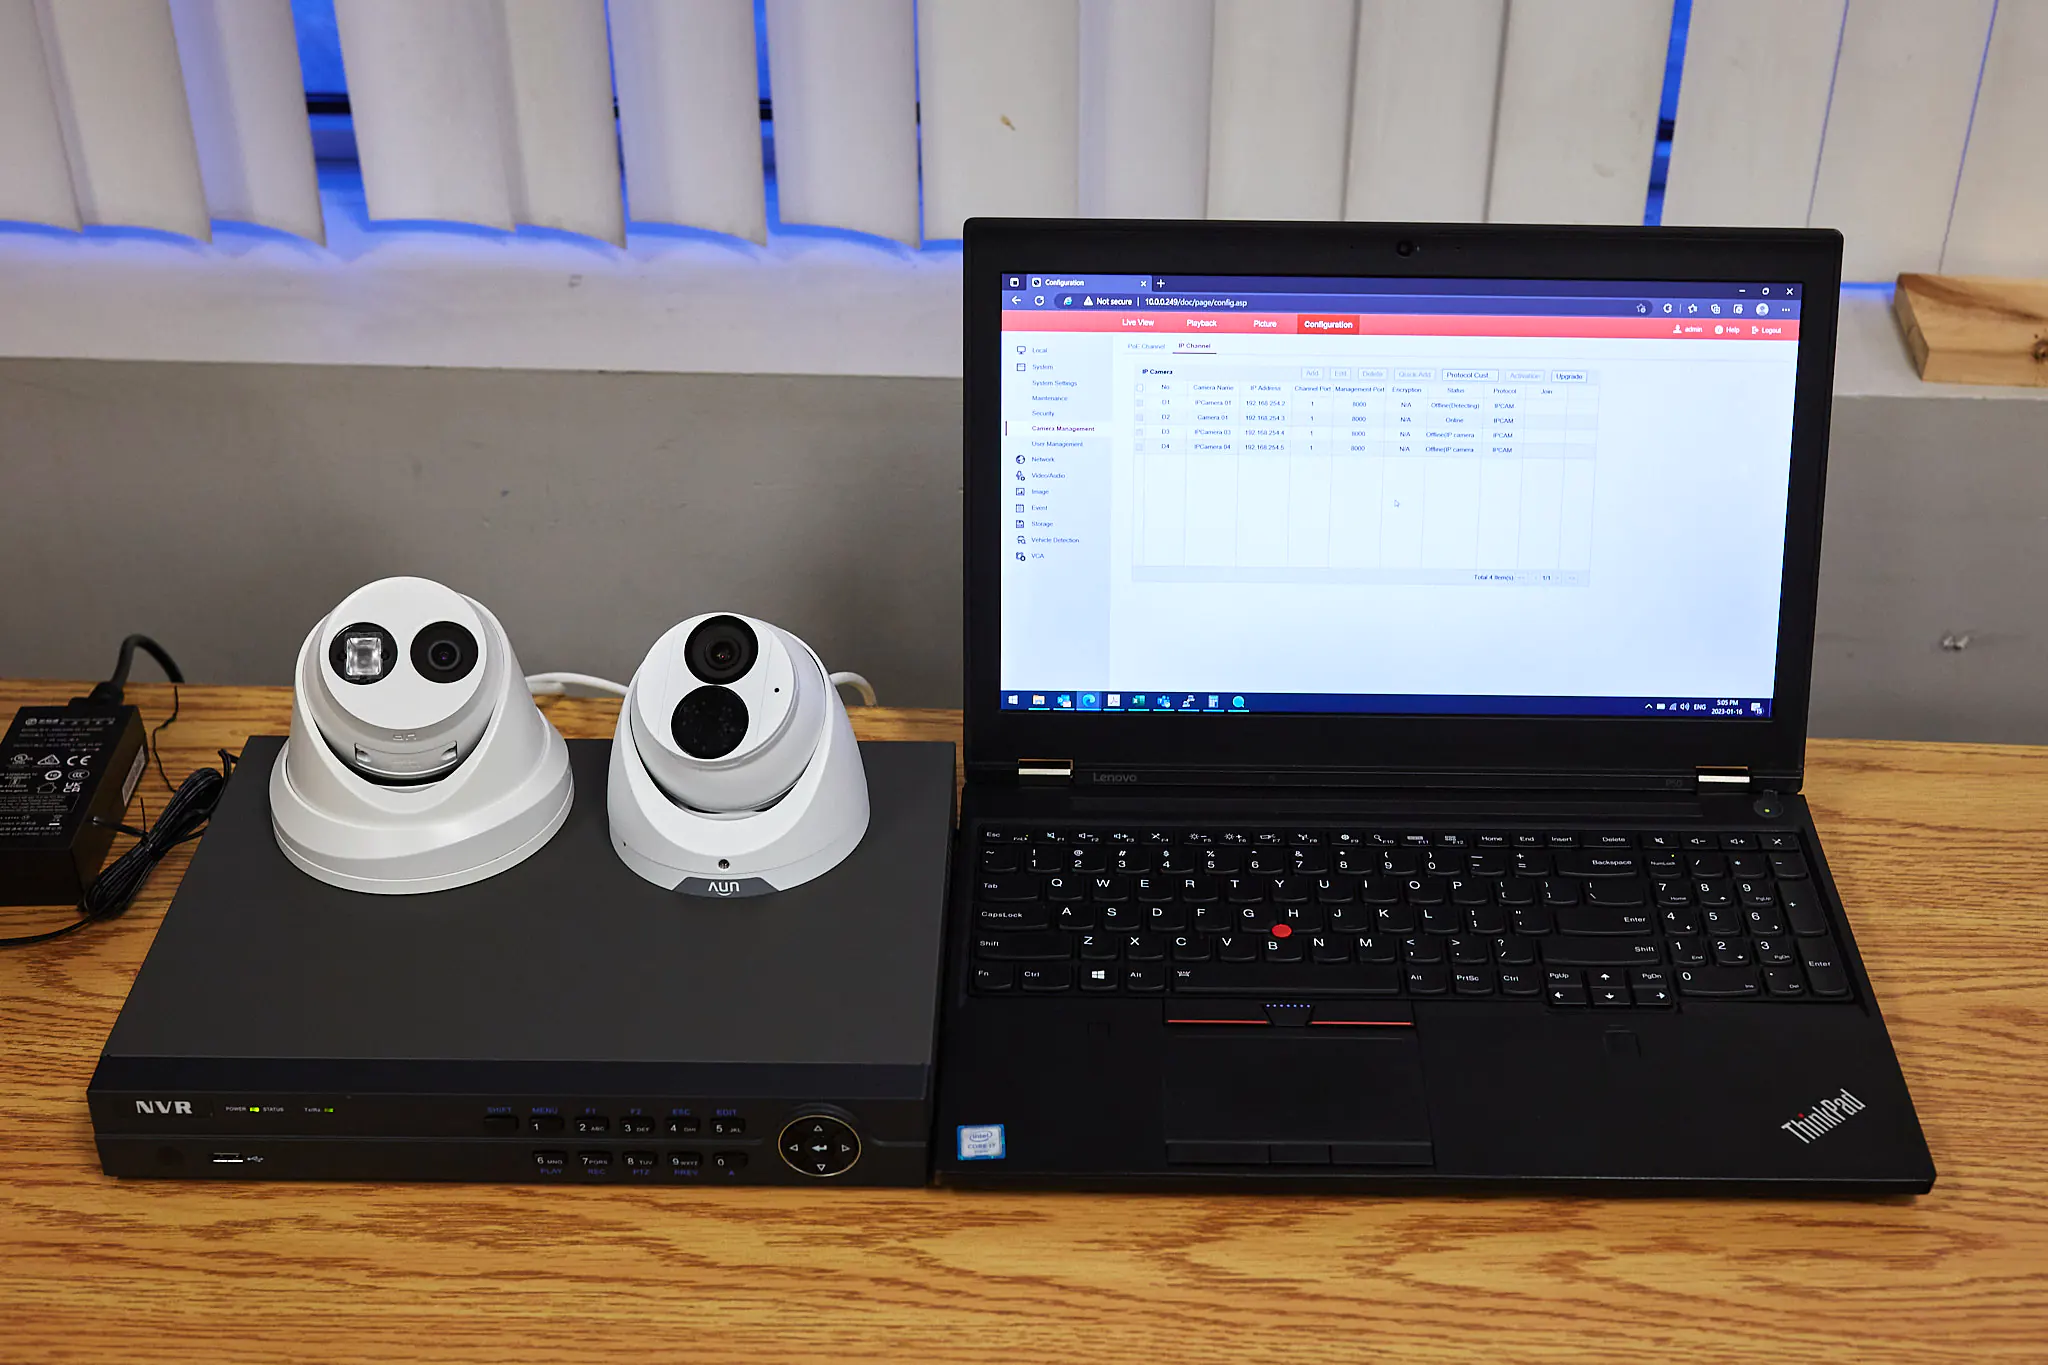
Login to Hikvision NVR - Check the "Camera Management" Settings
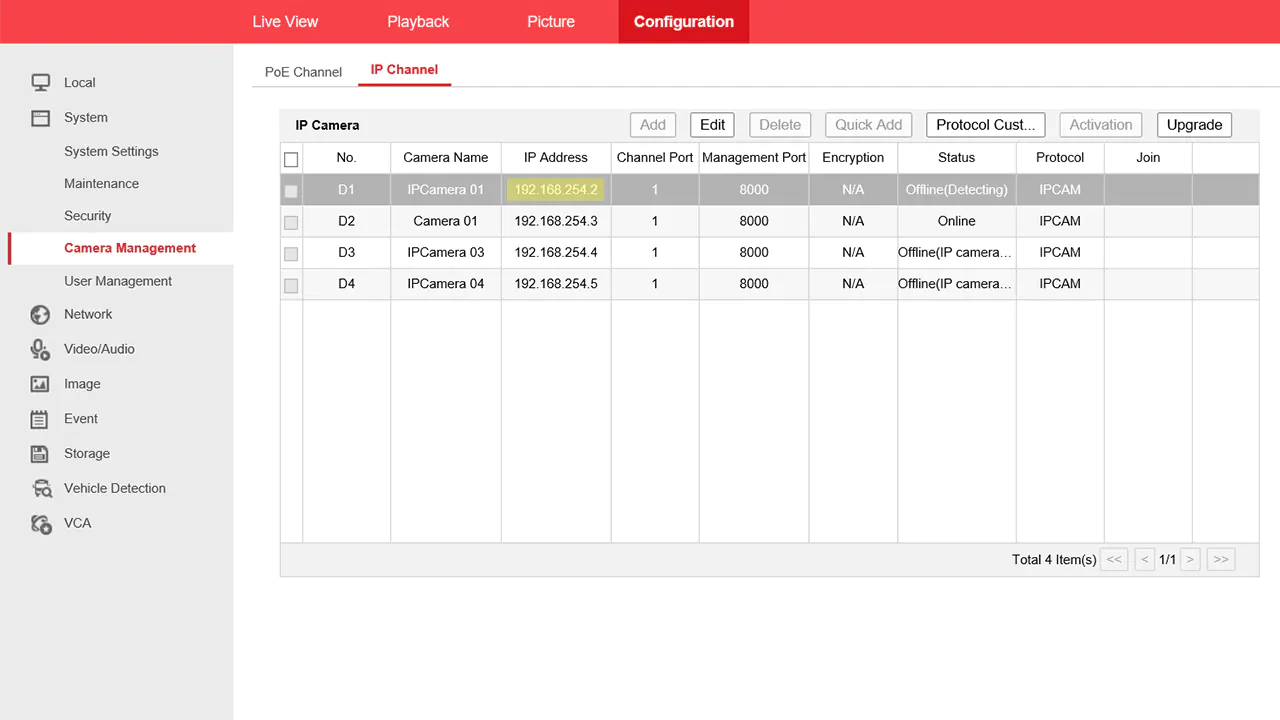
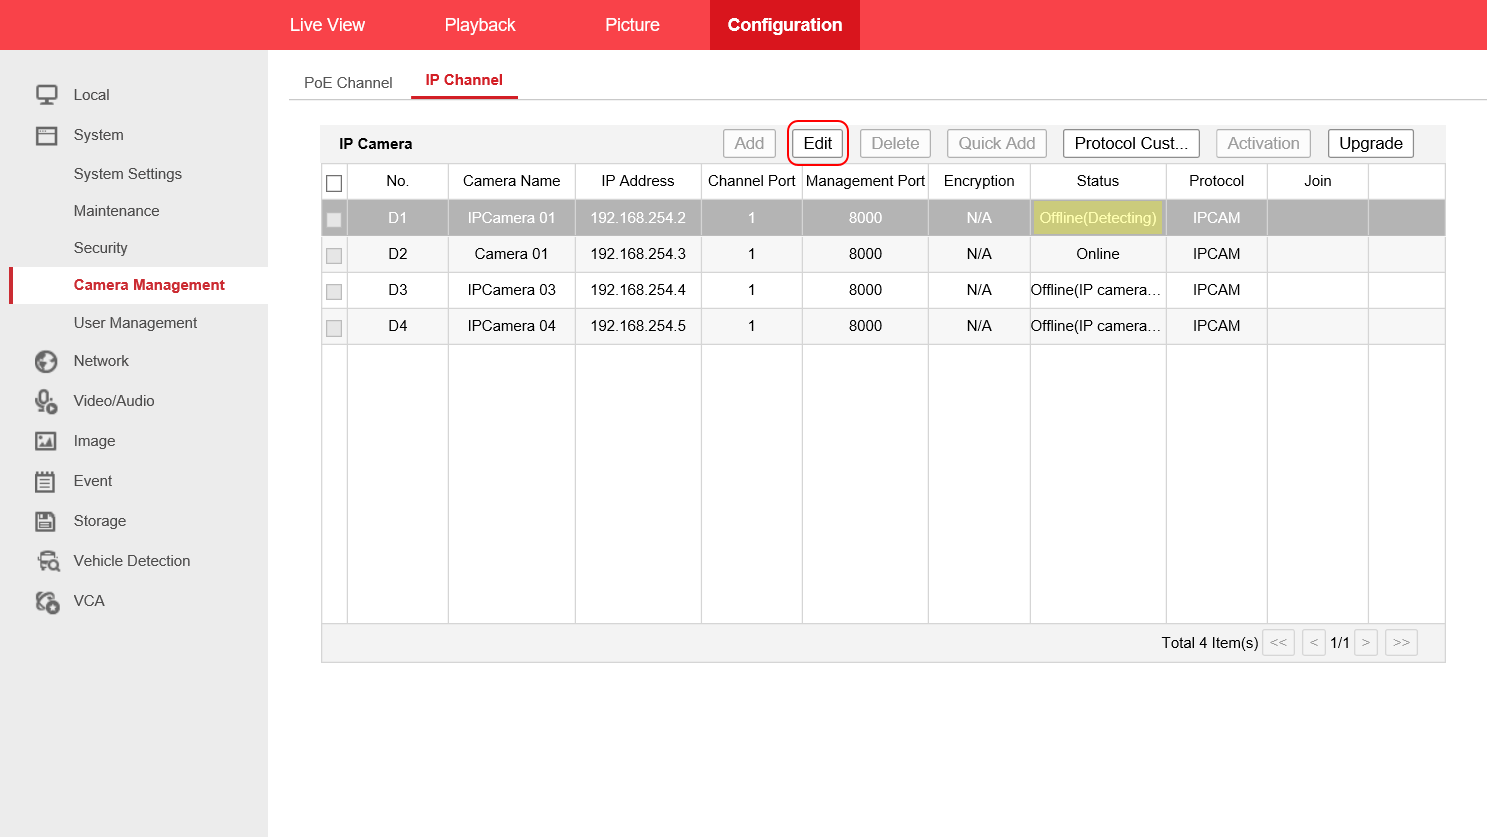
For the next step, we need to check which IP address we will set the Uniview camera to. Login to your Hikvision NVR and navigate to Configuration -> System -> Camera Management -> IP Channel. Take note of the IP address of an empty channel; in this case we will use 192.168.254.2. We will need to set the Uniview camera’s IP to this address.
In our example, because we plugged the Uniview camera into PoE port 1, it shows Status: Offline(Detecting) in D1 on the NVR. Therefore, we know D1 is an empty channel; we will use this channel to add our Uniview camera.
If you are following along, you may have a different channel and IP address than us. That’s okay, as long as you follow the basic idea, you will be able to get it working.
Set Uniview Camera to a Static IP Address
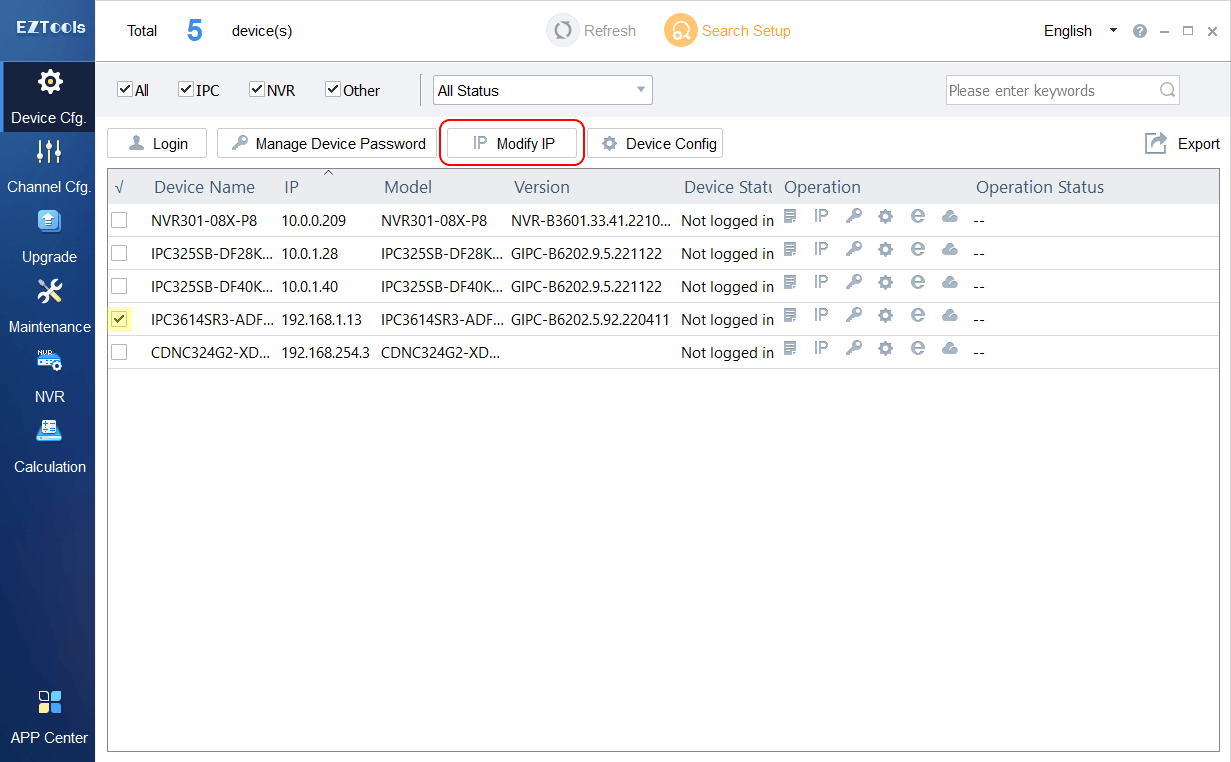
After finding the IP address from the Hikvision NVR, we need to set our Uniview camera to this address using a static IP. The best way to set a Uniview camera to a static IP is by using the EZTools 2.0 software. Download and install EZtools 2.0, then open it on your computer.
Once you have EZTools 2.0 open, look for your Uniview camera in the list. In our example, the camera with an IP address of 192.168.1.13 is the Uniview camera plugged into the Hikvision NVR.
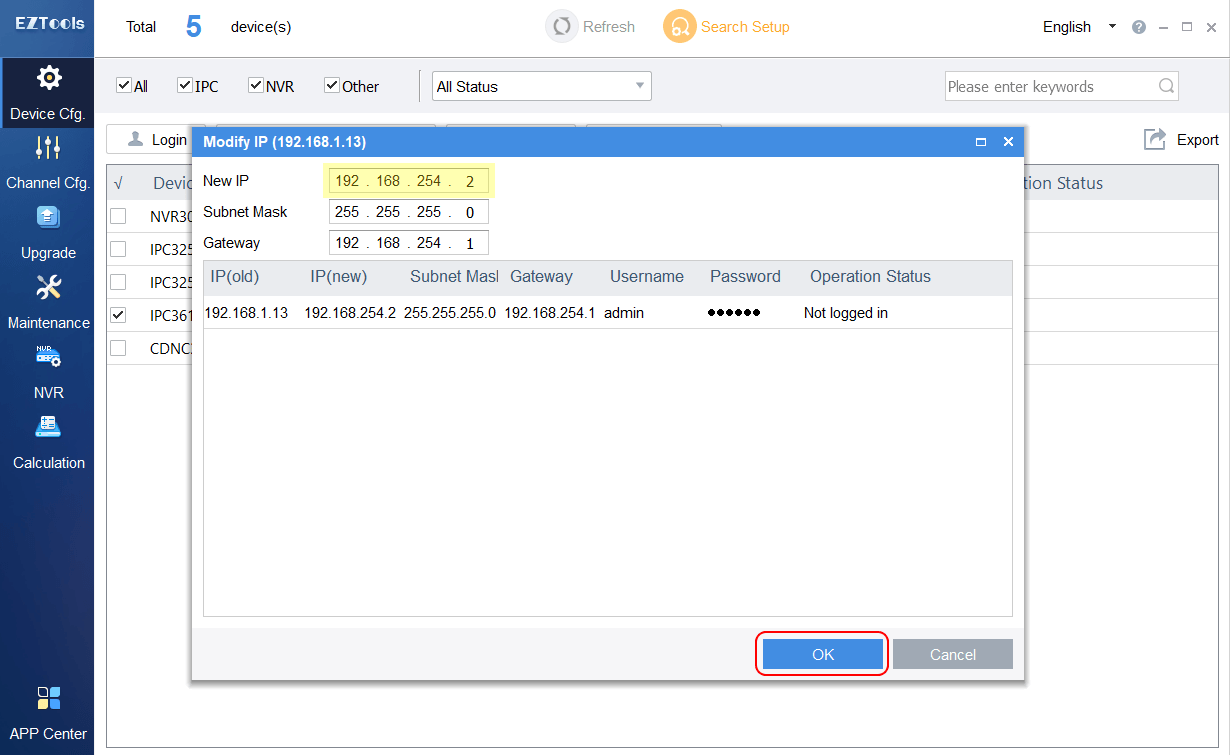
Tick the box beside the camera, then click Modify IP in the EZTools 2.0 menu. Now you can enter a new static IP address for the Uniview camera; we will use 192.168.254.2 which we got from the previous step. The subnet mask and gateway should auto-fill; click OK to confirm and change the IP of the Uniview camera.
Note: If you are get an error when modifying the Uniview camera’s IP address, you will need to set your computer to a static IP address within the same network as the camera. So, if your Uniview is 192.168.5.10, set your computer to 192.168.5.X so they can communicate with each other.
Add Uniview in Hikvision NVR via ONVIF
Now that you’ve set the Uniview camera to a static IP address, we are ready to add it in the NVR. Once again, login to your Hikvision NVR and navigate to Configuration -> System -> Camera Management -> IP Channel. Select the empty channel where the Uniview is plugged in (D1 in our example) and click Edit.
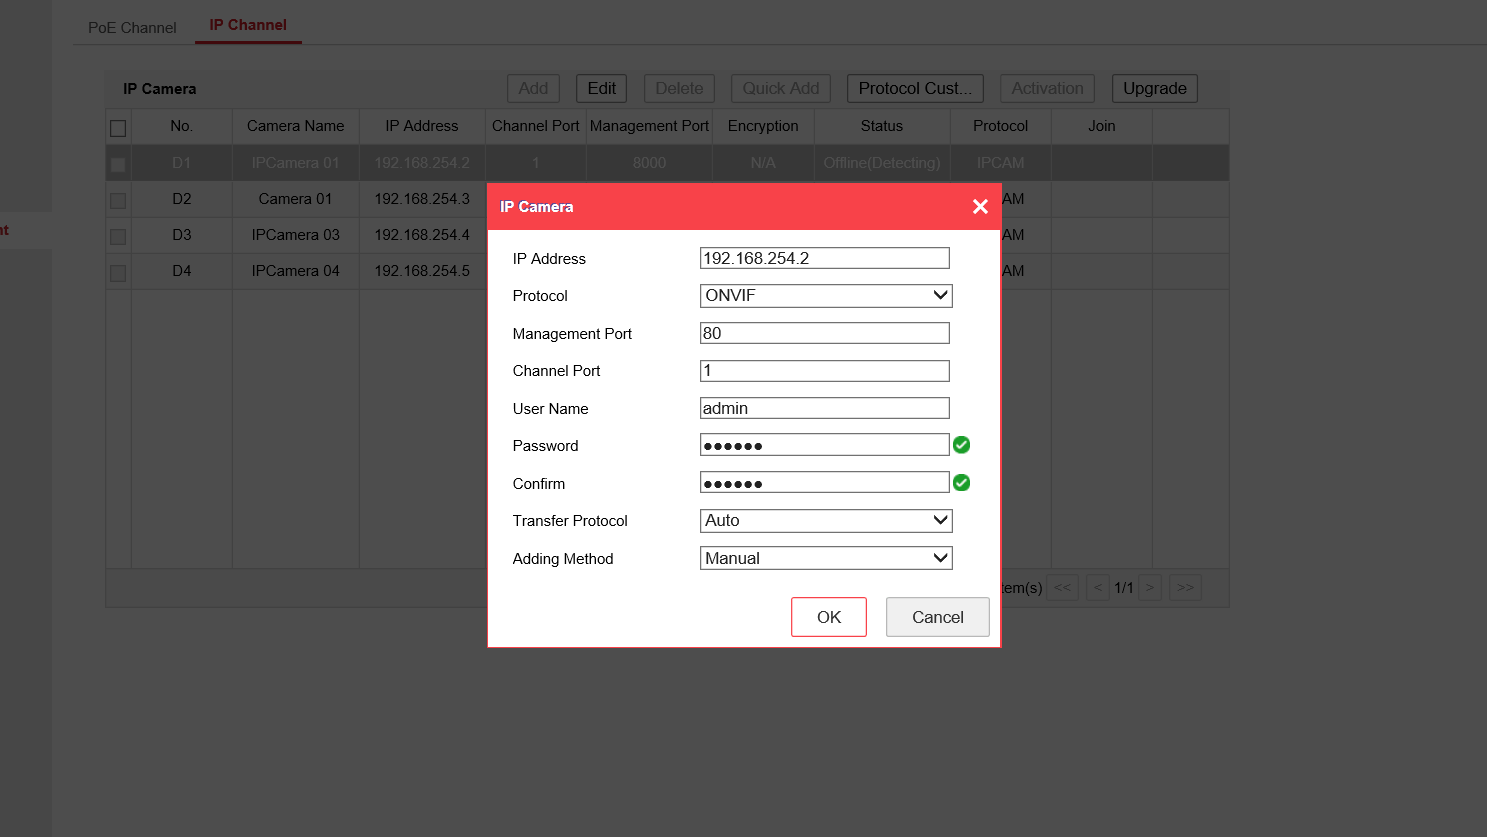
You will see a window pop up that shows the IP address of this channel, along with a bunch of other settings. At first everything will by greyed out; choosing Adding Method = Manual will allow you to edit the settings here.
Next, you’ll need to fill out the settings for the Uniview camera. The settings we used are:
- IP Address – The IP we set the Uniview camera to. In our example we used 192.168.254.2
- Protocol – This must be set to ONVIF for Uniview cameras
- Management Port – Set to 80 by default; this is the HTTP port for the Uniview camera
- Channel Port – Set to 1 by default; only useful if you are adding a camera with multiple sensors
- User Name – The default for Uniview cameras is “admin“
- Password – The default password for Uniview is “123456“
- Confirm – Type the password again “123456“
- Transfer Protocol – Keep it set to Auto for optimal stability
- Adding Method – As mentioned earlier, set to Manual so you can adjust the other settings
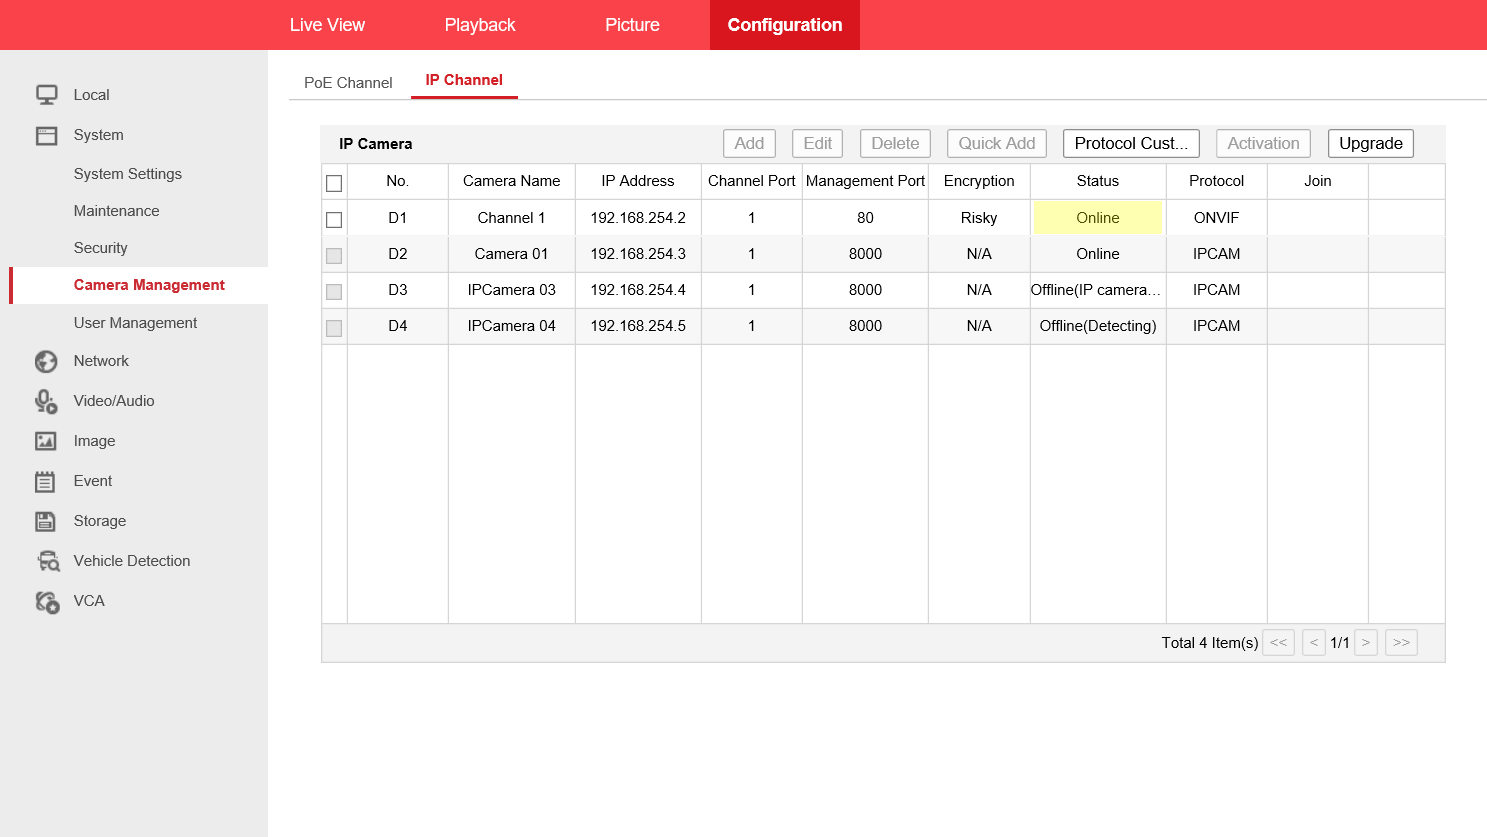
After entering the settings, click “OK” to save them. If done correctly, the Uniview camera will show up as Online in the camera management menu. You may need to wait 1-2 minutes before it shows up. Check the live view if it’s working.
Common Mistakes / Troubleshooting
Hopefully you were able to get the Uniview camera working on a Hikvision recorder. If not, here’s a few things you could try.
Offline(Parameter Error)
If you see this message, it means one of the camera settings is not compatible with the Hikvision NVR. Usually this can be fixed by lowering the resolution of the Uniview camera; or by setting the encoding to H.264.
Offline(Network Abnormal)
This message means the NVR is not able to communicate with the Uniview camera. Double check your network settings to ensure the address of the camera and NVR are in the same network. If your NVR is 192.168.254.xx, the camera must also have an IP of 192.168.254.xx.
It works on Main Stream only (sub-stream shows black screen)
If your camera only shows up on main stream, the first thing to try is restoring the Uniview camera to default settings. If that doesn’t work, you can try lowering the sub-stream settings to H.264 and lowering the framerate and resolution until it works.
Afterword / Final Thoughts
After getting the Uniview camera to show up on the Hikvision NVR, you can unplug it and mount it to the final location. Once you plug it back it, it will connect to the NVR automatically and appear in your iVMS-4200 and/or Guarding Vision app.
I tried to make this tutorial as clear and concise as possible but I understand you may still be having trouble. You are welcome to contact us if you have problems getting everything to work. We wish you the best of success in your CCTV journey!

