Uniview’s ColorHunter cameras can be configured to have either a flashing light, or a steady light depending on your situation and requirements. This light is triggered via the “Intrusion” or “Cross Line” detection zones which can be setup through the NVR “Smart” menu.
If you’d like to view this tutorial in a video format, you can watch the video below. Otherwise, keep scrolling for text and image-based instructions.
Prerequisite: Setup a Detection Zone on the NVR
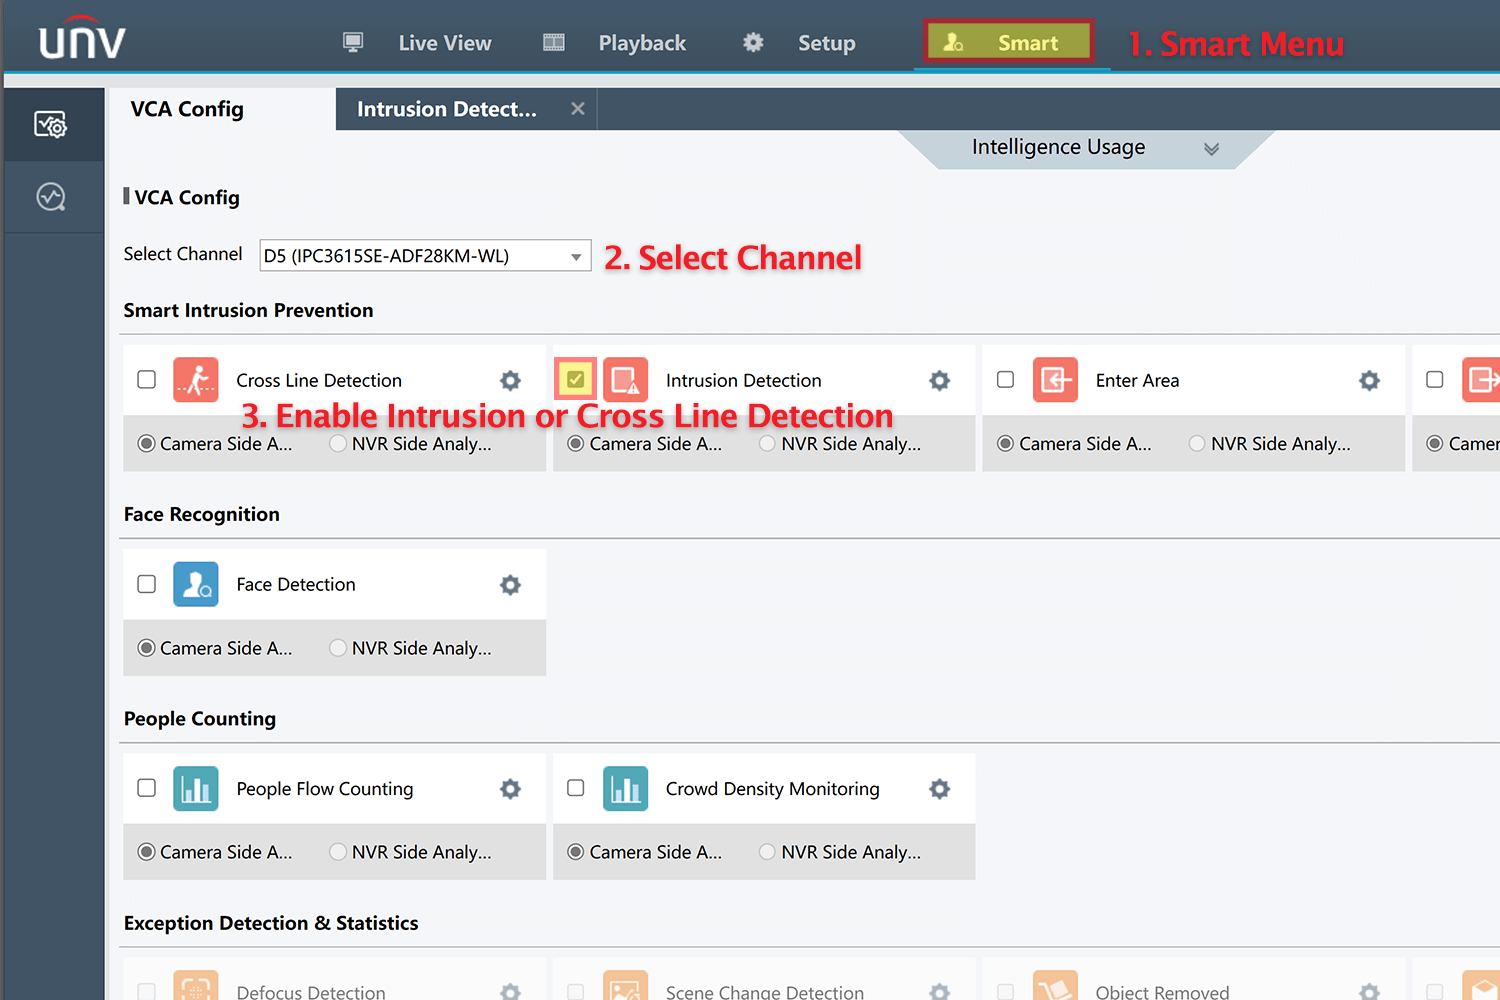
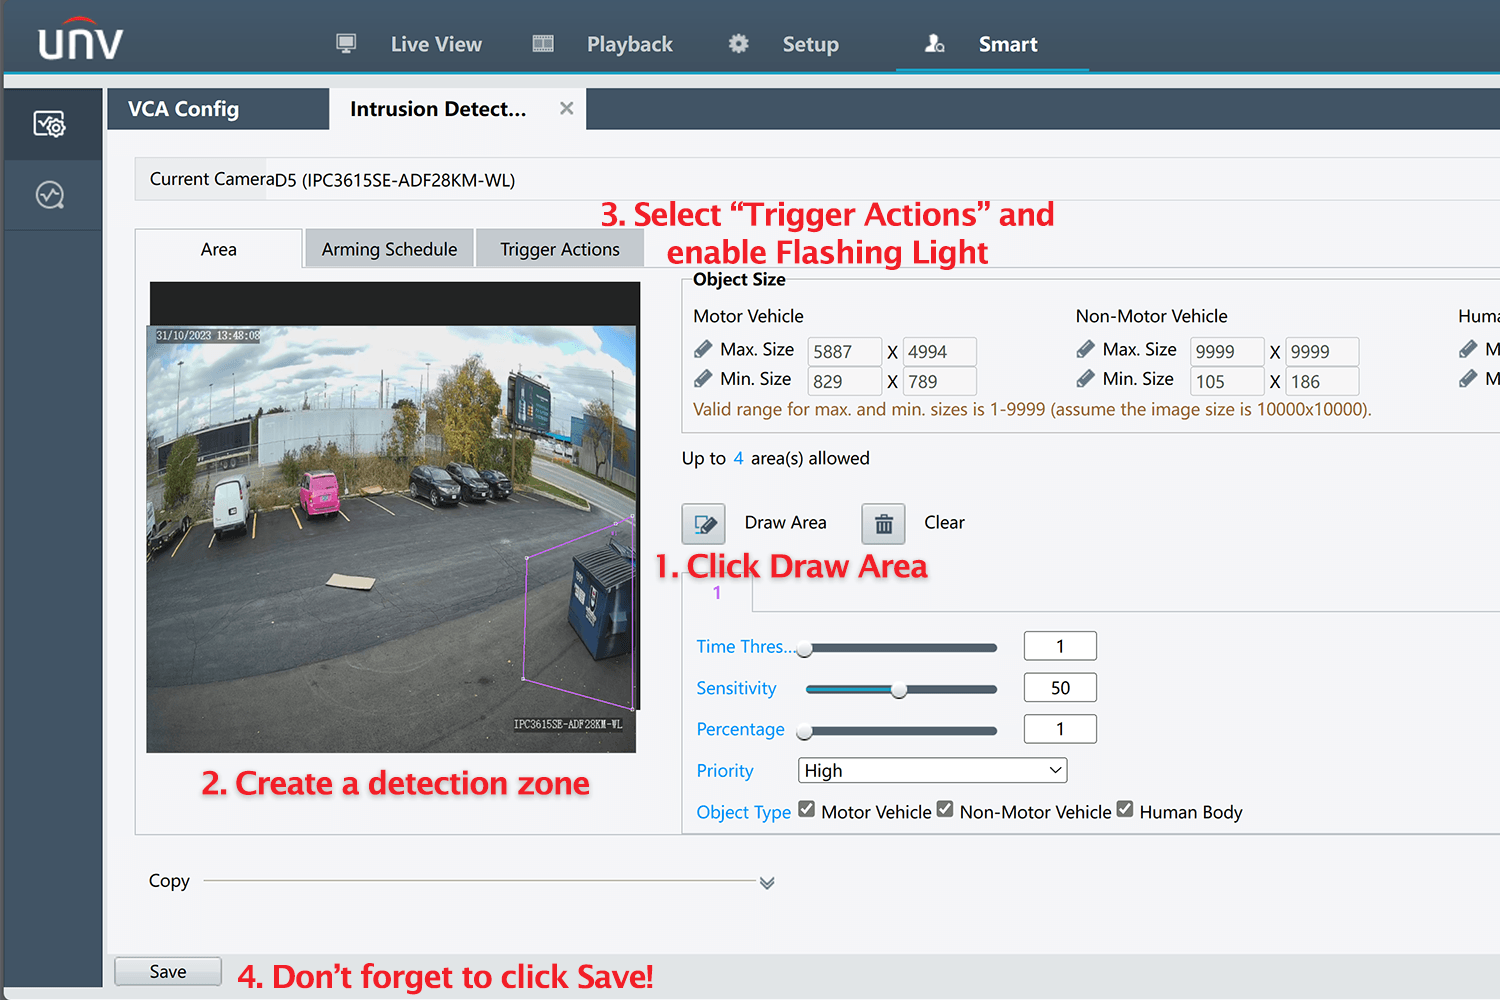
Before the white light can trigger, you will need to setup a detection area on the NVR. First, login to the NVR via the web browser and navigate to the Smart settings. Next, select your ColorHunter from the Select Channel dropdown menu, then check the box below to enable either “Intrusion” or “Cross Line” detection.
Once you’ve selected your detection method, click the Gear Icon to enter the settings for that detection method. Now, click on Draw Area and start drawing a detection zone over the camera image. Any person or vehicle enter this area will trigger the light on the ColorHunter camera.
Finally, navigate to the Trigger Actions tab and make sure Flashing Light is checked. Click the gear beside the flashing light setting to adjust the time the light will stay on; by default it’s set to remain on for 10 seconds.
Don’t forget to hit Save near the bottom left, otherwise your settings will not be saved!
Switch Between Flashing Light and Steady Light
Now that you’ve setup the detection zone from the Smart menu, the light will automatically flash when someone enters the area. This is the default behaviour, meant to deter people from loitering or trespassing into a restricted area.
If you’d rather have a light that turns on without flashing, you’ll need to configure a few more settings.
How to enable the steady (non-flashing) light
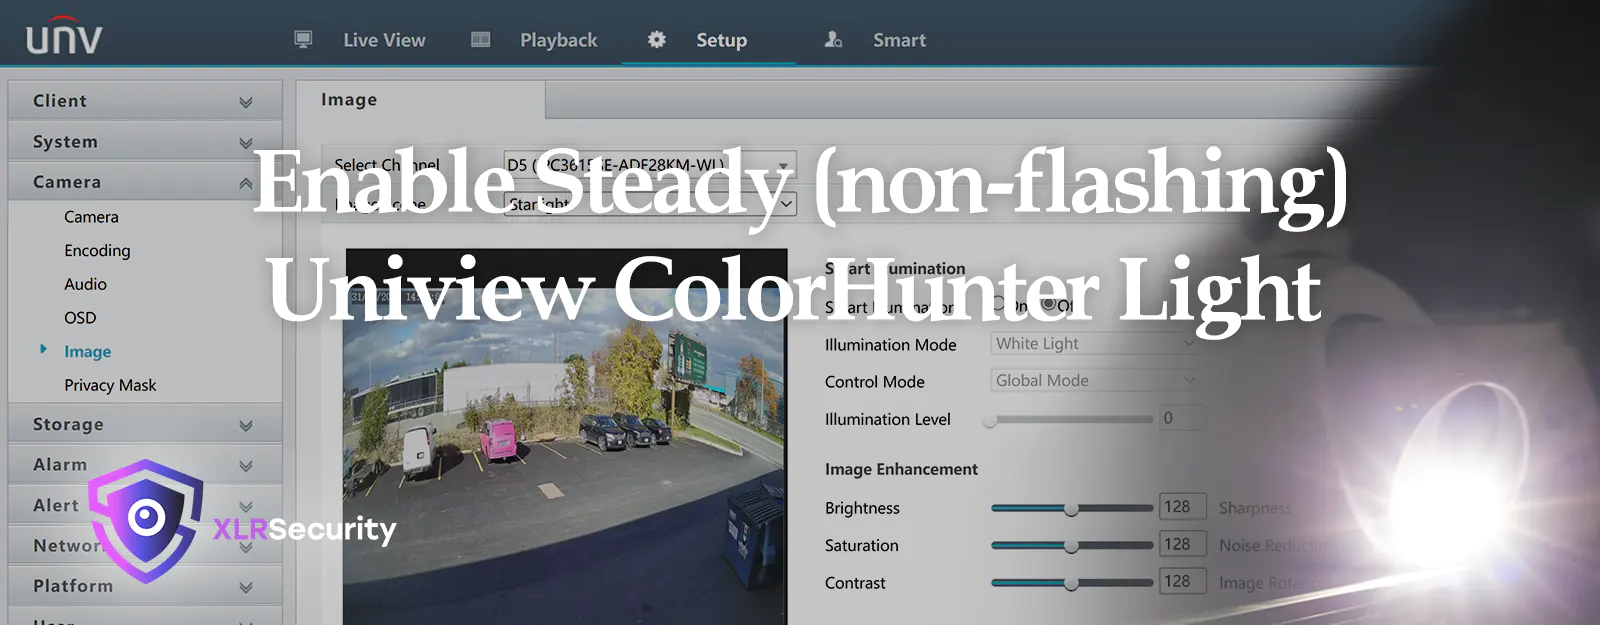
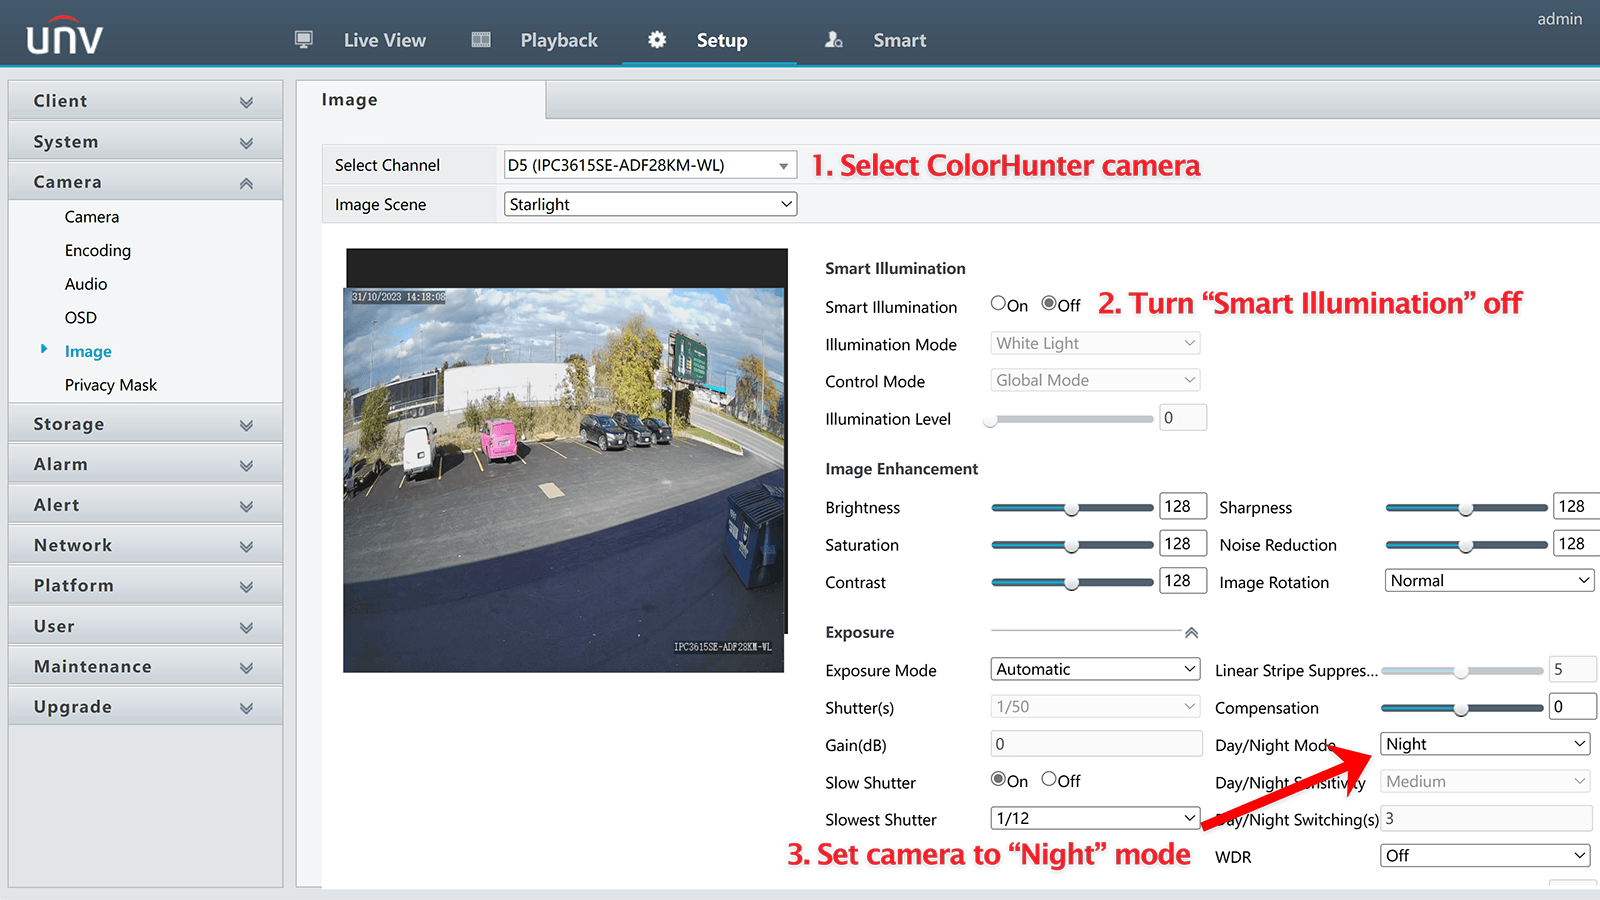
To enable a steady light, navigate to the Camera -> Image settings menu on the NVR. Select the camera from the Select Channel dropdown menu , and set Smart Illumination to Off. This will prevent the light from automatically turning on when the scene becomes dark.
Next, click the small arrow beside Exposure to reveal the options underneath. Set the Day/Night Mode to Night.
When the camera is set to Night mode and the light is triggered, it will turn on with a consistent brightness. In Day mode, it will trigger with the previous flashing behaviour we saw earlier. So, make sure the camera is set to Night mode if you want a non-flashing light.
Final Thoughts
By setting the ColorHunter camera to a steady light mode, you can utilize it similar to a motion-activated porch light. This does come with a downside; because the light is disabled until a person walks into the scene, you may not get full colour at night.
Ultimately, it depends on how much ambient light you have at your location. In a typical residential neighbourhood with street lights, the camera work fine. However, in rural areas you may want to keep Smart Illumination enabled otherwise the image quality may be degraded due to lack of light in the scene.
We hope you found this article helpful. If you’d like to purchase Uniview cameras in Canada, be sure to check out XLR Security and become a dealer with us!