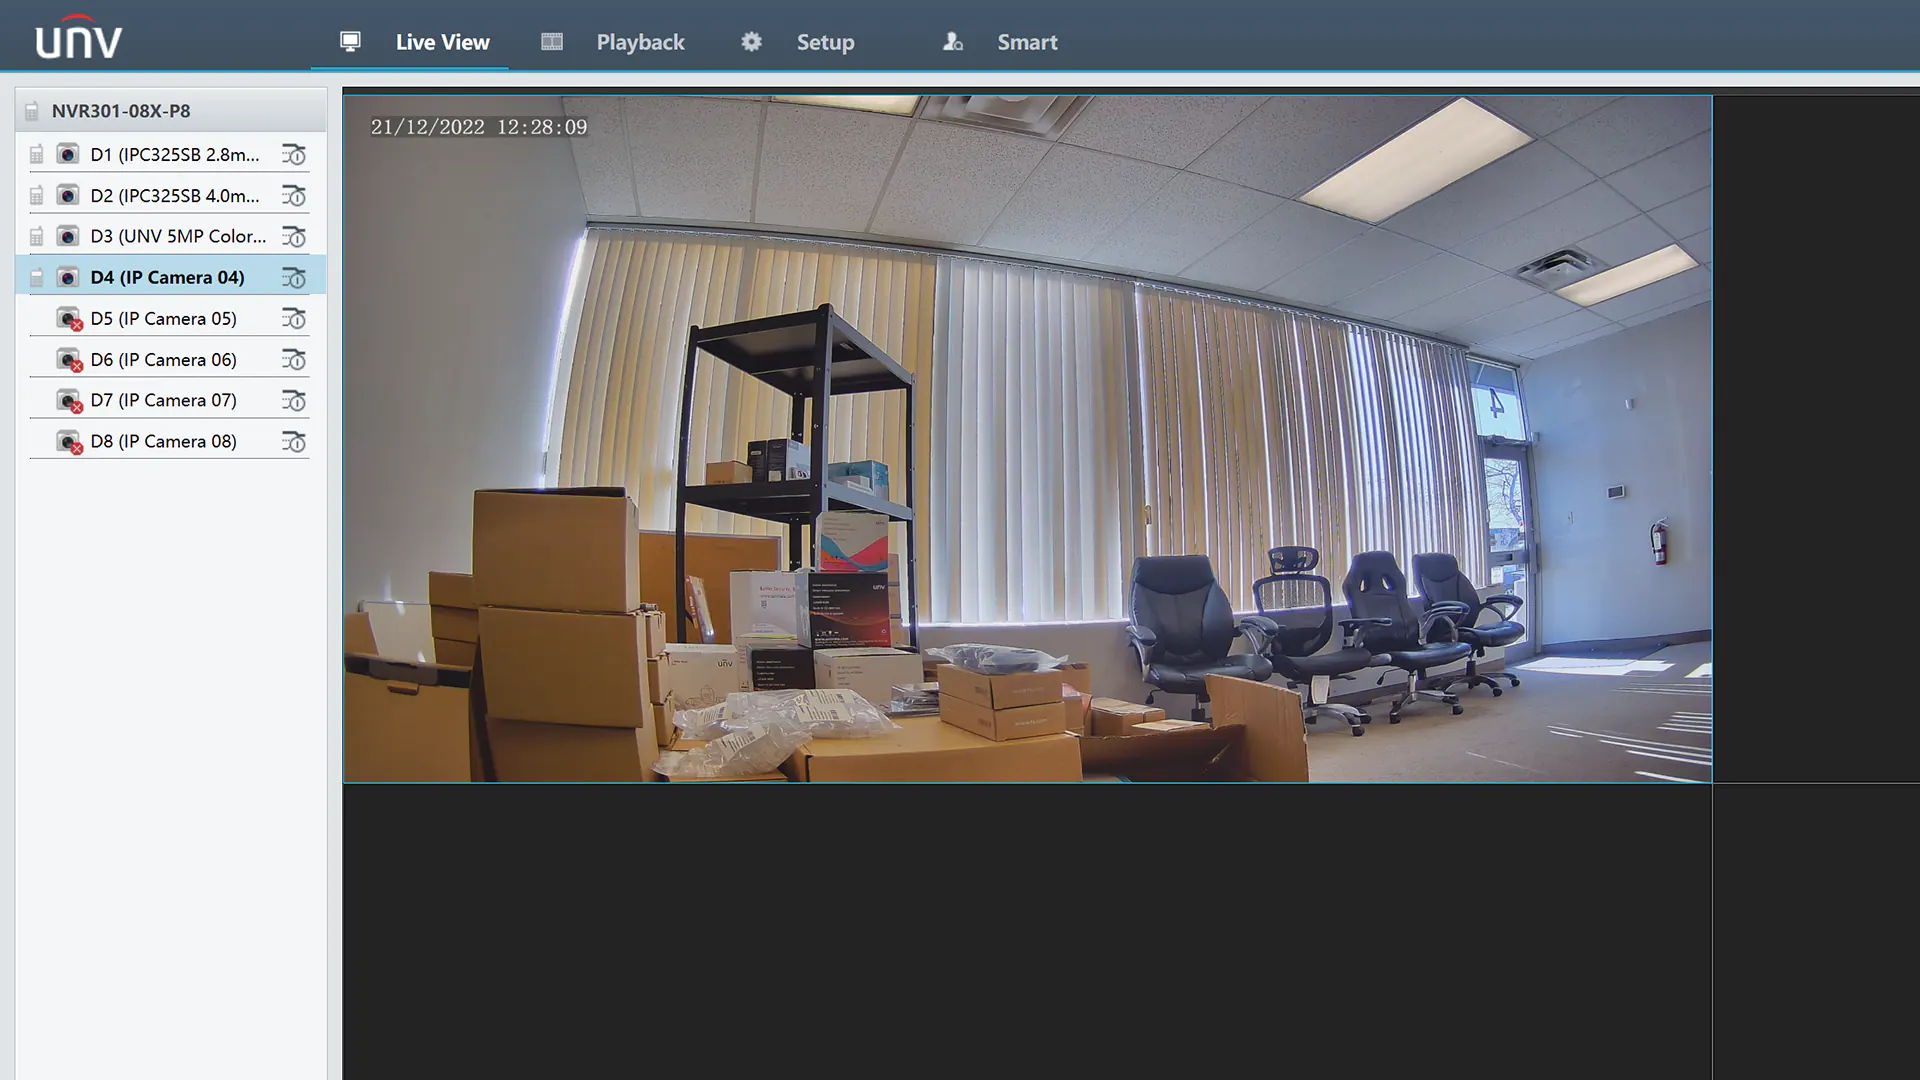
In this tutorial, we will access the Auto Search button from the web interface of the NVR; using a laptop or desktop computer.
What is Uniview Auto Search?
Uniview’s Auto Search function is a useful way to discover all ONVIF devices connected to a Uniview NVR, including third-party cameras. Using this feature allows you to quickly find all security cameras on the networking, including Uniview and third-party IP cameras.
Using Auto Search to add an IP Camera
To start, you’ll need to login to your Uniview NVR using a computer. Type in the IP address of your Uniview NVR in your web browser and login. You can also use EZTools 2.0 to find the IP address of your NVR.
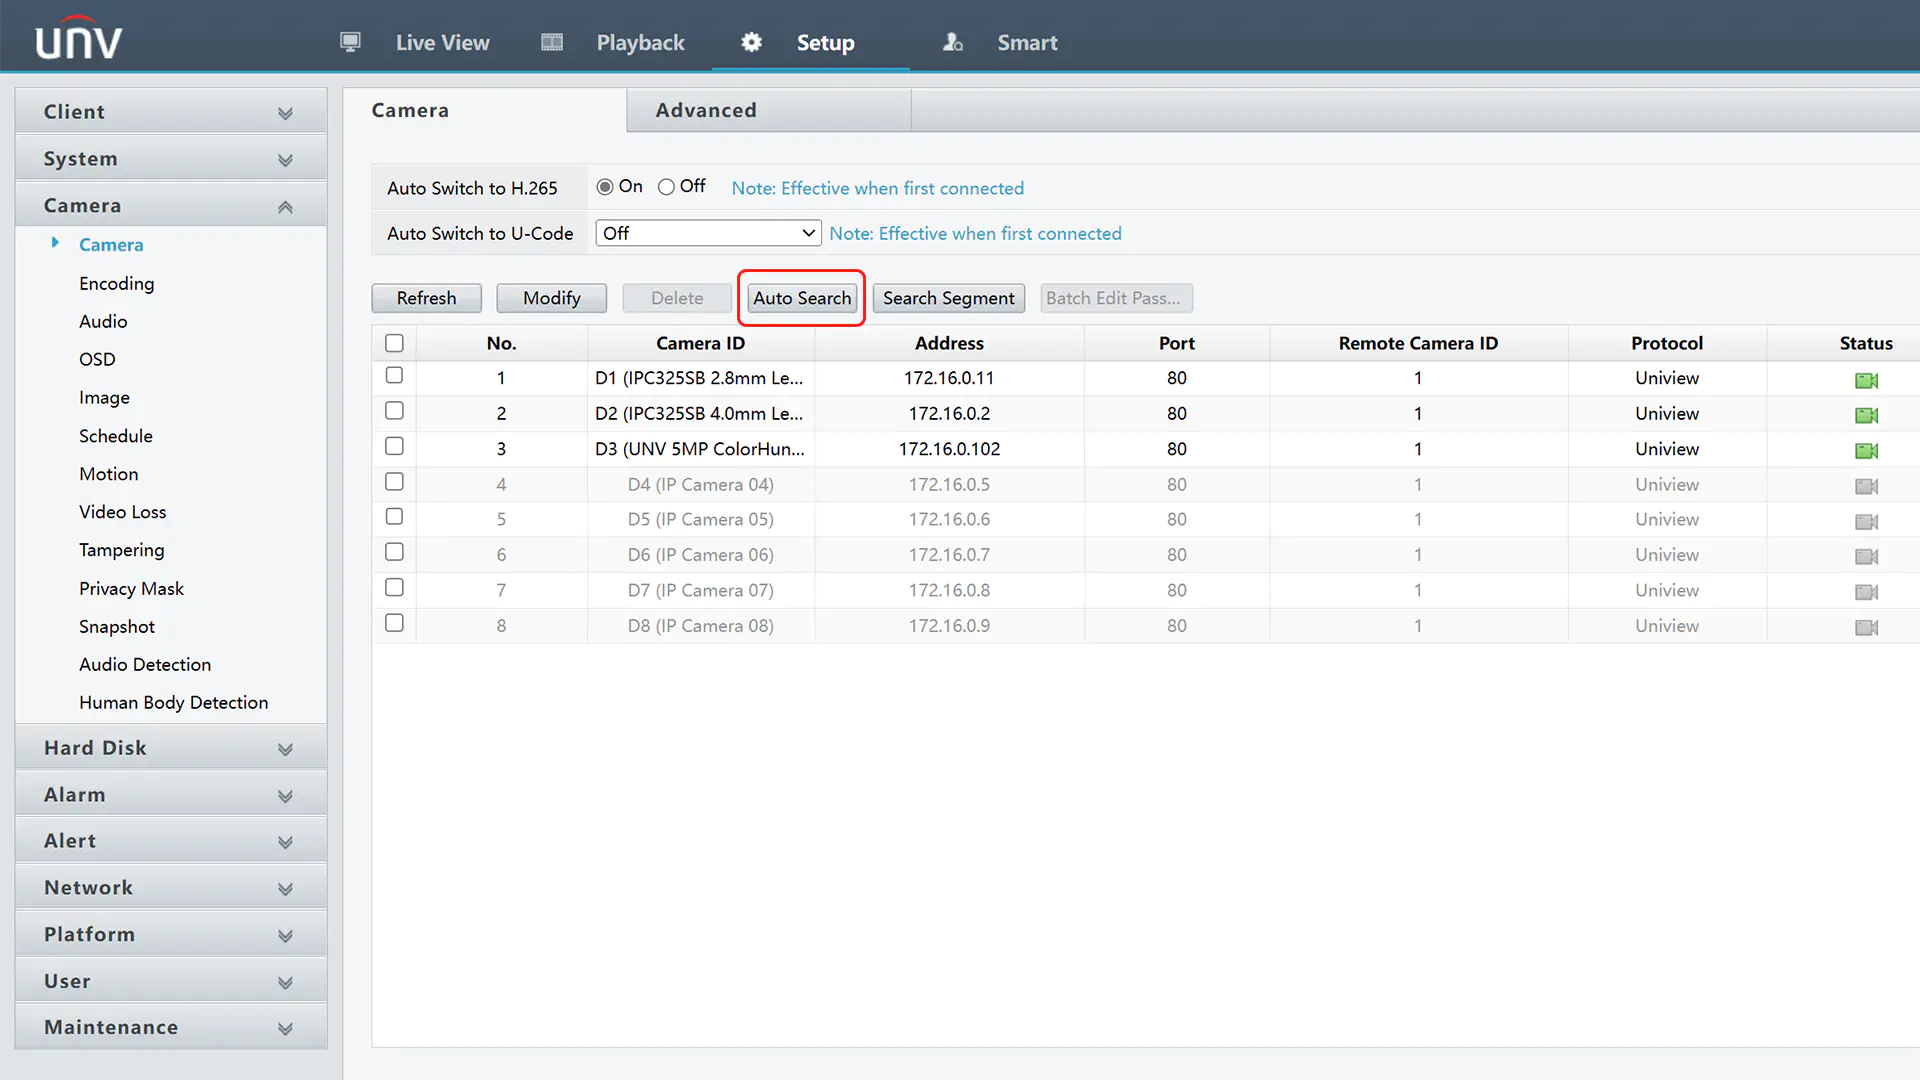
Next, navigate to Setup -> Camera -> Camera and click the ‘Auto Search’ button.
You will see a list of cameras available on your network; it will show devices plugged into the PoE ports on the back of the NVR, and cameras connected on your network via the LAN port of the NVR. If you don’t see any cameras, please check the physical connection to ensure the camera is receiving power and is communicating with the NVR.
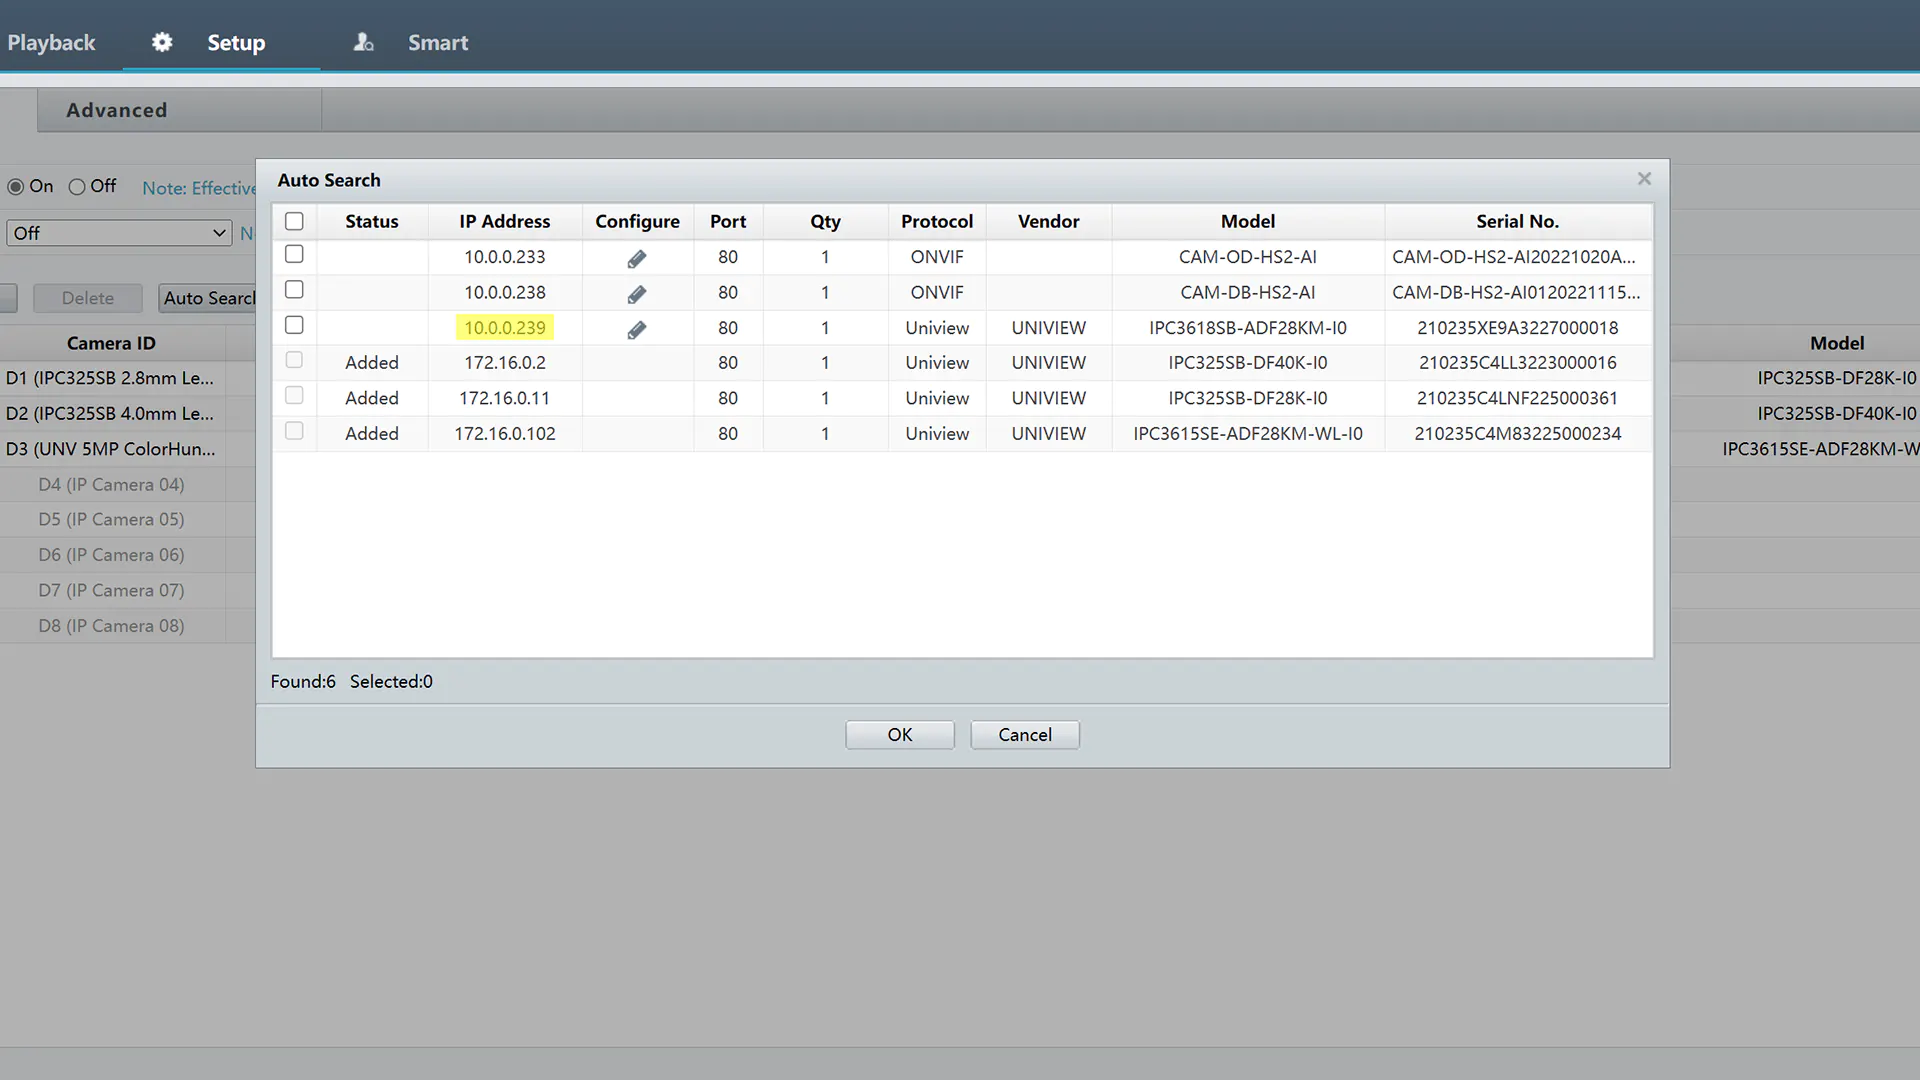
Make Note of the Camera’s IP Address
The Auto Search menu will show a list of the IP cameras on your network; it also shows important information such as the IP address, model number, and serial number of each device. Make a note of the un-added cameras IP address, you’ll need it in the next step.
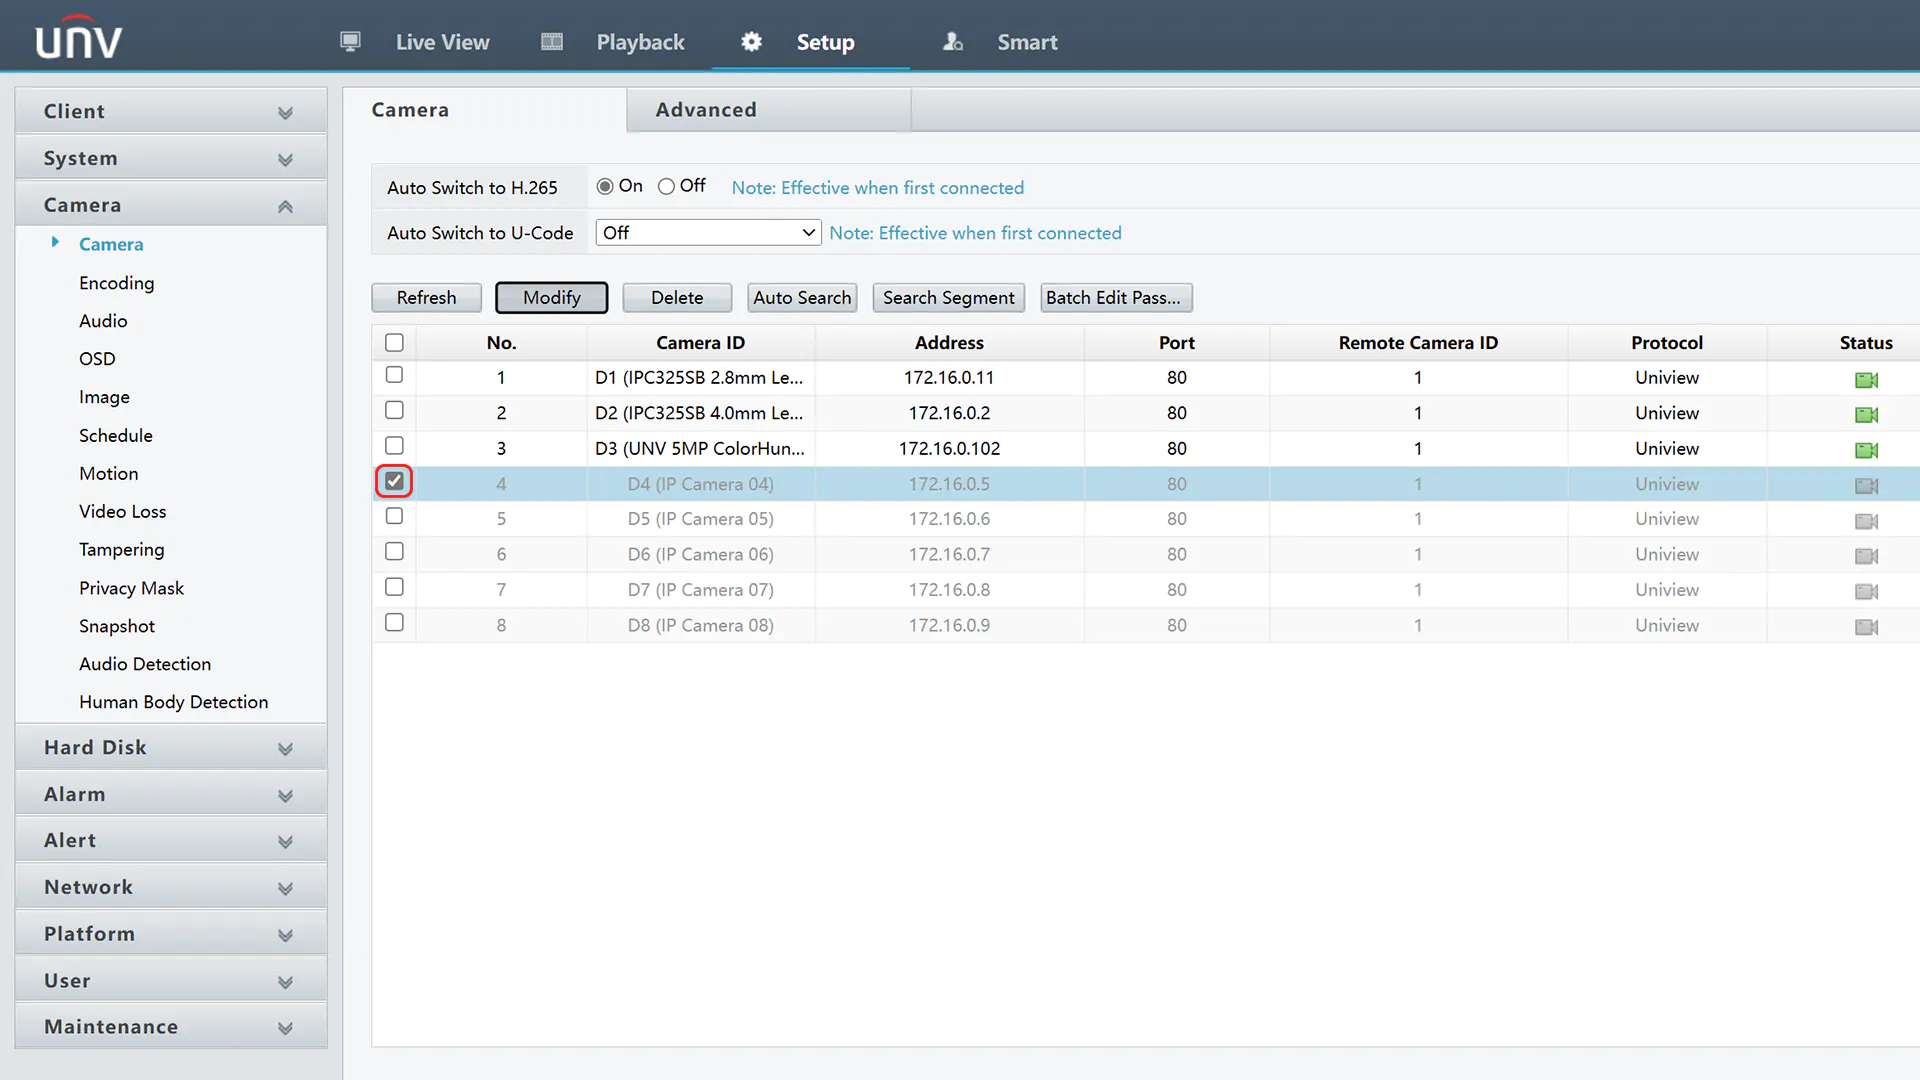
Add the IP Camera by Modifying an Empty Channel
Next, we’ll use the Modify function on an empty channel to add the IP camera. Click on an empty channel so the arrow is checked, and click Modify.
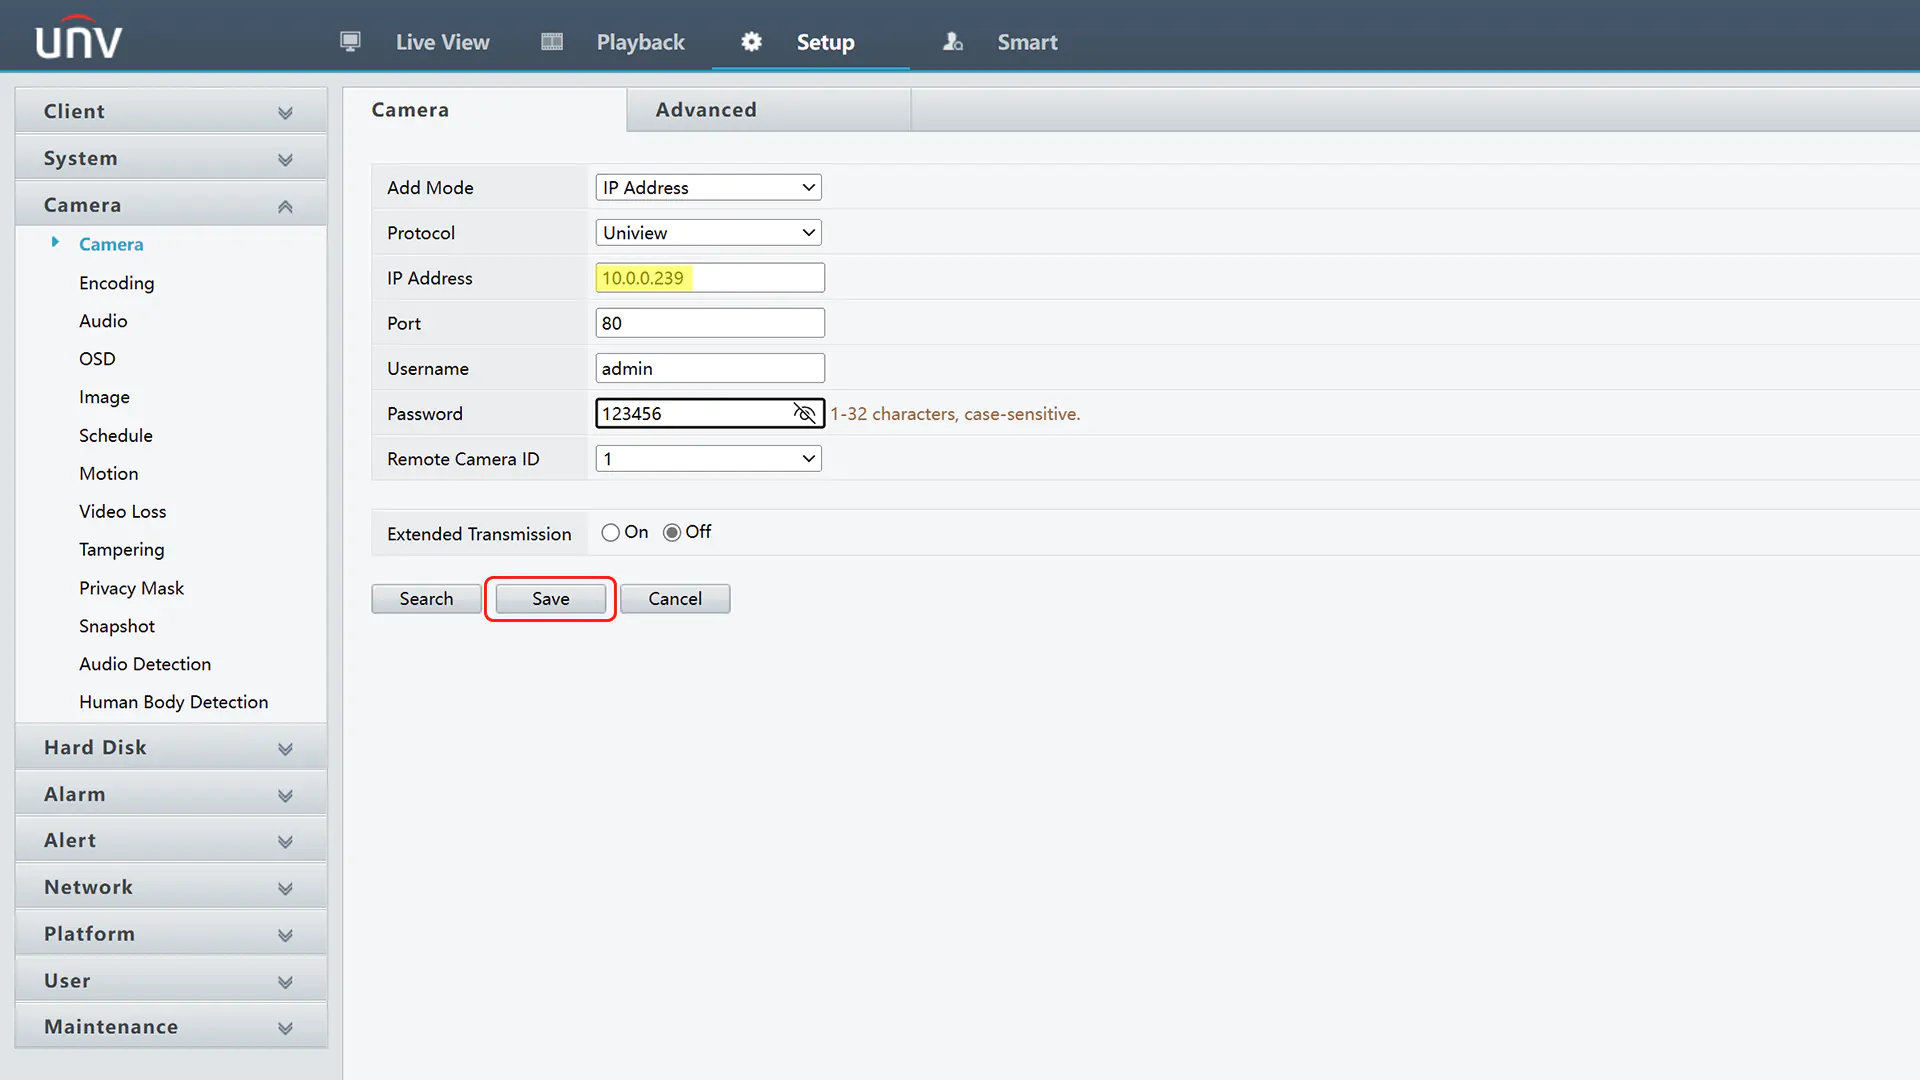
Change the Add Mode from ‘Plug-and-Play’ to ‘IP Address’, and type in the IP address of your camera, followed by the password. If you are using a third-party camera, change the Protocol to ‘ONVIF’, otherwise keep it set to ‘Uniview’. Click Save at the bottom to finish adding the camera.
Troubleshooting – Camera is Still Offline
If your camera is still offline, follow these steps to check what the issue could be:
- Confirm you entered the correct IP address for the camera. If you entered the wrong IP, it won’t work.
- Verify the camera and the NVR are in the same logical network; this means they should be in the same IP range. If connected to the PoE ports on the back of the NVR, the camera should be in the 172.16.0.xx IP range.
- Ensure you entered the correct username and password for the camera.
- Verify if ONVIF is enabled in the IP camera settings. Certain brands, such as Hikvision and Axis, require you to first enable ONVIF in the camera’s settings. Check the camera’s user manual for detailed instructions.
Final Thoughts
Adding cameras to a Uniview NVR is made easier by using the Auto Search function. This function allows you to view all IP cameras connected to the network and quickly add them via IP address. This also works for third-party cameras – as long as they support ONVIF.
Uniview’s Auto Search function can be accessed through the web interface, and a similar function can be accessed directly from the NVR while using a monitor. Learning to use the Auto Search feature will greatly reduce the time it takes to add cameras to a Uniview NVR.
