
If you need to reset any of your Lysora equipment to factory default settings, there are two main methods:
- Log in through web interface: You can log in to the device using the IP address (here’s an explanation of how to find the IP address), then navigate to System –> Reset –> Select ‘Primary Device’ –> Click the Reset button. However, this method requires you to know the password of the device.
- Hold the reset button for at least 5 seconds: After holding the factory reset button down for 5 seconds, the device will restore to factory settings (takes ~2-3 minutes).
Note: With Lysora wireless bridges, you need to hold the reset button for at least 10 seconds to perform a factory reset.
Scroll below for detailed photos of where to find the factory reset button on your Lysora router, managed switch, wireless access point, and wireless bridge.
Where to find the factory reset button on Lysora equipment?
Typically, it’s going to be on the front panel (as with routers and most switches) – however the exact location varies depending on the exact model you’re dealing with. That’s why we’ve compiled a guide below, with photos to help you locate the reset button on your specific model.
Where is the reset button on Lysora routers?
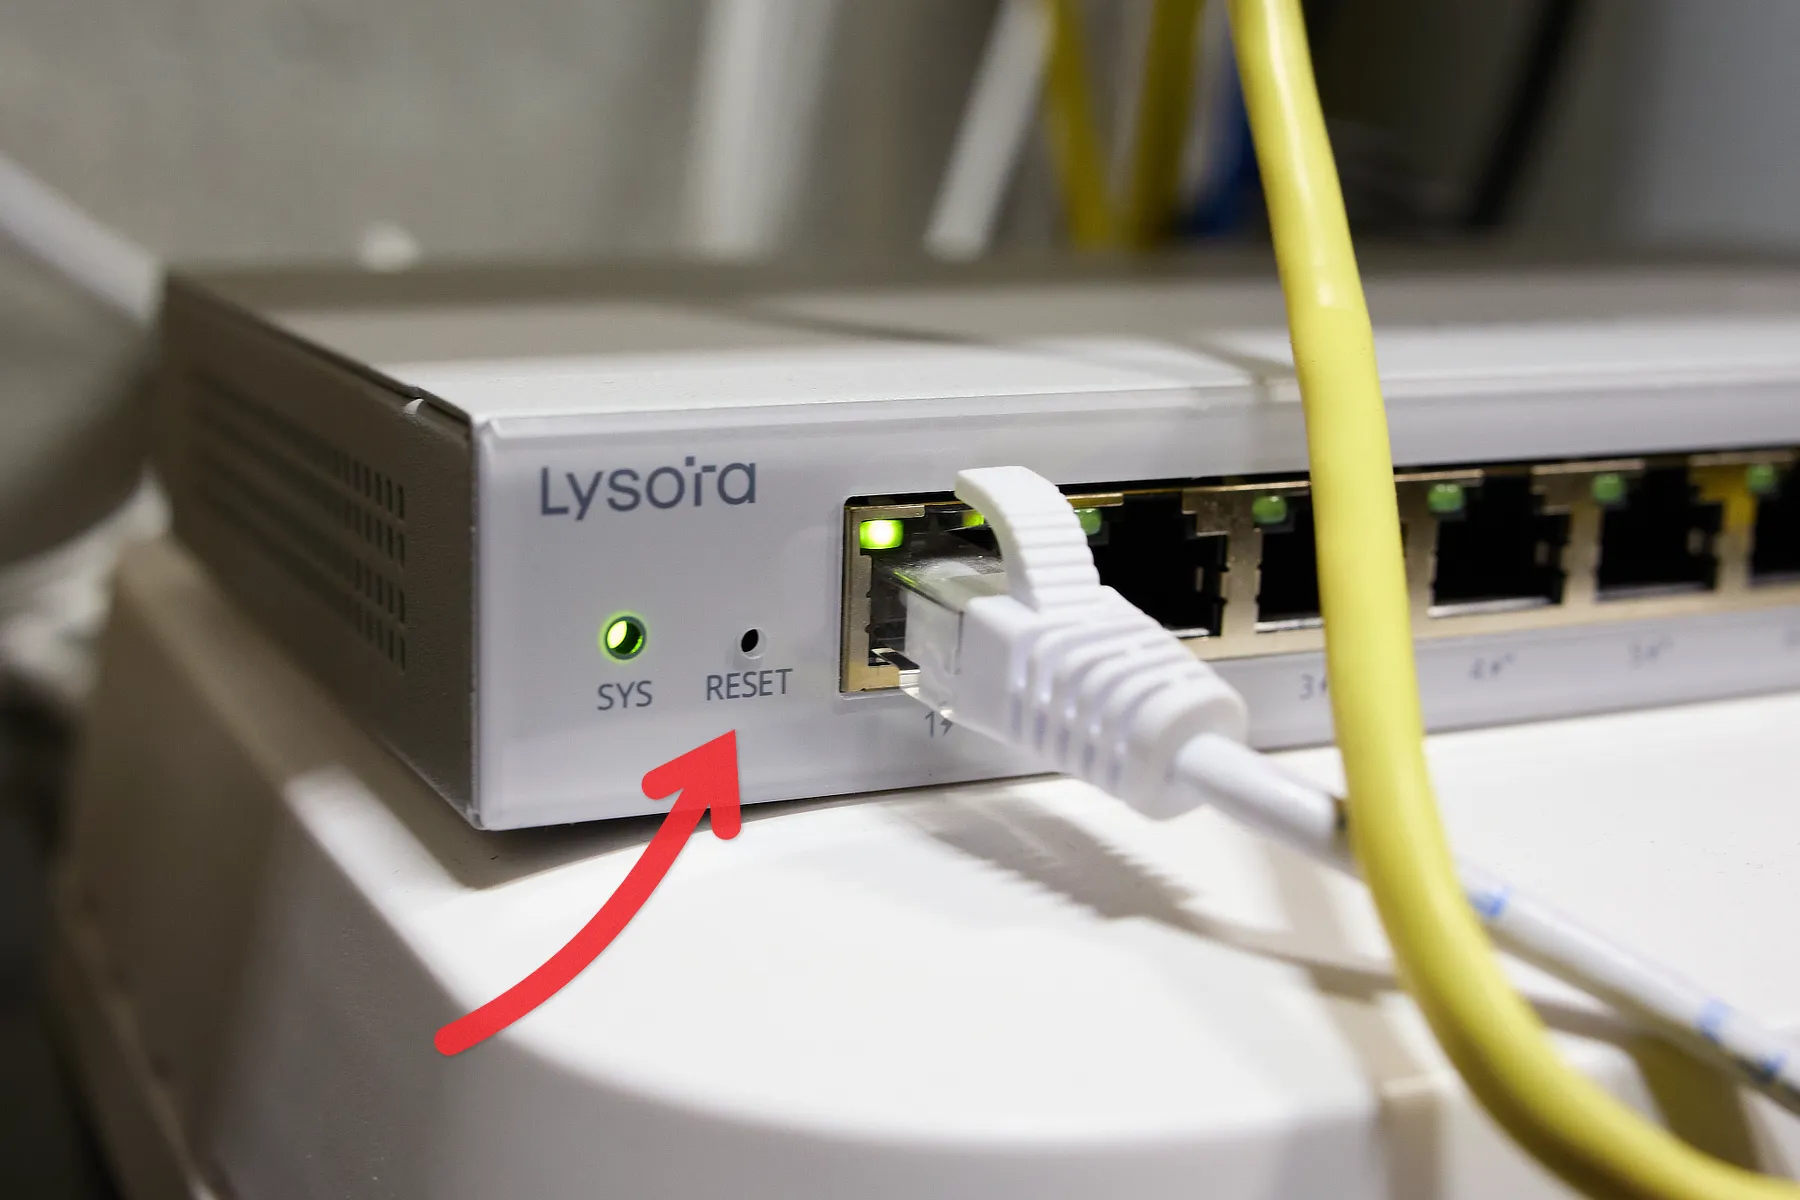
The reset button can be found on the front panel of Lysora routers, to the far left beside port #1. This applies to all Lysora routers, including LR100G, LR300G-P, and LR1500XS.
Pressing the reset button for less than 2 seconds will reboot the router, while holding it down for more than 5 seconds will perform a full factory reset. You can hold the button down until the system light starts flashing, which tells you that a factory reset has been initiated.
Note: Holding the reset button for between 2 to 5 seconds has no effect.
Where is the reset button on Lysora switches?
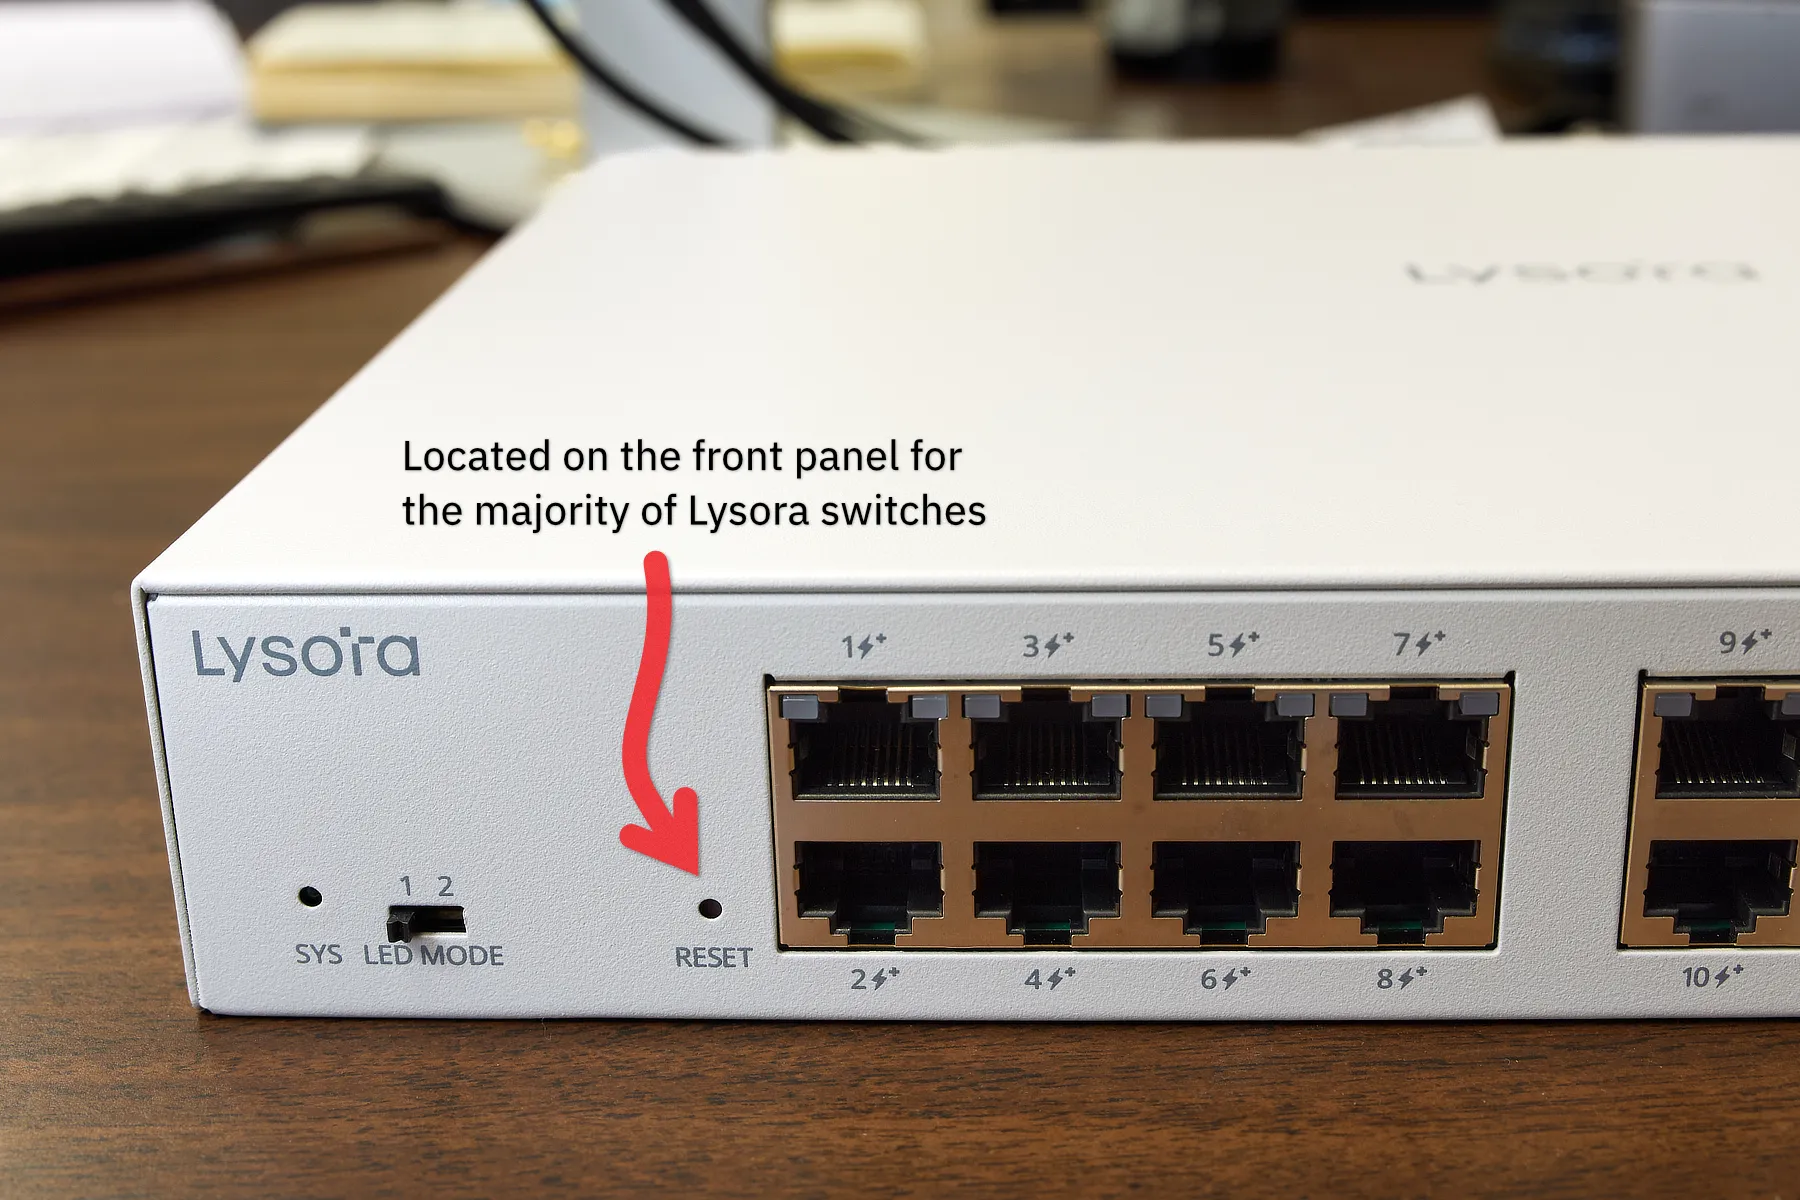
Typically, the reset button for Lysora switches can be found in the same location as with the router – which is on the front panel at the far left.
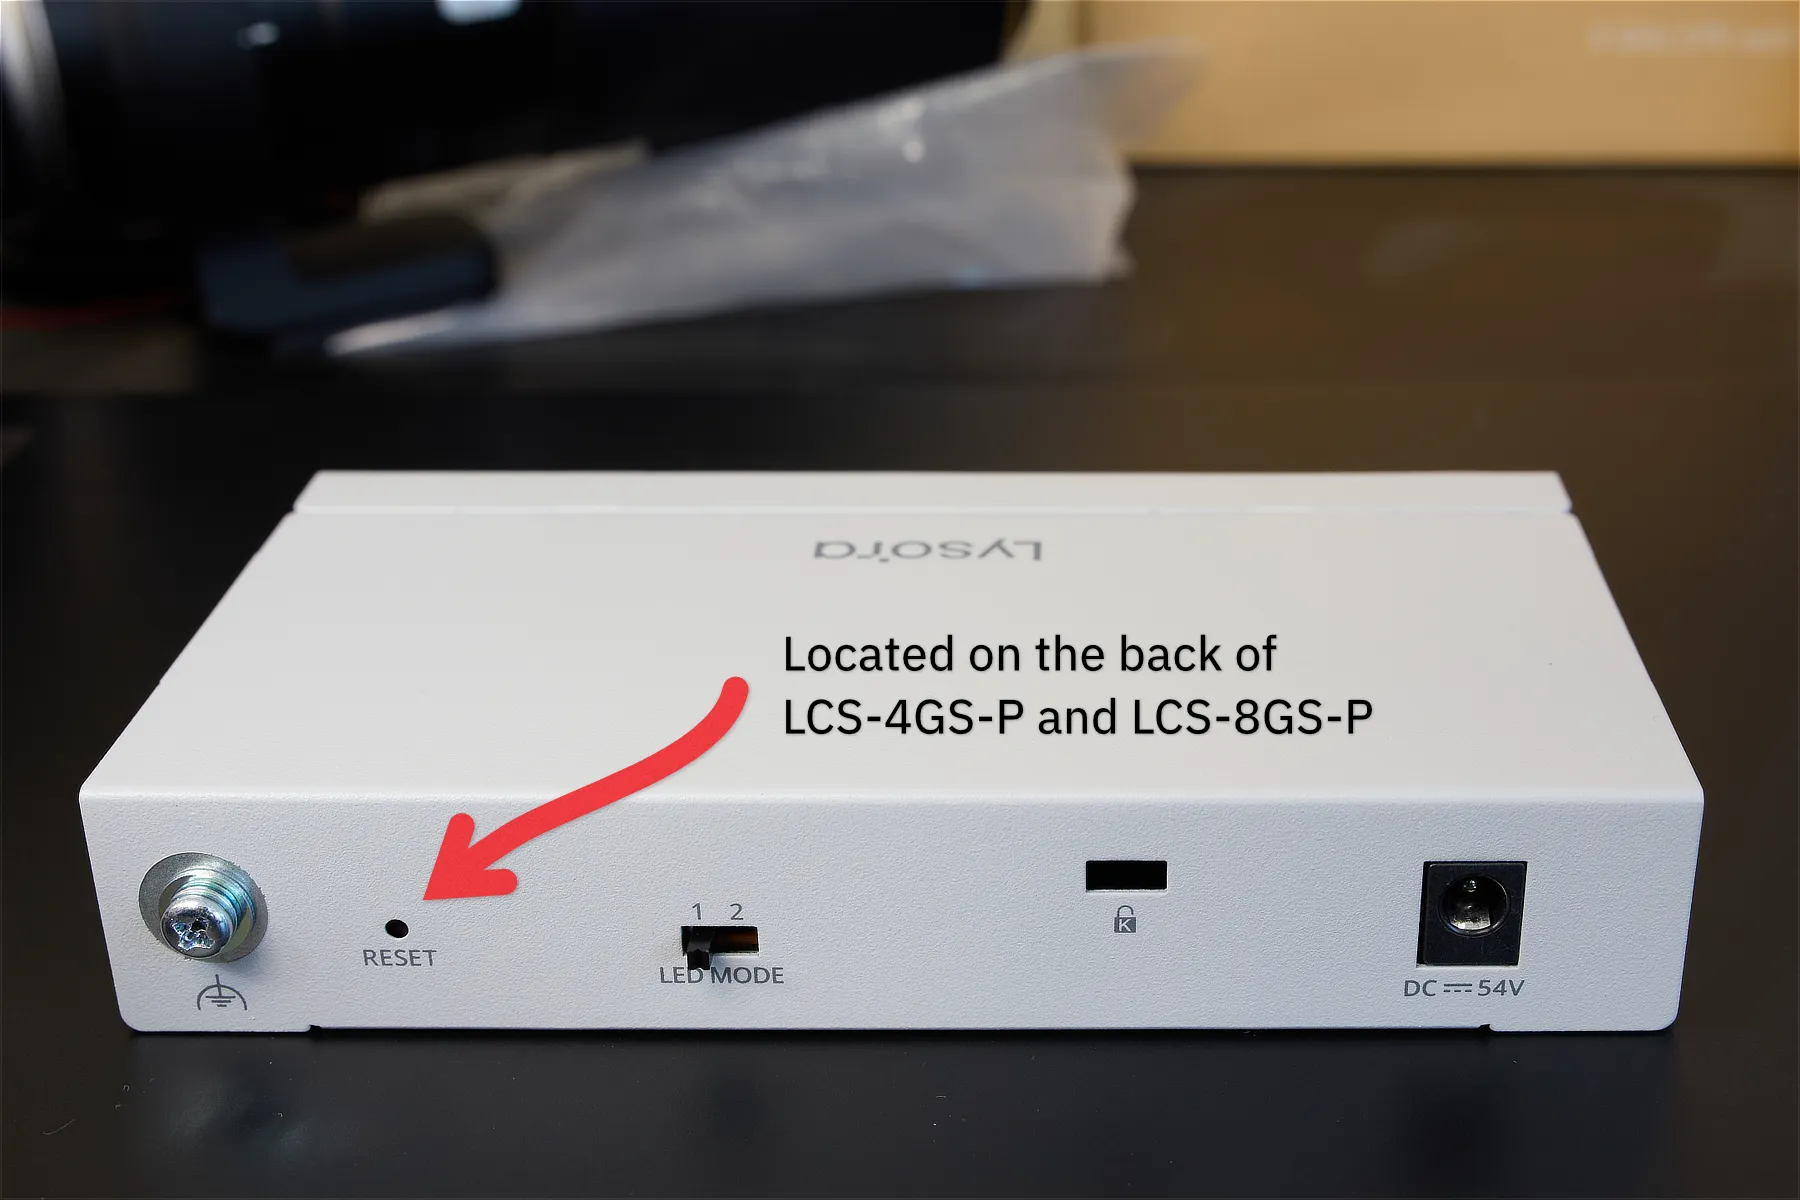
However, there are two notable exceptions: LCS-4GS-P and LCS-8GS-P. These two models have a reset button located at the back panel, on the left side, beside the grounding terminal screw.
Hold the reset button down for at least 5 seconds (until the system light starts blinking) to perform a factory reset. Pressing the button for 2 seconds will simply reboot the unit – which can be helpful if the unit is frozen or otherwise unresponsive.
Where is the reset button on Lysora wireless access points?
The factory reset button for ceiling-mounted Lysora wireless access points is located at the bottom of the device, beside the Ethernet port and 12V DC input.
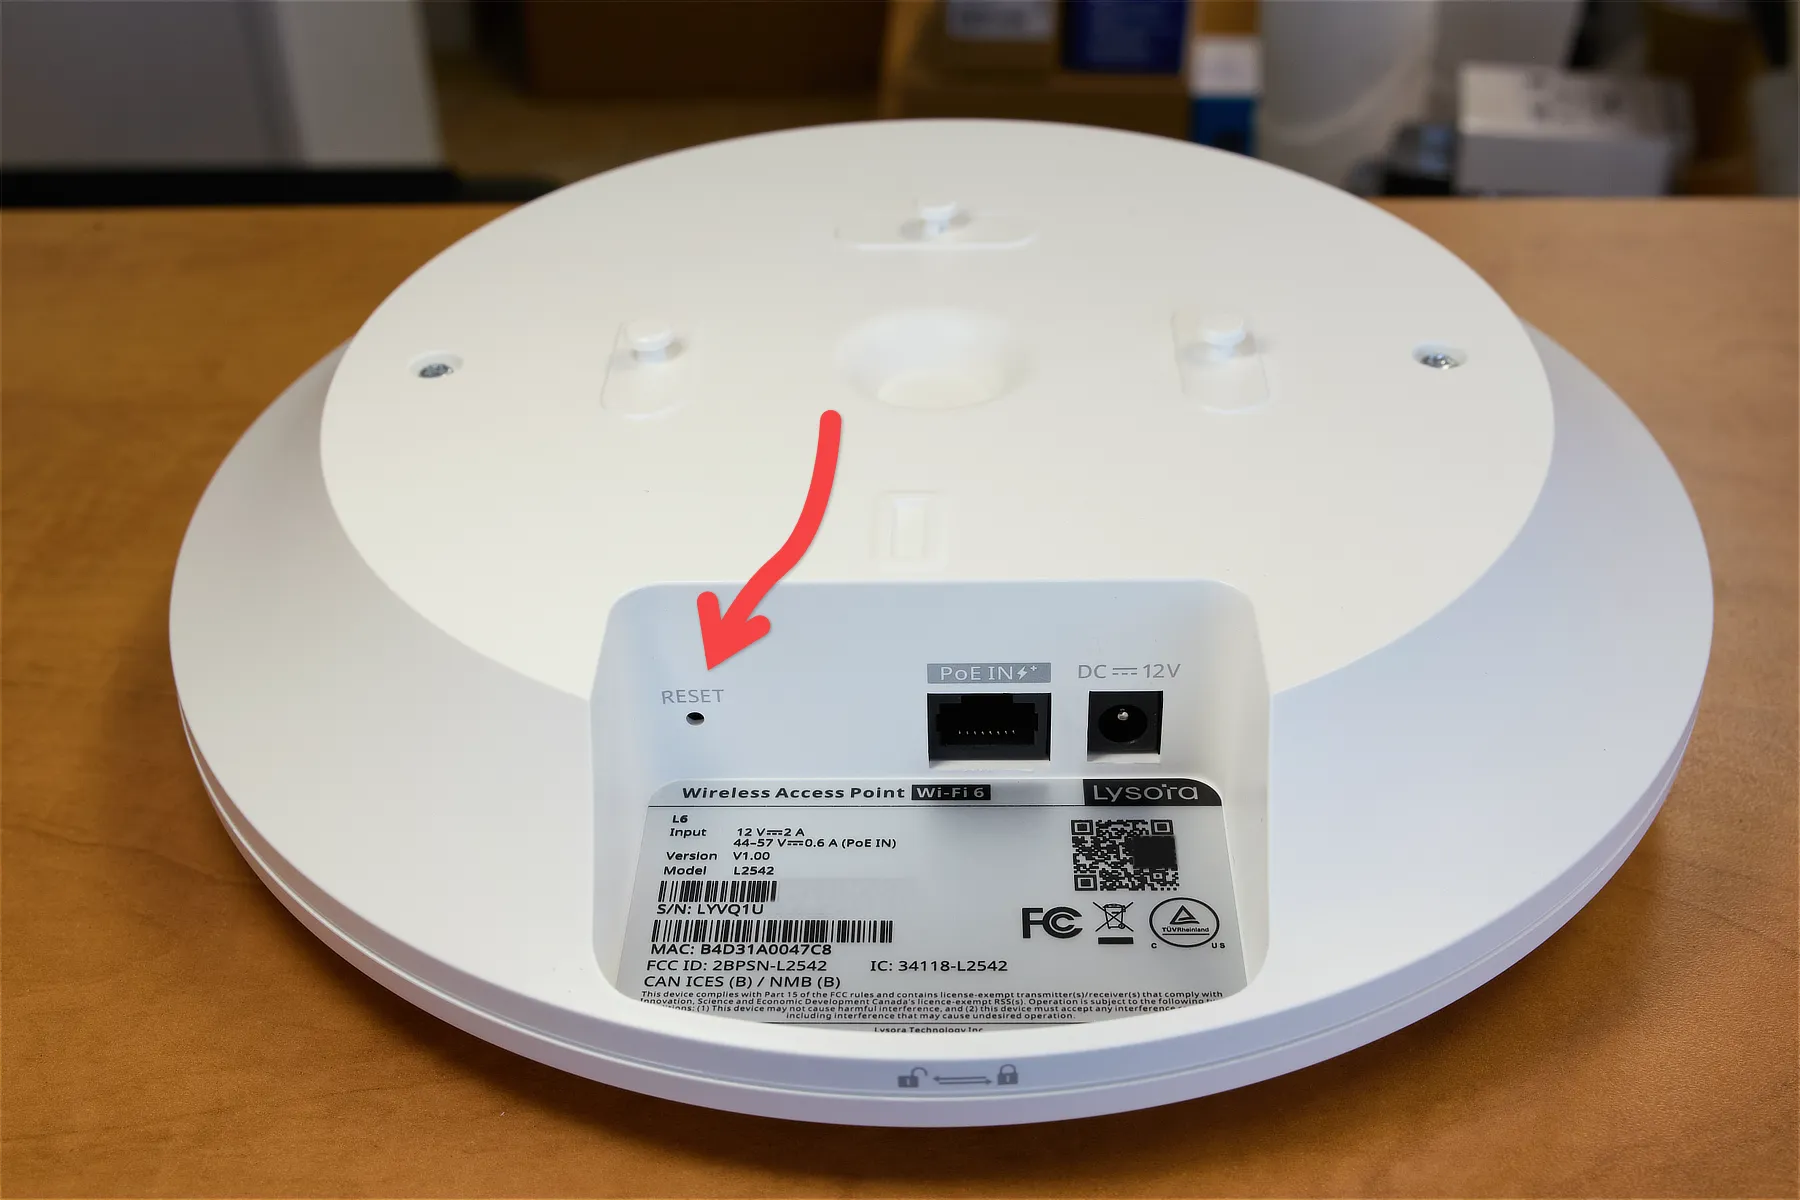
To reach the reset button, you’ll have to remove the AP from the ceiling using the included key lock, which looks like an L-shaped piece of metal. To remove the AP, you need to insert that metal key into the slot until it clicks, then slide the AP towards you. This will detach it from the ceiling bracket, allowing you to access the reset button.
Where is the reset button on Lysora wireless bridges?
With Lysora wireless bridges, the reset button can be found underneath the cover – to the right of the Ethernet ports. This small brown button also functions as the one-touch pairing button. If you hold it for less than 2 seconds, it will pair nearby bridges to the same network. Hold it for more than 10 seconds to restore the bridge to default settings.
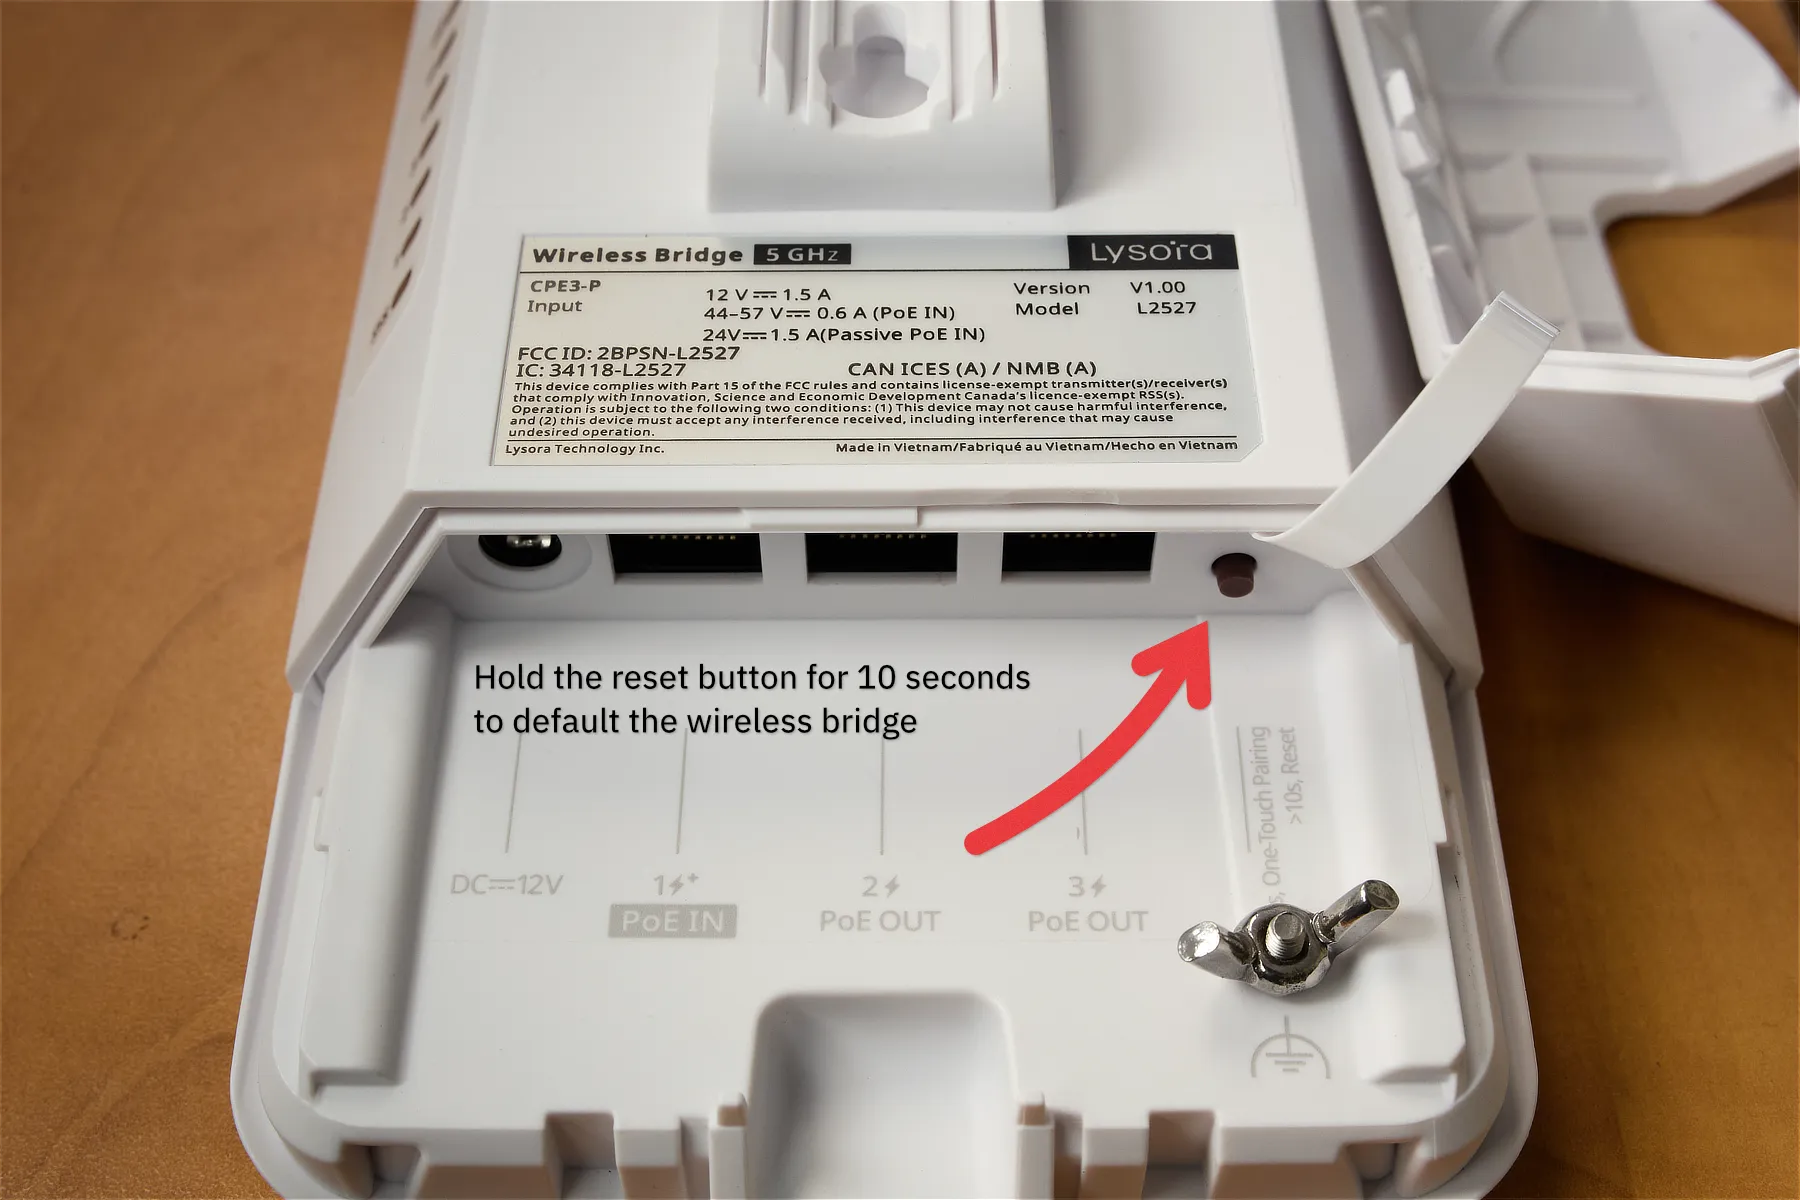
After holding the button for more than 10 seconds, you’ll see the system light start flashing – which indicates that the reset process is starting. Wait for the system to fully reboot and for the system light to turn solid before unplugging the device.
Final Thoughts
Overall, it’s easy to factory reset Lysora devices once you know where the reset button is. Hold it for at least 5 seconds (or 10 seconds for wireless bridges), then wait for a few minutes until the system light stops blinking.
Once the device is reset, you can enter the default IP address into your web browser and enter the default password admin to log into the device’s web interface.
