
One of the benefits of a managed switch is the ability to label the ports in the user interface for organization and management purposes. Once the ports are labeled, you’ll be able to do remote troubleshooting without having to guess which device is connected to each port.
Step 1 – Login to Lysora Cloud & Add Device
In order to label the ports, you must add the switch to your Lysora Cloud account – as the labels are stored on the cloud. If you’re new to Lysora, you can read this tutorial for How to add Lysora Equipment to the Cloud.
Once you’ve got your managed switch added to the cloud, you can proceed to the next step.
Step 2 – Set the Alias of a Specific Port
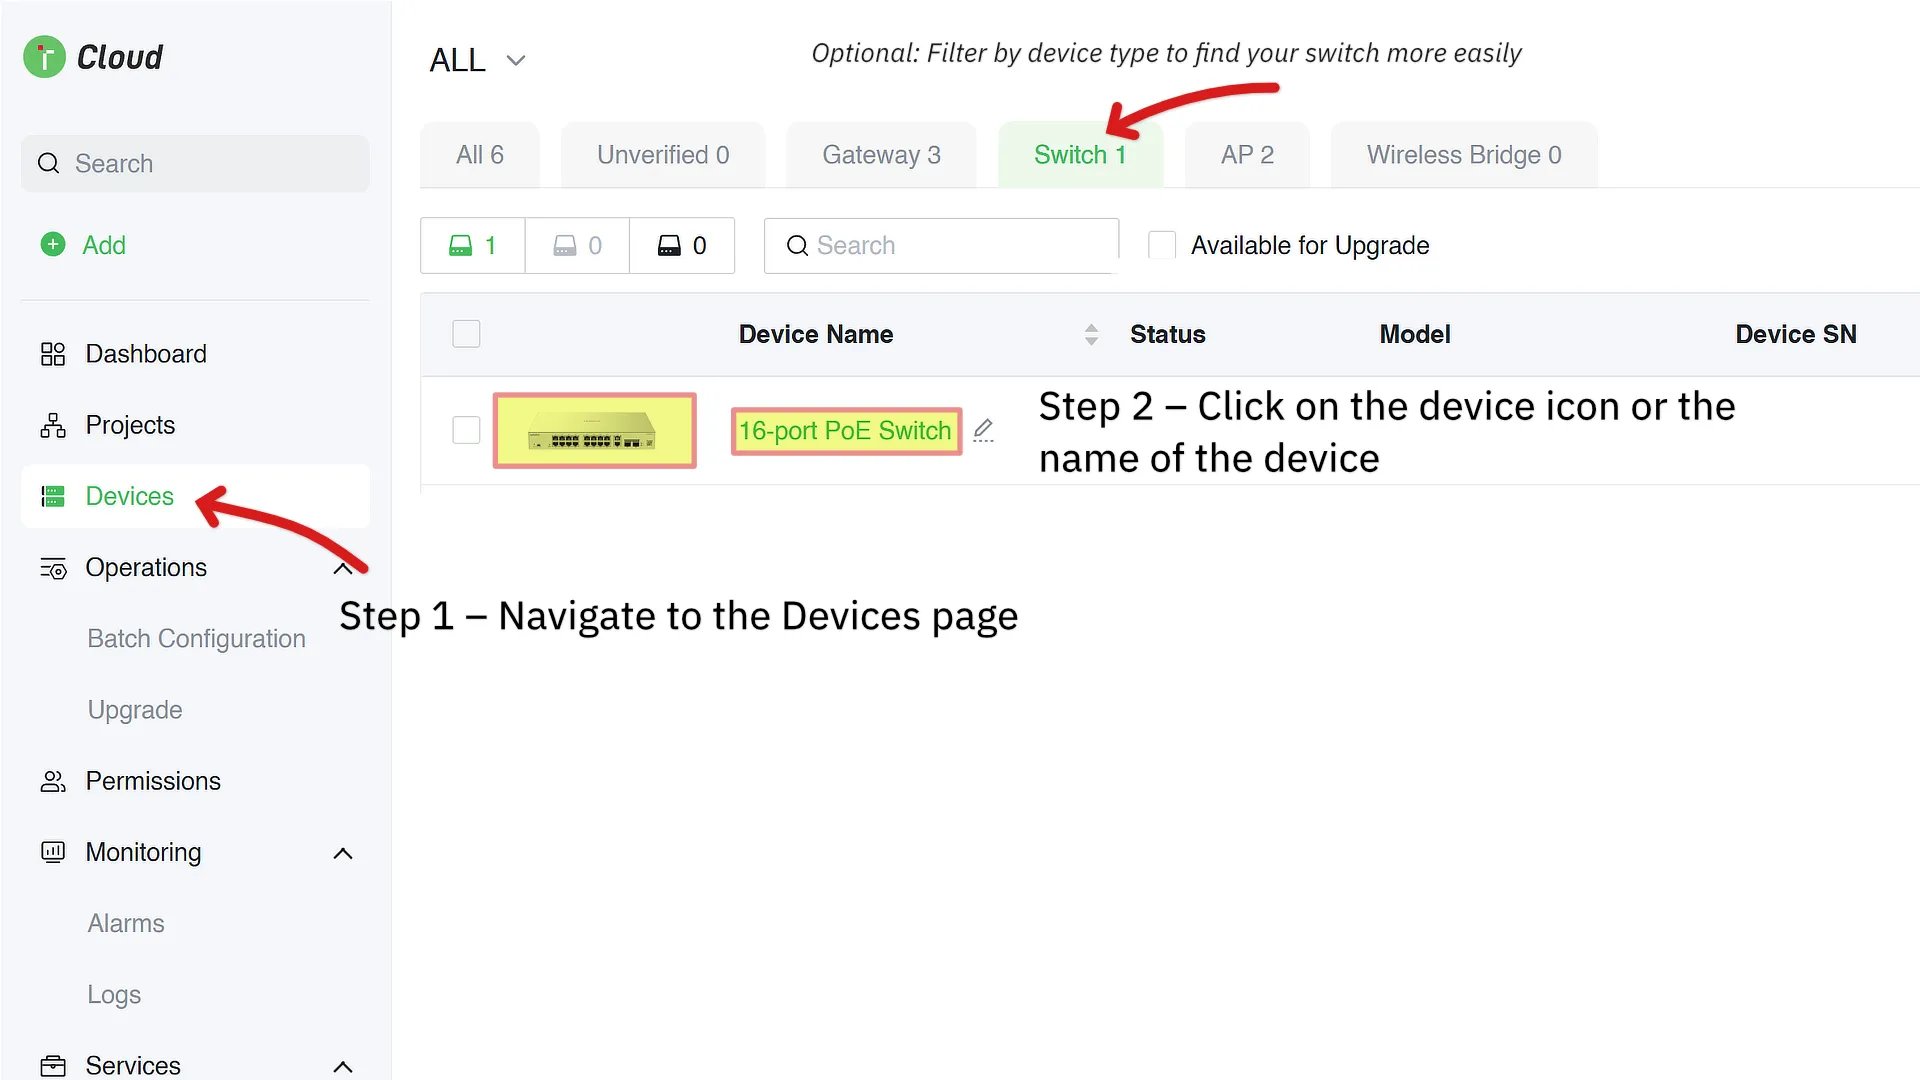
Now, select your switch from the Devices tab in the Lysora Cloud interface. If you have many devices added to your account, you can filter to only switches by clicking on the Switch tab at the top. Then, click on either the icon of the device or the device’s name to navigate to the settings for the switch.
Once you’re in the device’s settings, click on the Configuration tab near the top of the page, then navigate to General –> Interface. Then, select one of the ports from the diagram and enter a name for it under the Alias field.
For example, I’ve labeled my ports based on what they’re connected to – such naming port #8 Office AP.
Some of our the cables in our switch go to network jacks around the office. For these ports, I’ve given them labels such as Office Near Warehouse — Upper, and Mid-Office — Lower to describe the upper and lower network ports coming from the wall plate.
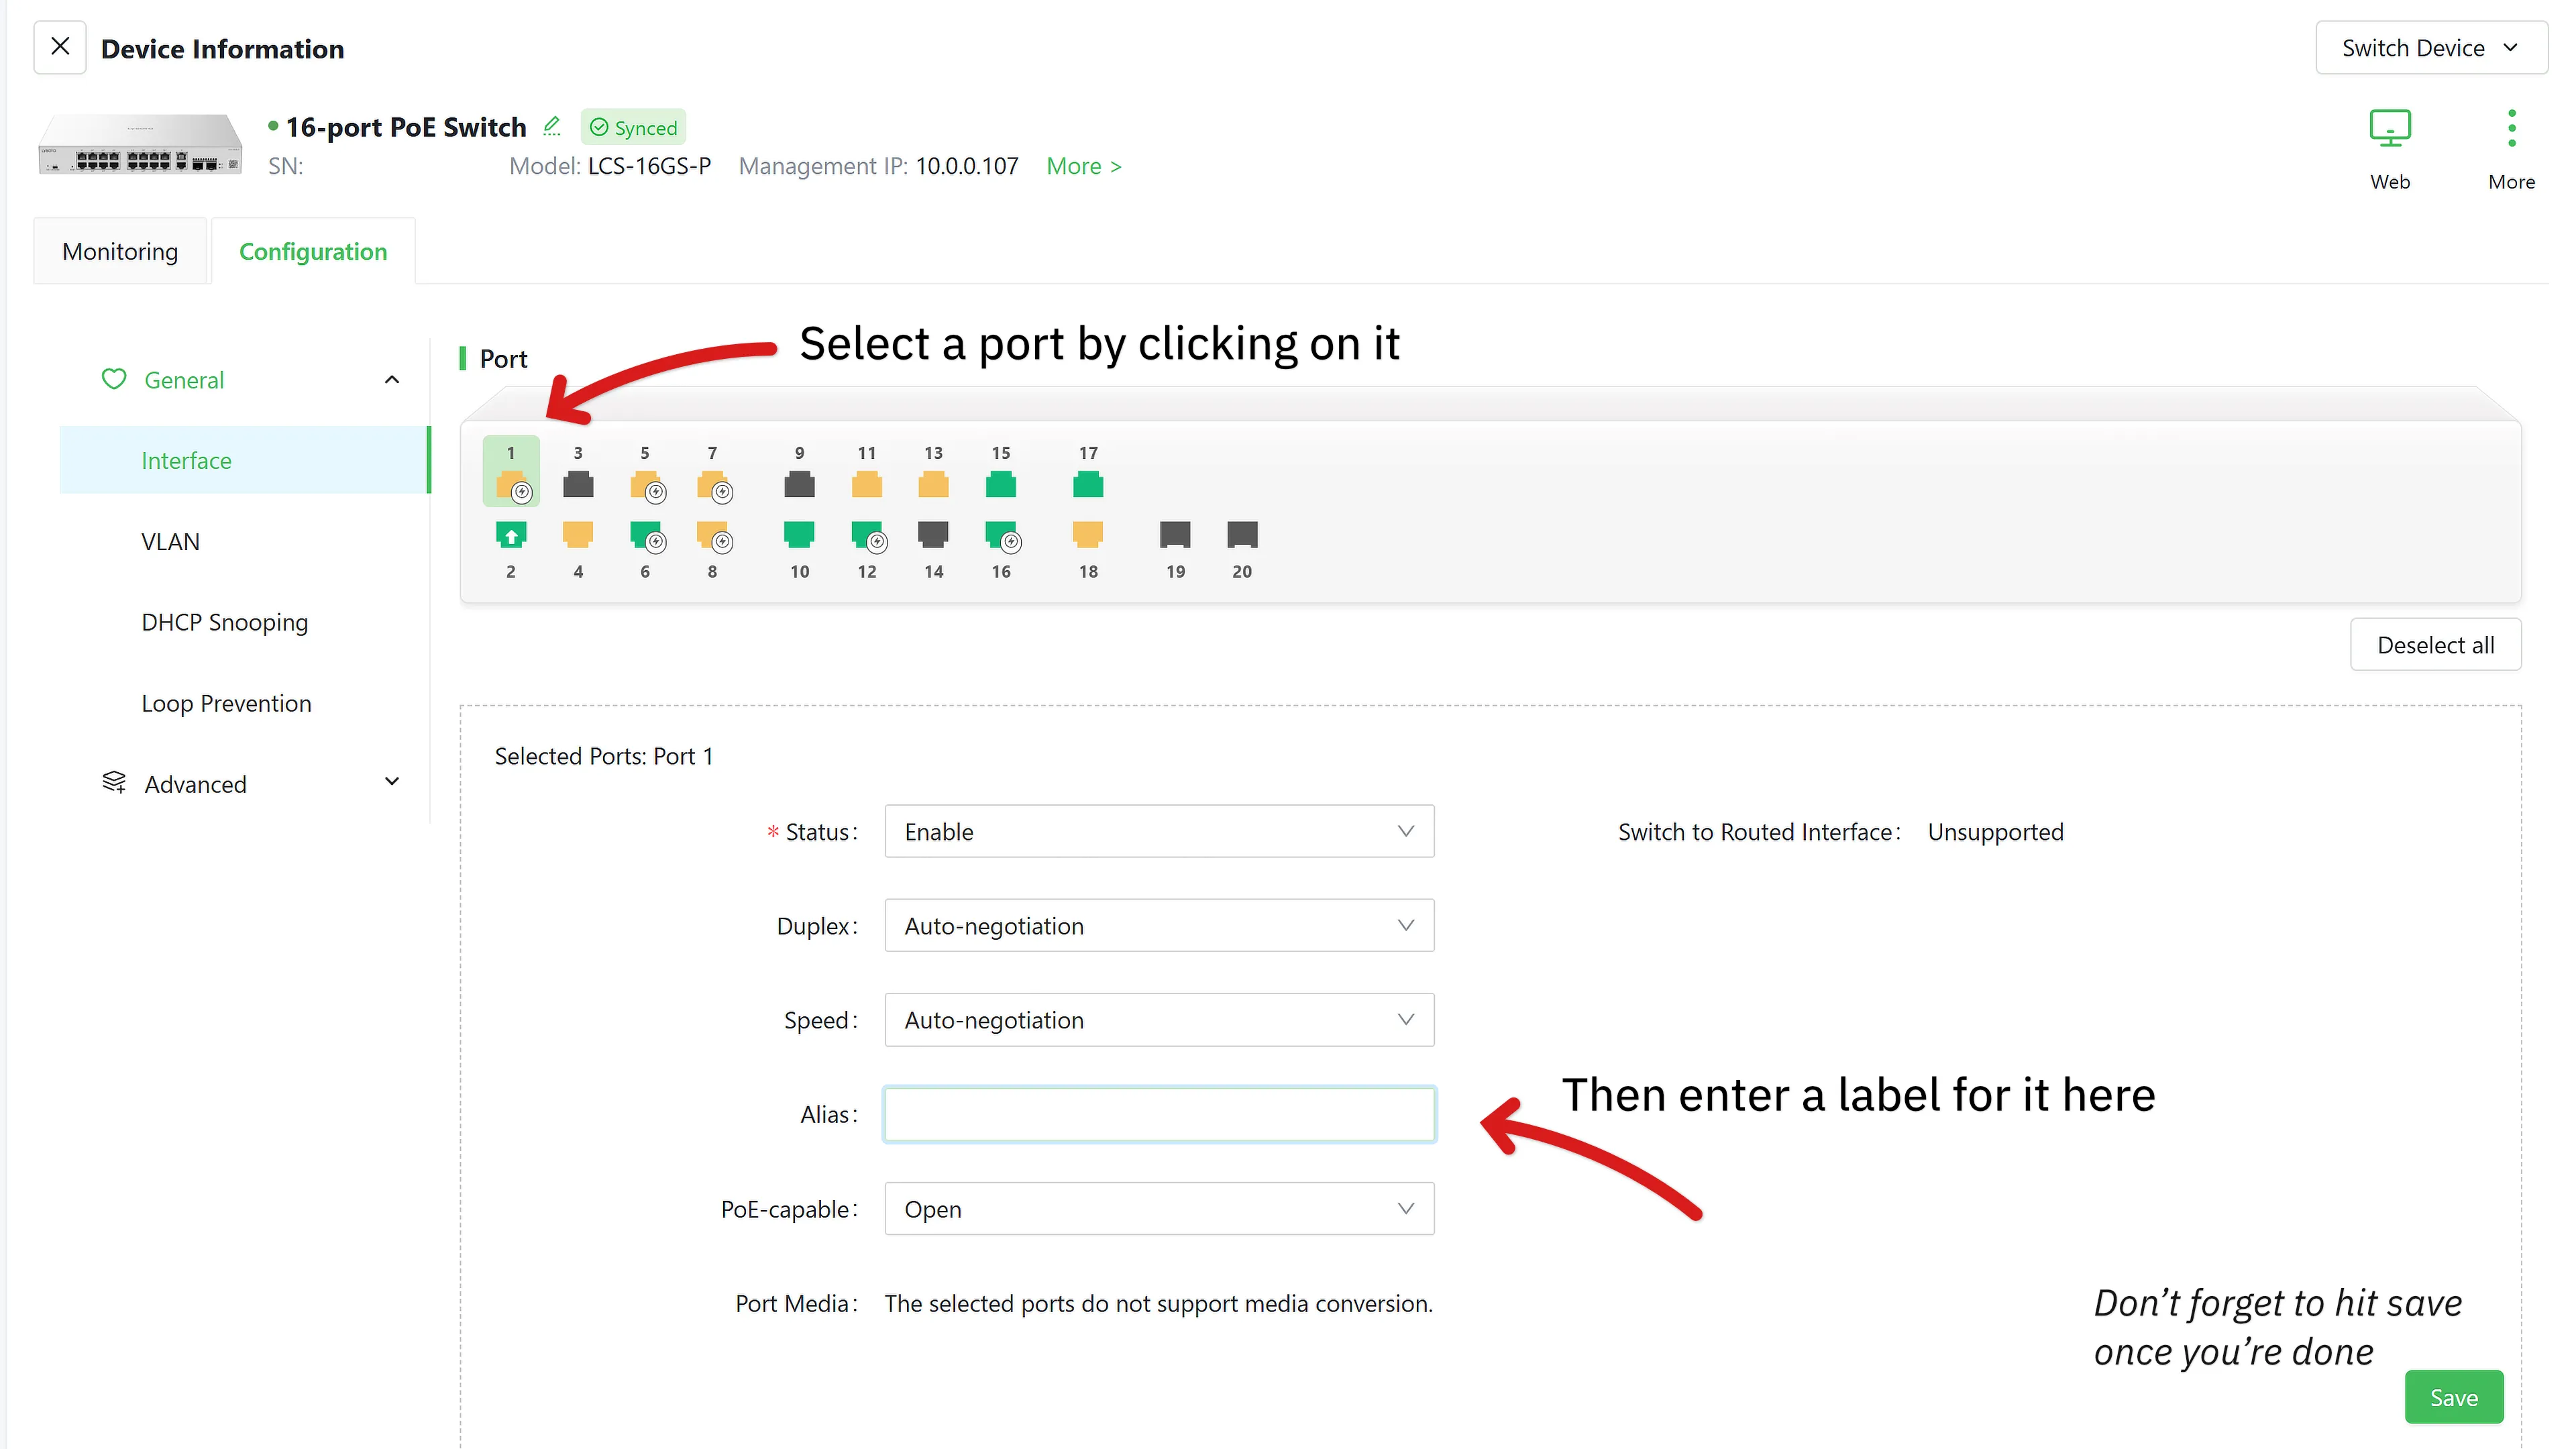
Once you’ve chosen a name for that specific port, click save at the bottom right to apply the changes. Then, click on the port to un-select it and select another port to continue labeling.
Once you’re done, you should have all the ports labeled in a way that makes the most sense to you. If you’re not using some ports, you can always label them something like Unused — Future Expansion so that it’s clear why a certain port has been left disconnected from the rest of the network.
Viewing Port Labels
Once you’ve labeled the ports on your Lysora switch, you can view them in two places:
- The Lysora Cloud portal on your desktop or laptop computer
- The Lysora app on your smartphone
How to View Port Labels from Lysora Cloud
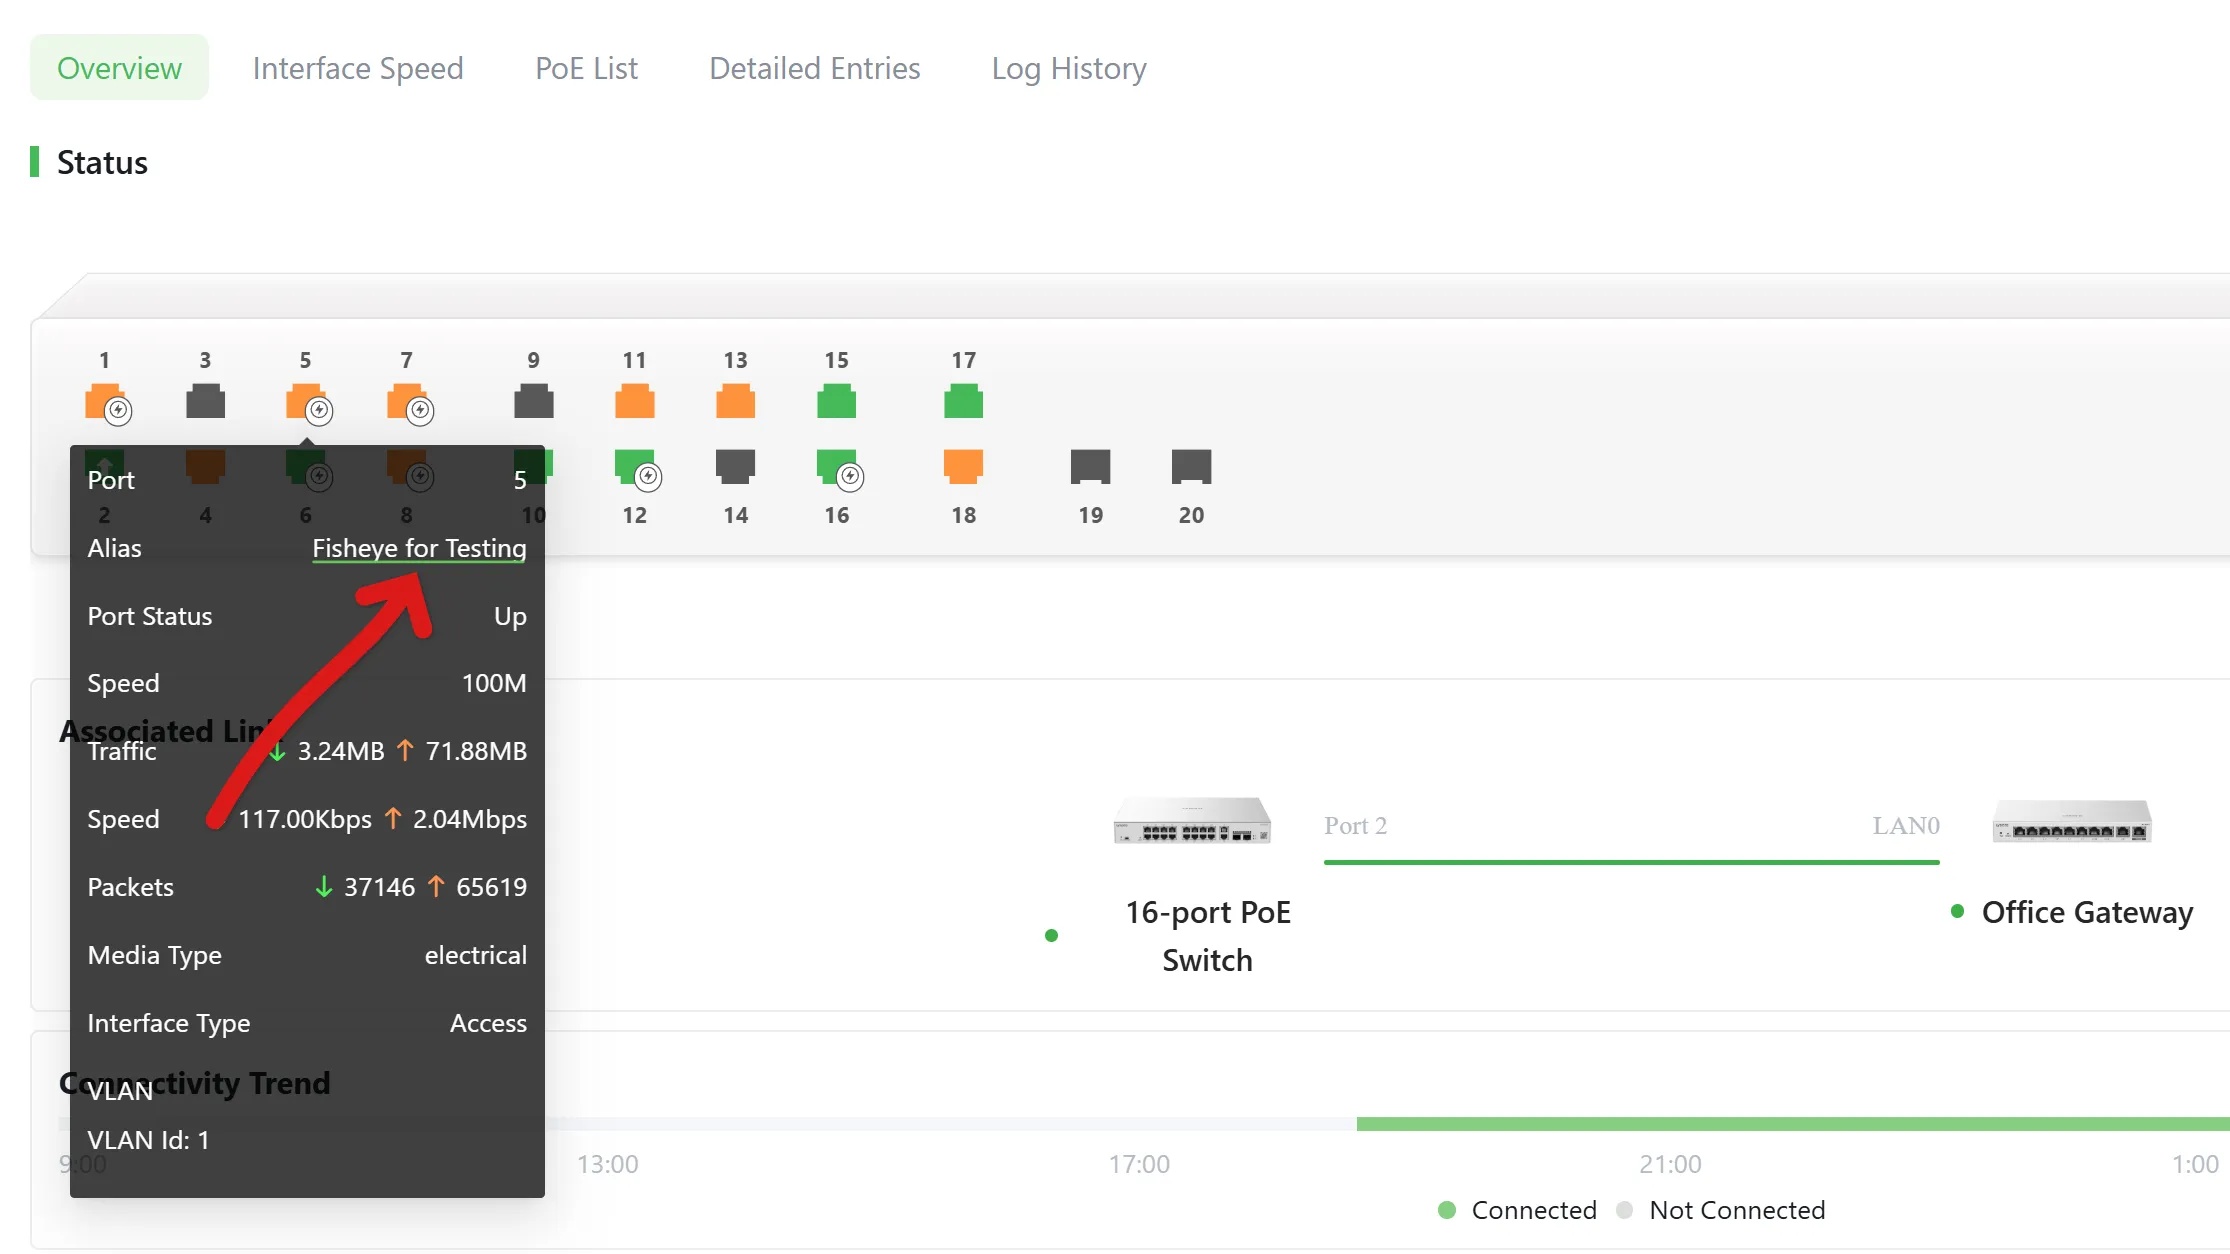
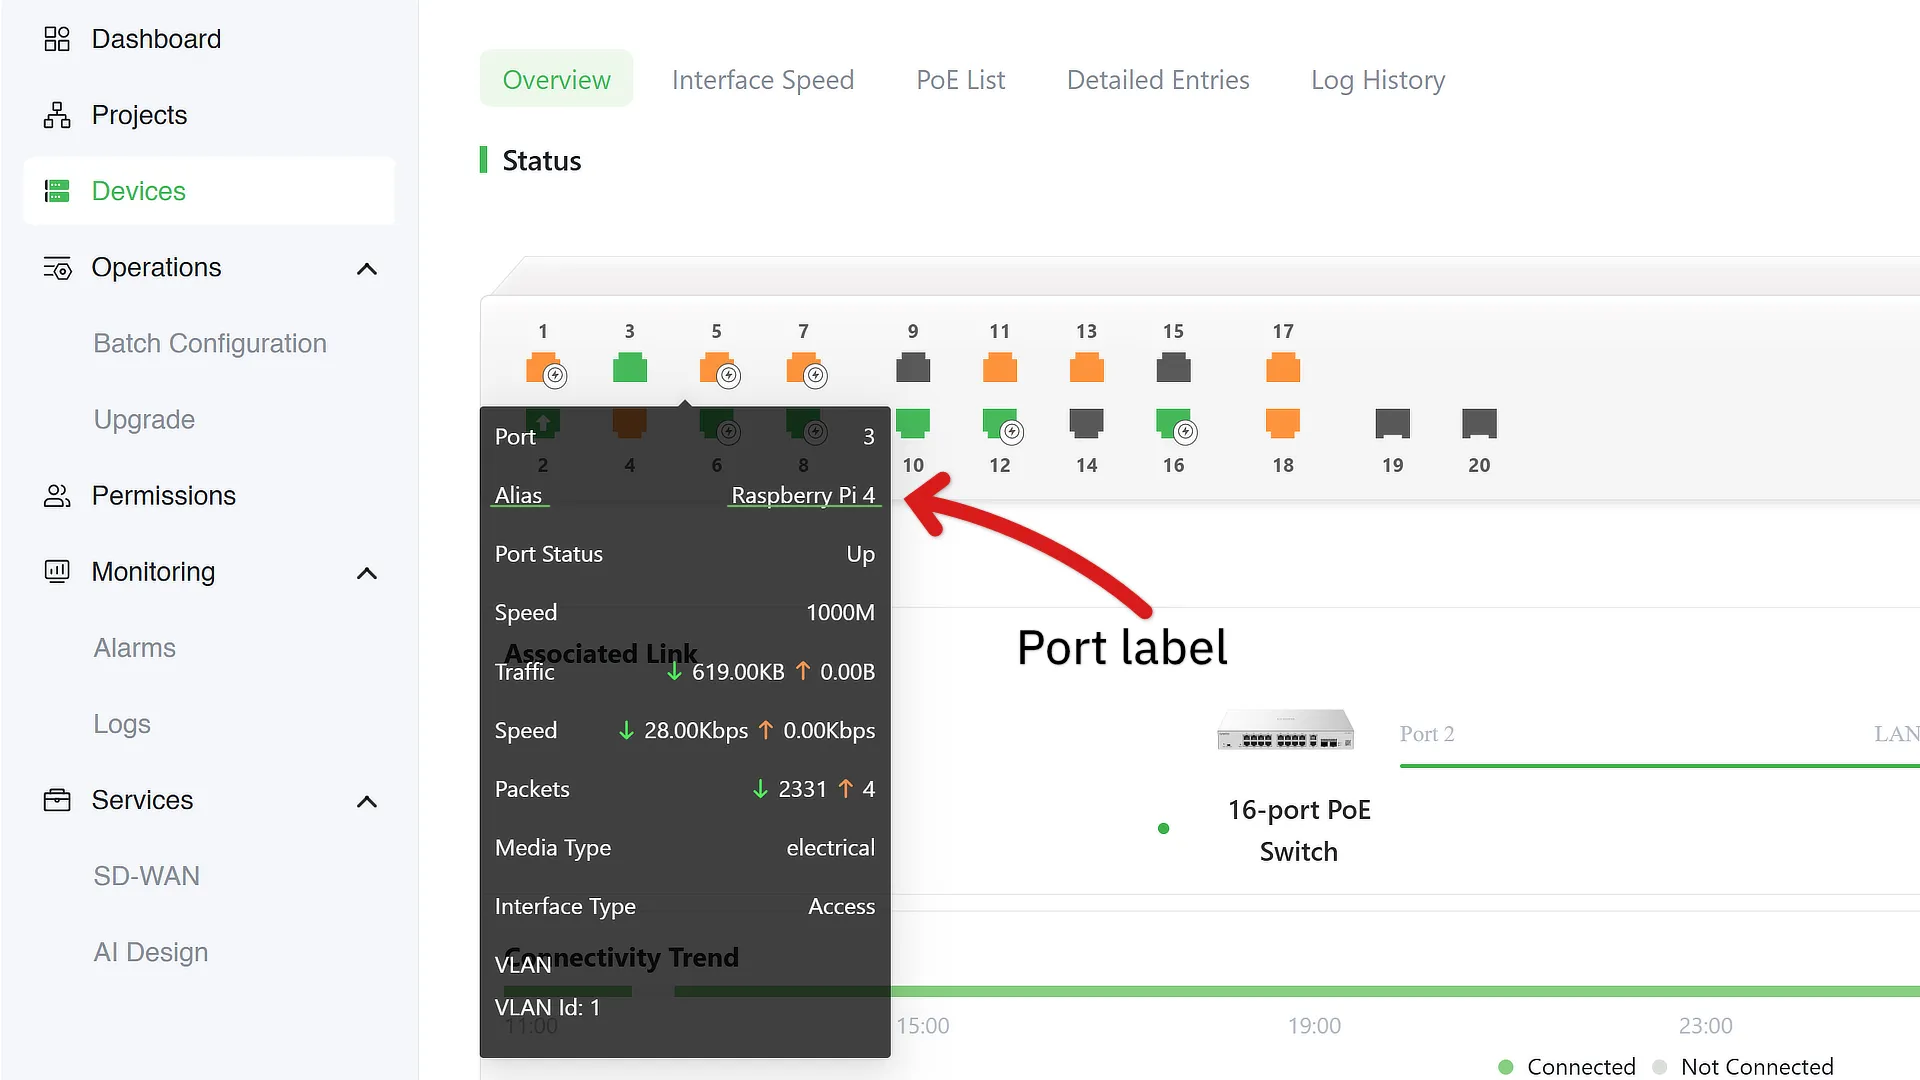
To view port labels on Lysora Cloud, first login to your cloud account and navigate to Devices –> Switch and click on your PoE switch. Then, simply hover your mouse over the PoE ports on the diagram to see the label.
If you don’t have a label on the port, you won’t the port name. But if you’ve already named the port, it should appear in the second row titled Alias. You can hover over different ports to view their names.
How to View Port Labels from Lysora App
You can also view port labels on the Lysora app, which is helpful when you’re trying to troubleshoot the connections on a PoE switch, but you don’t have a laptop or computer nearby.
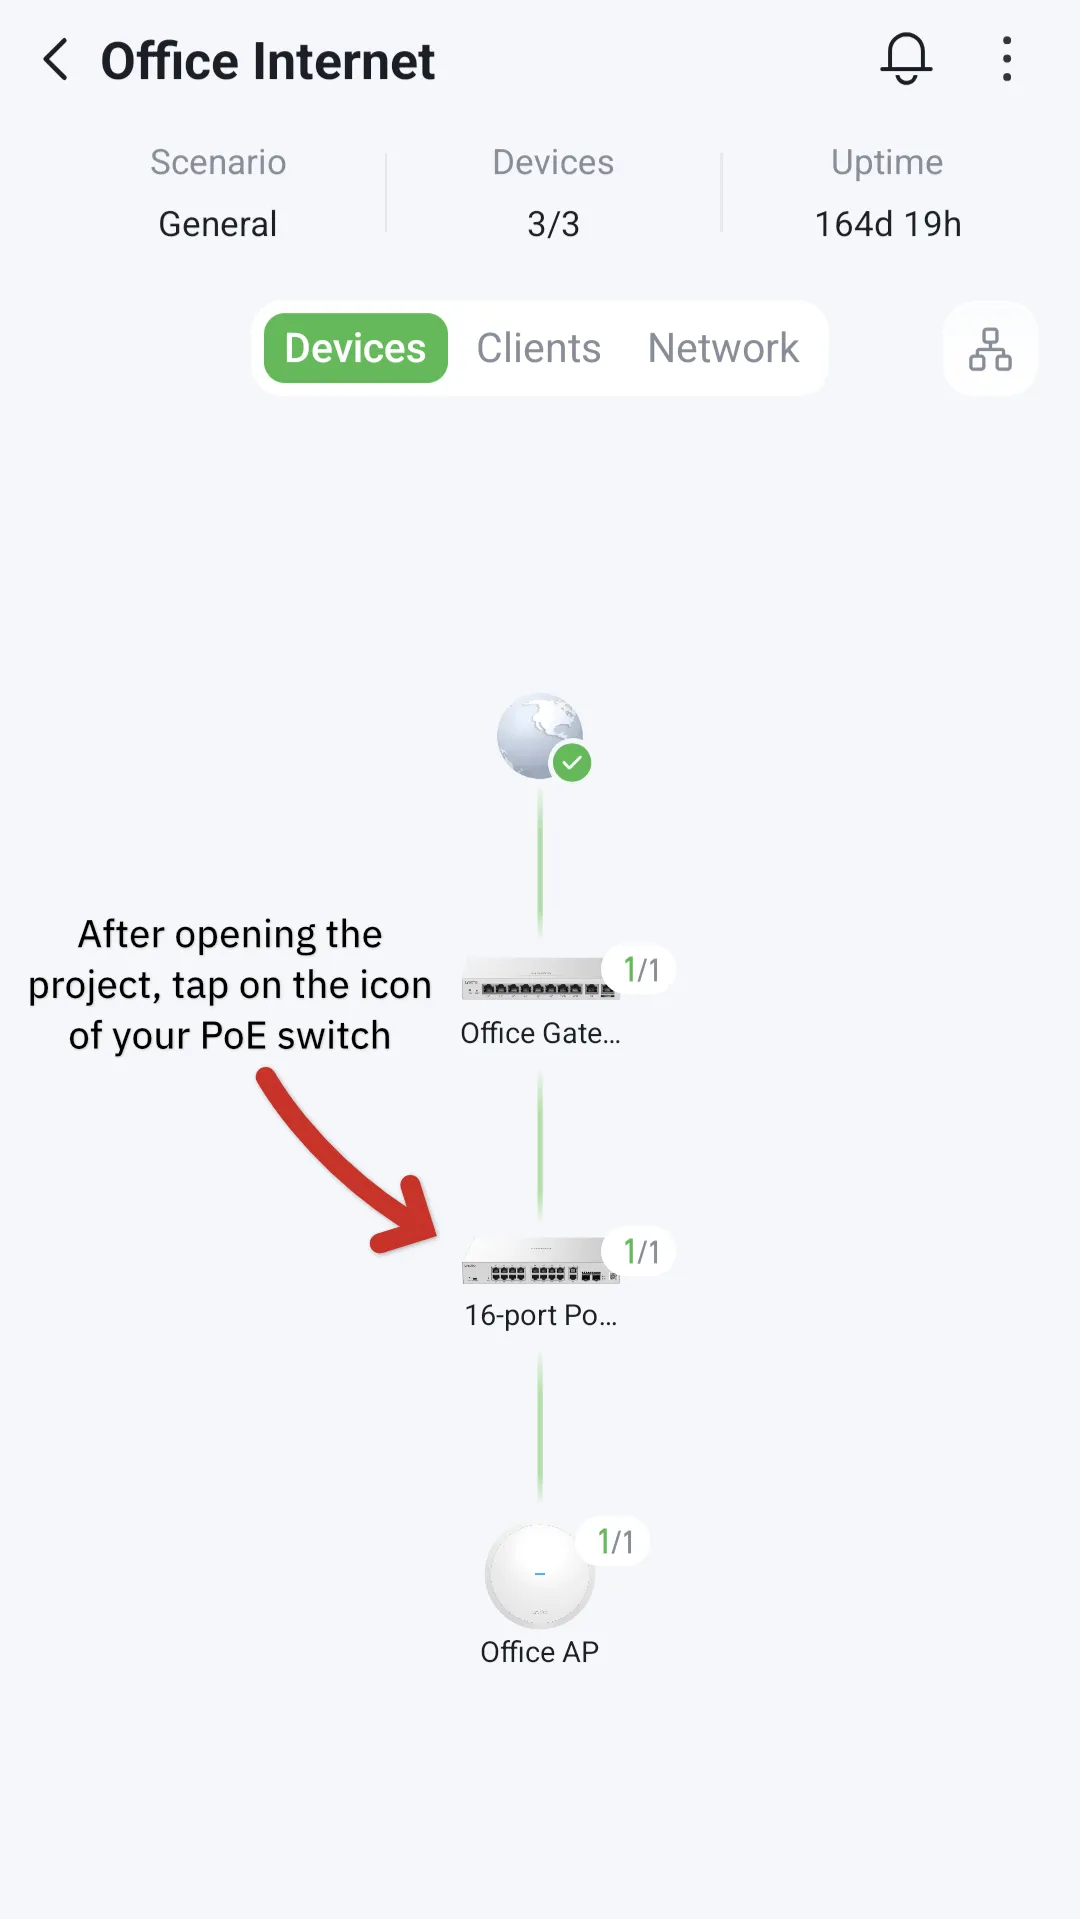
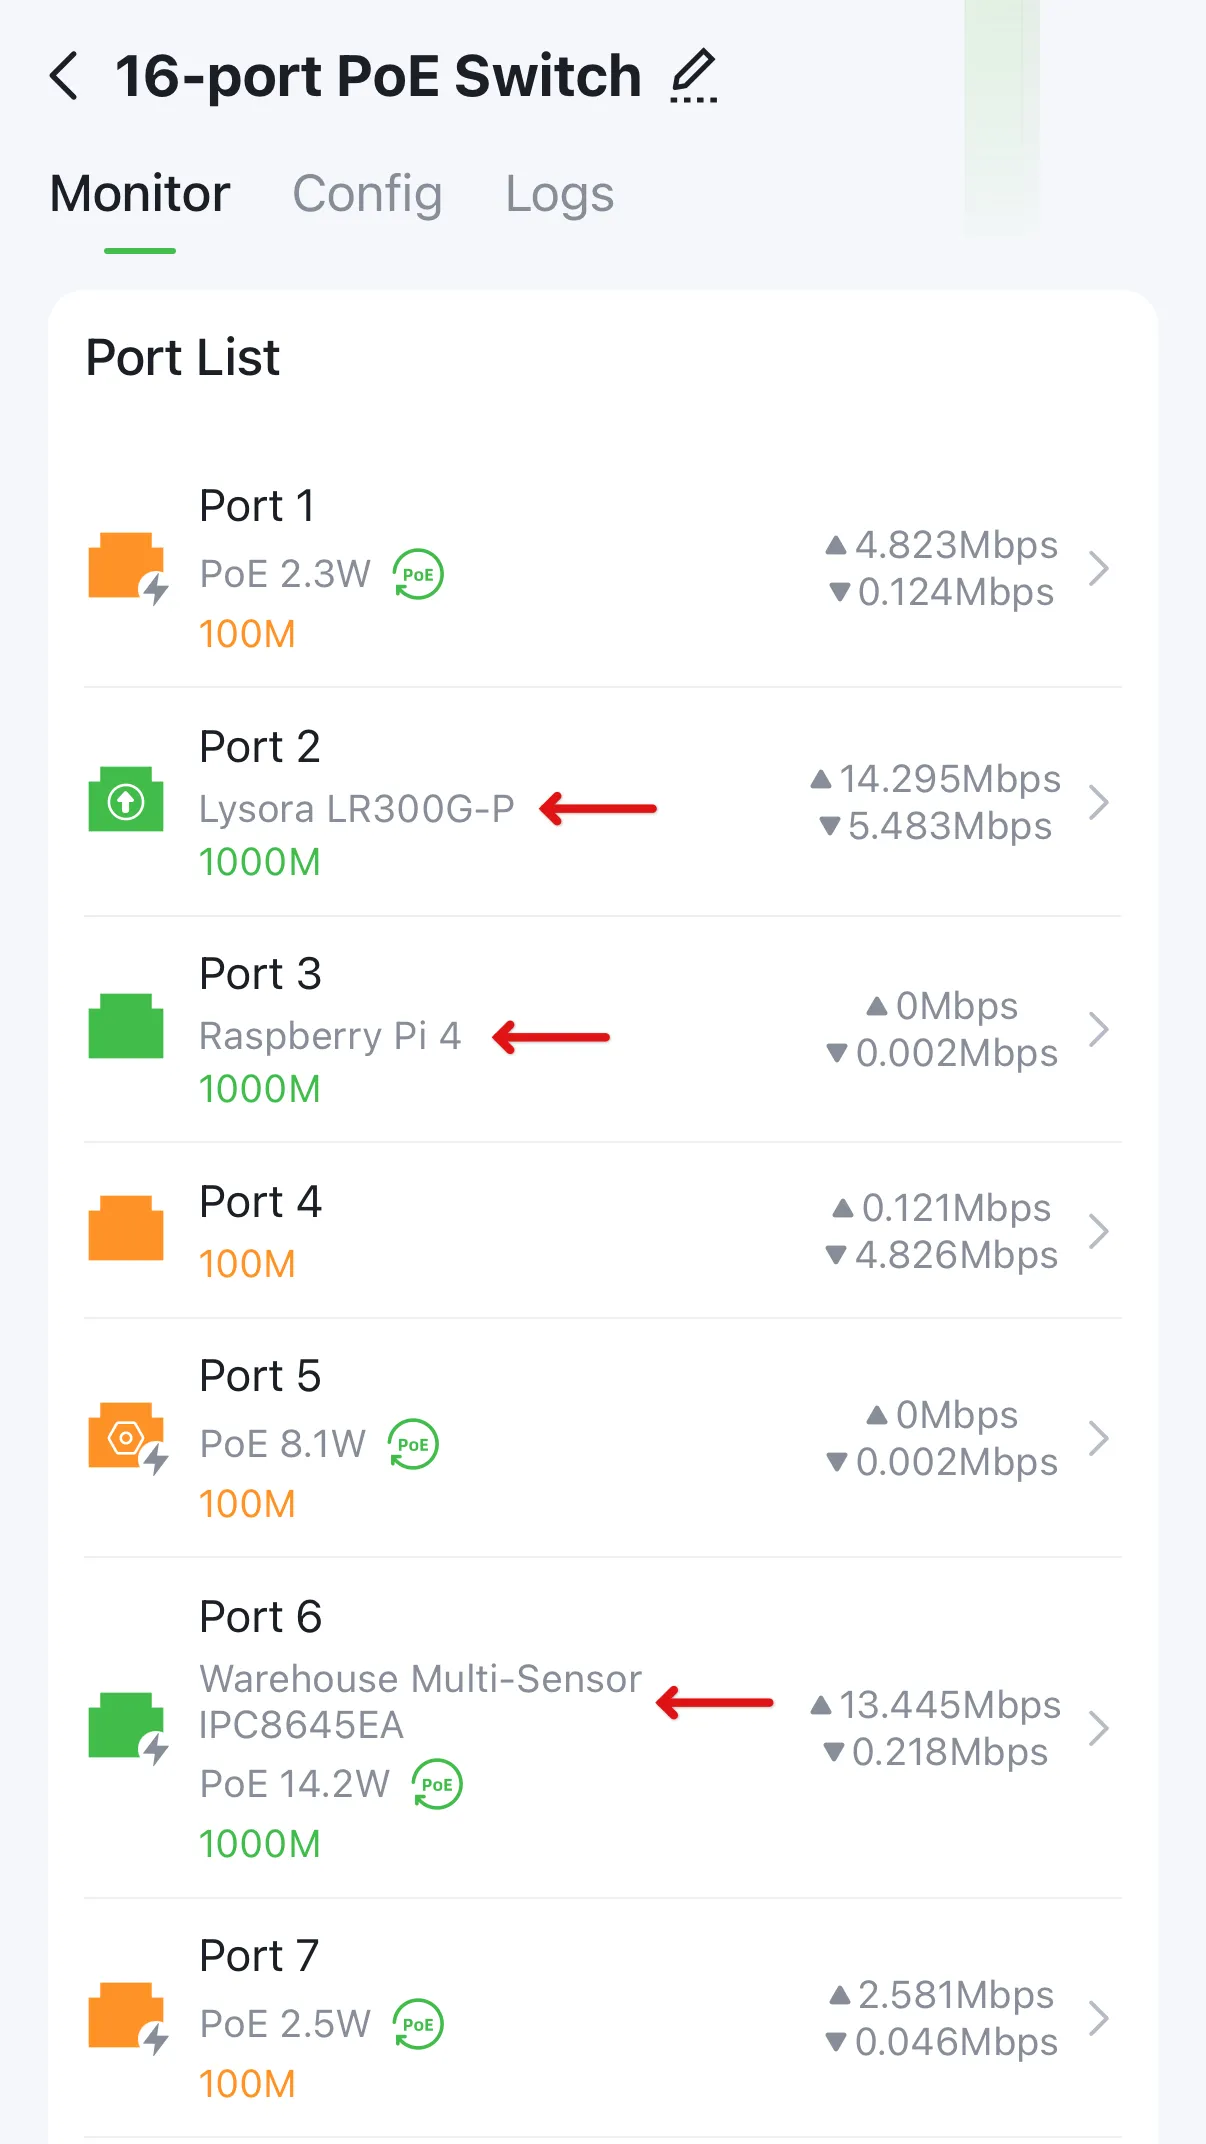
First, open the Lysora app on your phone and select the project that contains the PoE switch you want to view. Then, tap on the icon of your PoE switch to open the devices details. Then, scroll down to the Port List section. If you’ve given a label for each port, you should see it listed beneath the port number.
Final Thoughts
It’s important to keep your projects organized, and labelling ports is a key part of that. So next time you’re installing a Lysora PoE switch, don’t forget to label the ports while everything is still fresh in your mind.
You’ll thank yourself the next time you’re troubleshooting a network issue – or rebooting PoE ports remotely.
